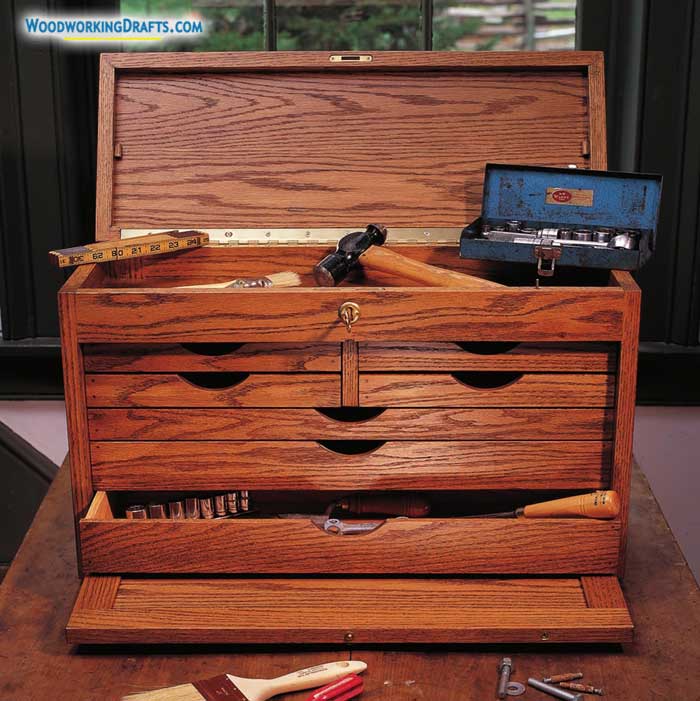
Our cabinet maker’s tool chest plans let you build a classic design from red oak.
The design features a rod that fits into a hole as the lid is closed to lock the entire chest in place. You can easily increase the storage capacity by adding more drawers or making the chest deeper.
Cabinet Maker’s Tool Chest Plans And Blueprints
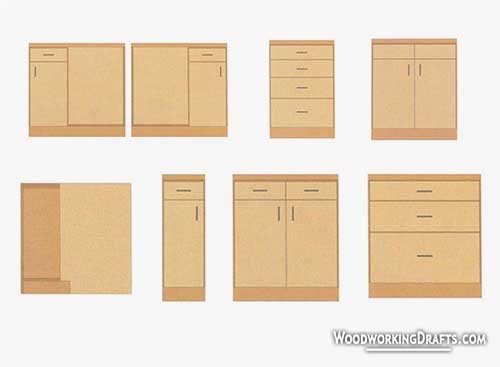
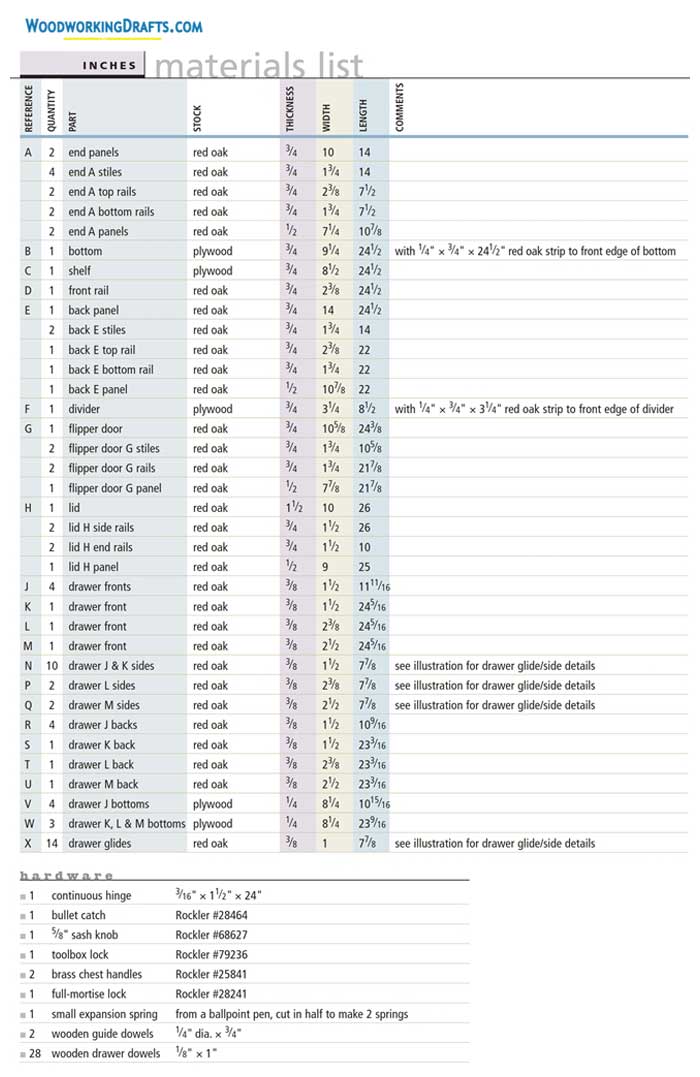
Materials List For Cabinet Maker’s Tool Chest
Building Instructions For Cabinet Maker’s Tool Chest
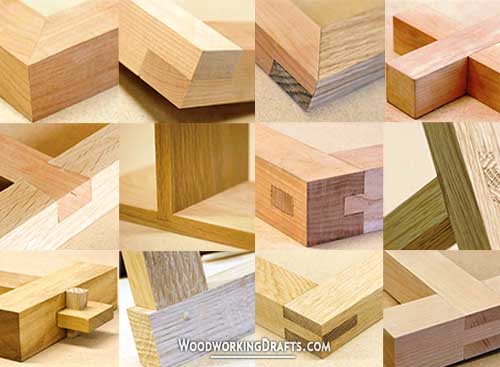
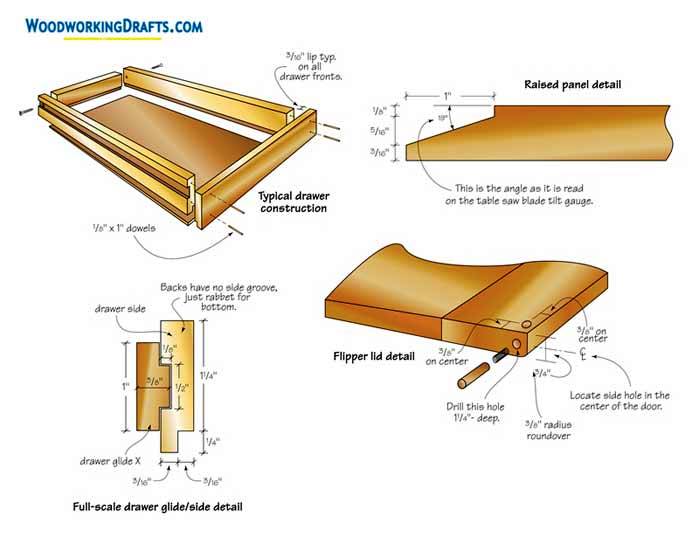
- Craft 19-degree bevels on the wooden panels for lid H, door G, back B, and ends A with an angled table saw blade.
- Readjust the saw blade and make it straight. Now place the panel facing downwards and create the bevel cheek to make the raised part of the panel.
- Build and sand the remaining parts for the frame and fasten the pieces together with glue.
- Cover the front edge of the bottom panel with glue and attach hardwood edging. Use a block plane to even out any excess edging and make it level with the panel.
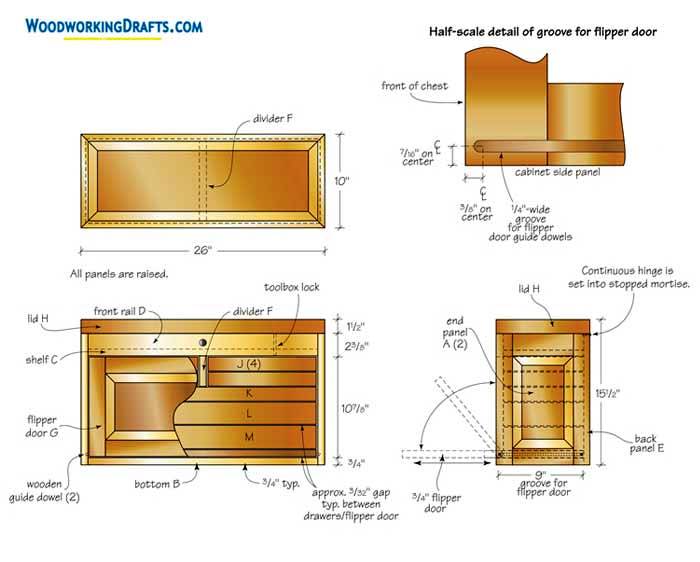
- Fasten the back panel to the bottom with glue and check they are square.
- Now attach the shelf C to the back panel and make the lower edge of the shelf level with the lower edge of the back panel.
- Create stopped recesses in the end panels A with a router. These will serve as channels for the guiding dowels of the top door and allow smooth movement.
- Secure the front rail D to the end panels with glue.
- Build the drawers N, P, and Q and their glides X with a dado cutter set up on your table saw.
- Now create the backs of the drawers keeping only the rabbet at the bottom of the drawers.
- Center the drawer divider inside the chest and secure it at the bottom of the shelf with screws.
- Secure the drawer glides into the cabinet with glue and screws.
- Create dowel holes for the flip door using a doweling jig. The notches cut into the end panels will help the dowels position the door accurately with the box front.
- Construct an access hole into the door so that you can remove the guide dowel out of its channel and take it out the door when needed.
- Use a drill press to cut holes into the drawer fronts that will hold the drawer dowels.
- Fasten the sides of the drawers with the drawer backs using screws. Then place the drawer front on the sides and drill pilot holes.
- Apply glue and put the drawer dowels. Clamp the drawer front and allow the glue the dry.
- Attach the drawer bottoms into the position. Test fit the drawers into their openings and pare the wood as needed to make adjustments.
- Make 45-degree miters on the rails for the top and build the lid.
- Craft a stopped rabbet into the upper edge of the back of the chest and make a corresponding rabbet into the back rail of the lid.
- Fasten the hinges to the chest with screws.
- Cut the mortise for the lock with a shallow router bit. Use a drill to clear the deeper part of the mortise and fit the mortise into the lock with a chisel.
- After you check that the lock will fit correctly, then drill the keyhole.
- Use screws to fasten the door with the hinges and fasten the lock into place.