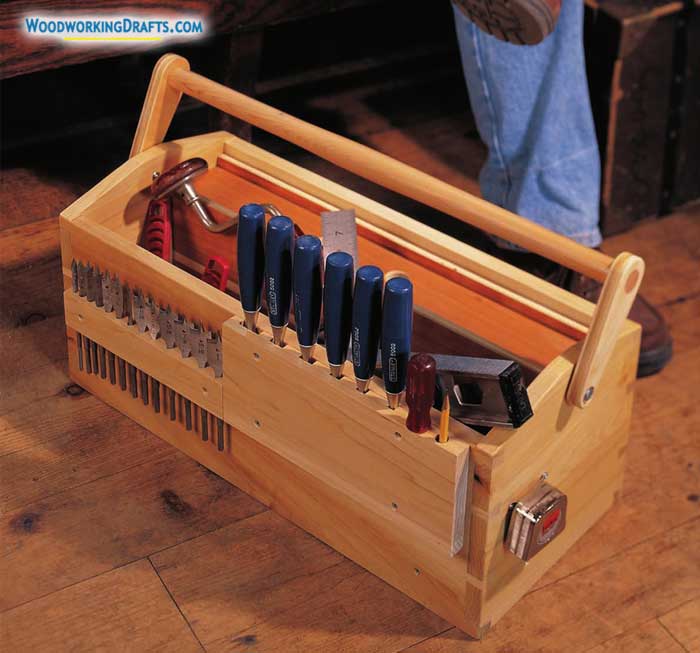
Here is a simple tool tote box that can be easily built with our carpenter’s wooden toolbox plans and some plywood.
The handle is placed on swivel bolts so that it can easily swing out of the way and give you easier access to your tools inside. It also has two removable boxes that can hold nails, screws, and other small items that can otherwise get lost under larger tools.
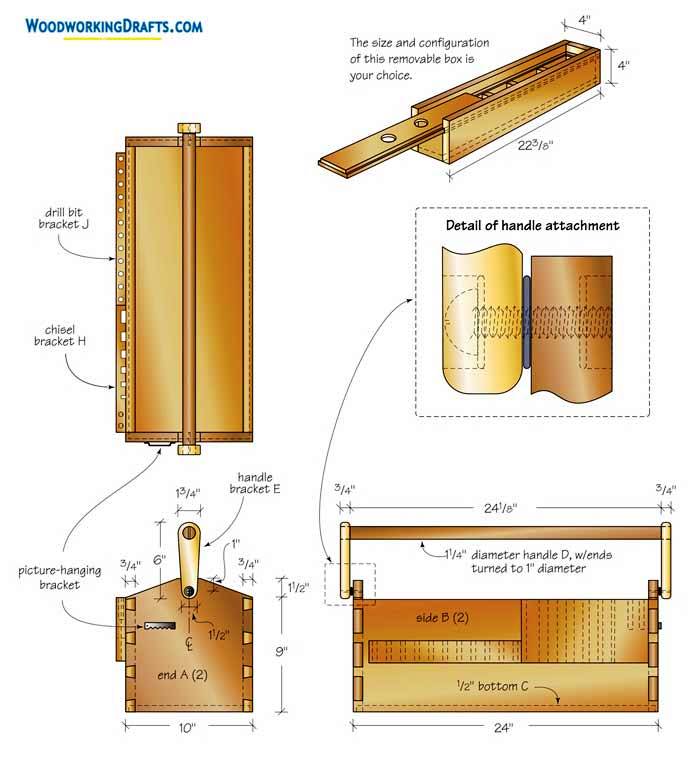
Carpenter’s Wooden Toolbox Plans And Blueprints
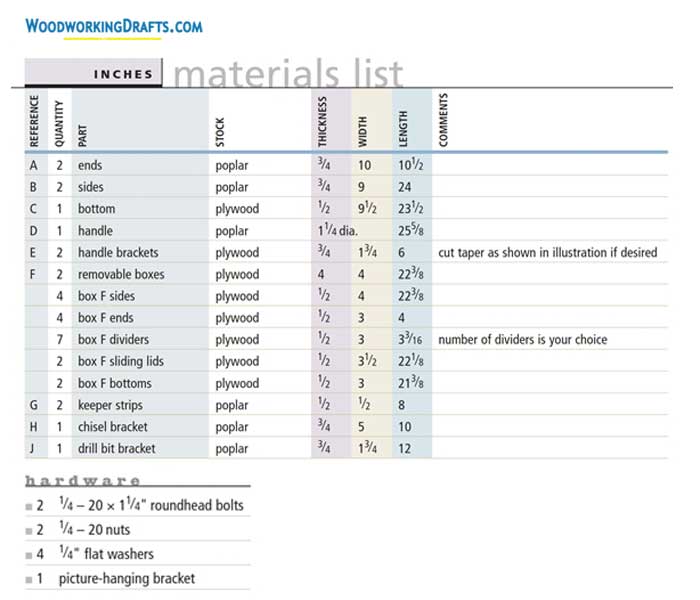
Materials List For Carpenter’s Wooden Toolbox
Instructions For Assembling A Carpenter’s Wooden Toolbox
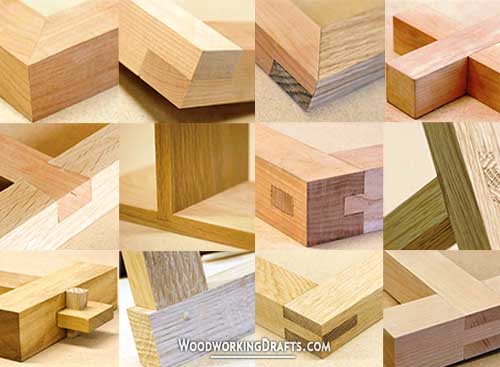
- Scribe the dovetail pins on both the side pieces B and highlight the areas of wood that will be cut out as waste.
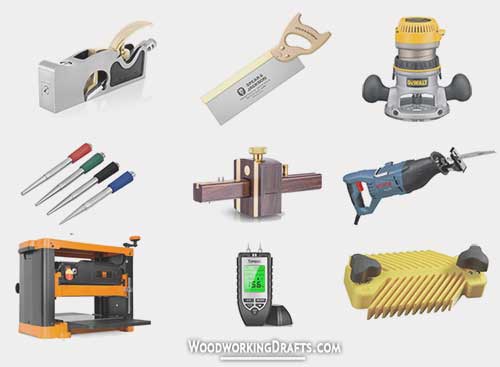
- Cut the pins on a table saw with the help of a fence.
- Use the pins cut into sides B as a reference to scrip the tails on end pieces A.
- Align the saw blade’s angle to 10 degrees and craft the tails.
- Use a chisel to clear the waste stuck to the pin and tail corners.
- Create bevels in the upper part of the end pieces. Drill holes inside the end pieces for fastening bolts.
- Test fit the dovetails and check they fit correctly. Then apply glue and secure the joints.
- Cut a rabbet at the bottom inner part of the box using a router bit for fitting the box base.
- Craft the bottom panel to fit the rabbet and then secure it in place with screws and glue.
- Drill holes for the handle brackets into the box.
- Build the slotted handle D for the box with smoothened edges and drill bracket holes into it.
- Create a wedge slightly thicker than the handle’s slot and the same diameter as the slot hole. Make the wedge tapered enough so that it will go into the hole till about two-thirds of its depth.
- Apply glue around the handle’s ends and into the slots, then put the handle together with the box by attaching the wedges.
- Sand the handle’s ends level with the brackets after the glue dries.
- Install the strips G into the interior of the box about 4 inches from the top. This will support the removable boxes.
- Next, secure the brackets for the chisels H and brackets for drill bits J on the other side of the toolbox.
- Arrange your tools and scribe the distance between the slots for the drill bits and chisels.
- Create the slots for the chisels using a table saw and the slots for the drill bits using a power drill.
- Washers, nails and screws, wrenches, and screwdrivers can be stored in the removable boxes for quick access.
- Create the notches for the sliding lid and then build the boxes. Craft a finger hole into each lid to lift the box easily out of the tool tote.