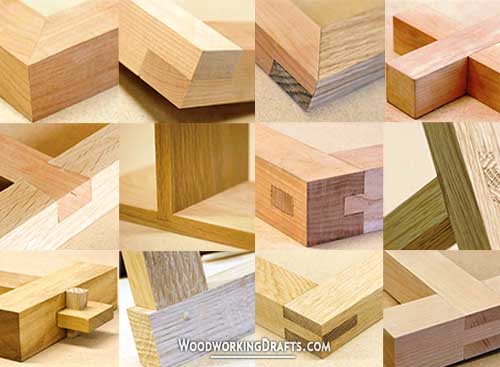
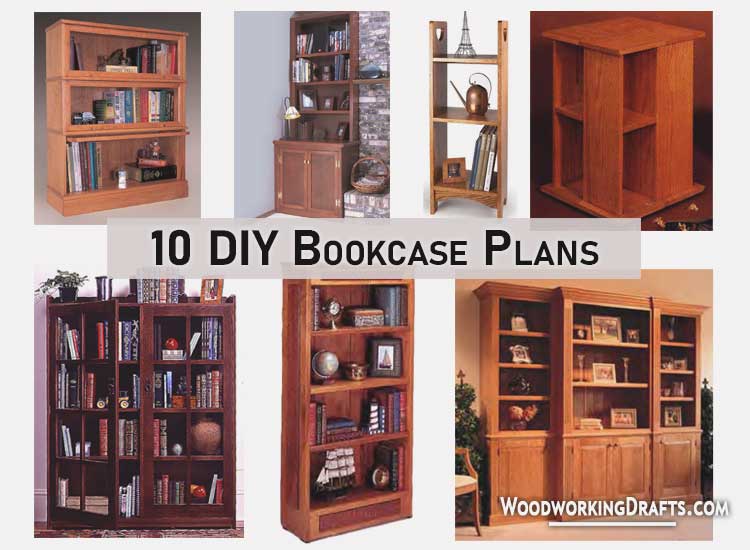
Blueprints For Building Barrister, Stickley, Rustic, Chair-Side, End-Table, Modular, Built-In, Simple, Small, And Large Bookcases
You can build a practical and durable bookshelf using these DIY bookcase woodworking plans & blueprints and just a few days of work.
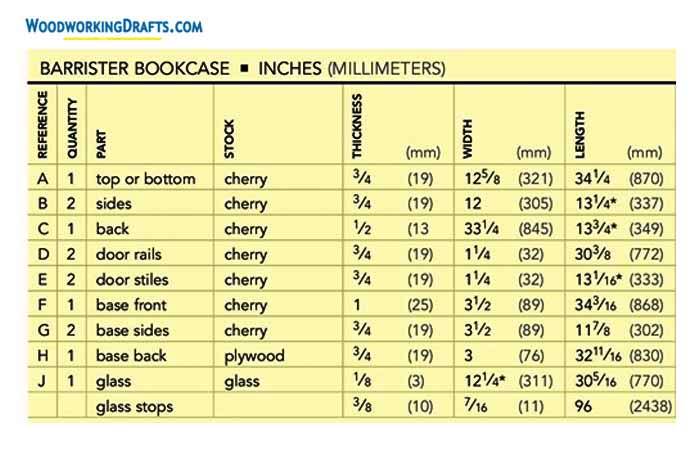
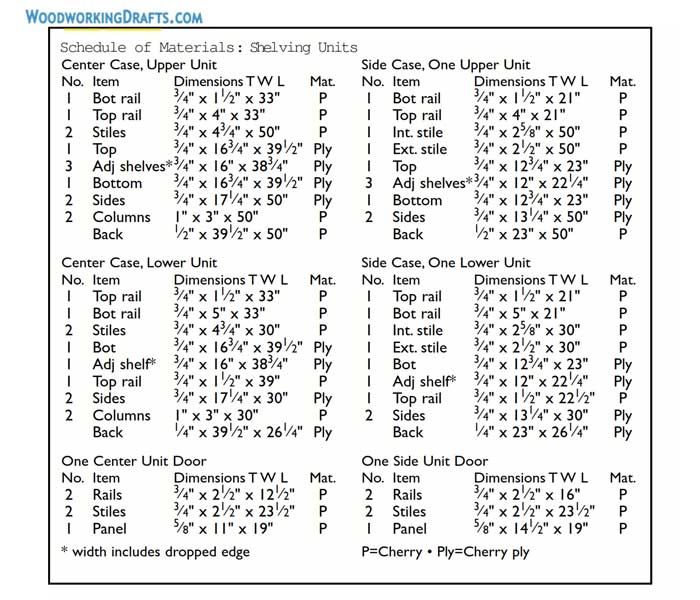
Each plan provides a complete cutting list of materials with details of the dimensions and quantities needed for each component.
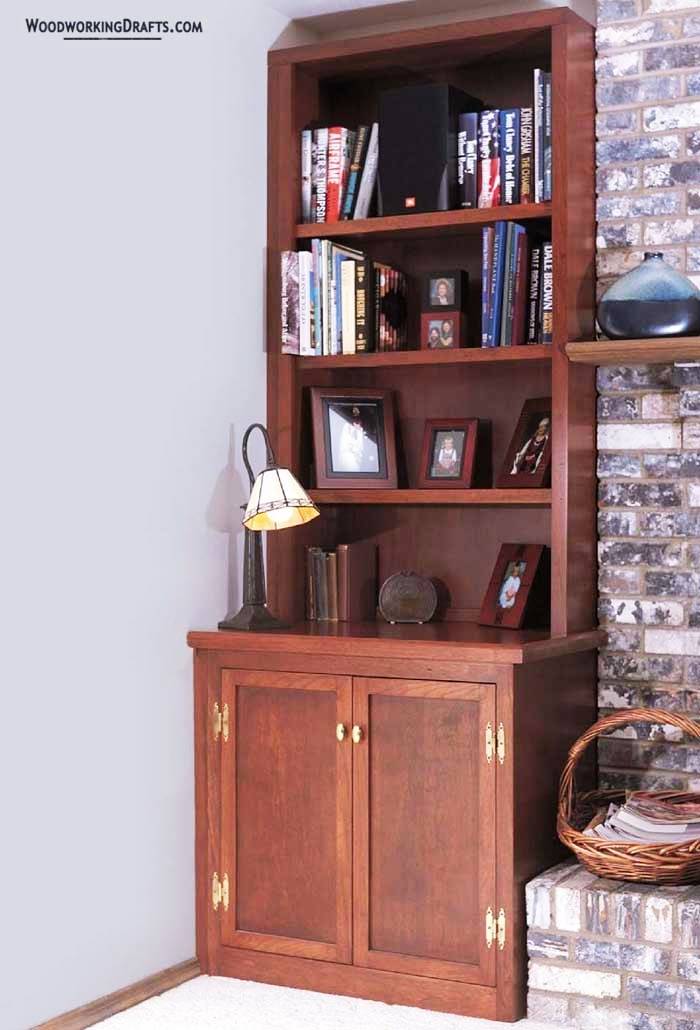
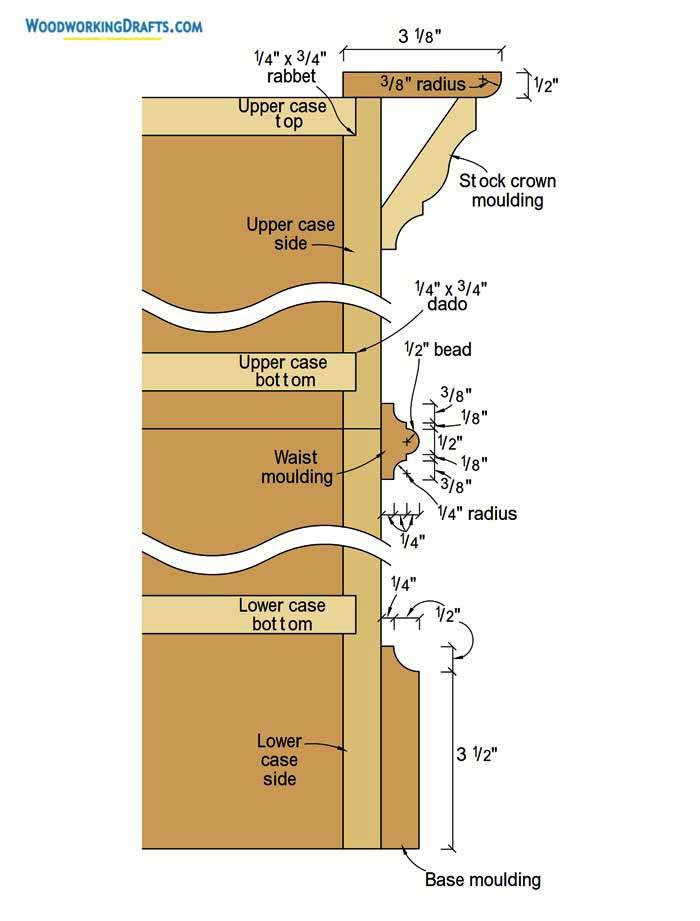
Stackable Barrister Bookcase Plans
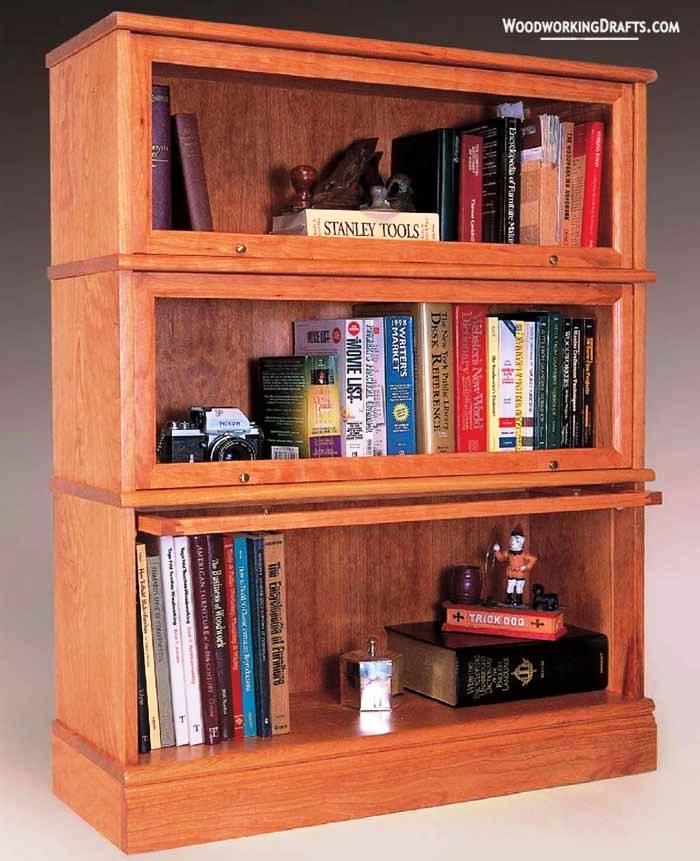
These stackable barrister bookcase plans can be used to build a classic design that was originally used only by attorneys and bureaucrats. That is how they came to be known as barrister bookcases.
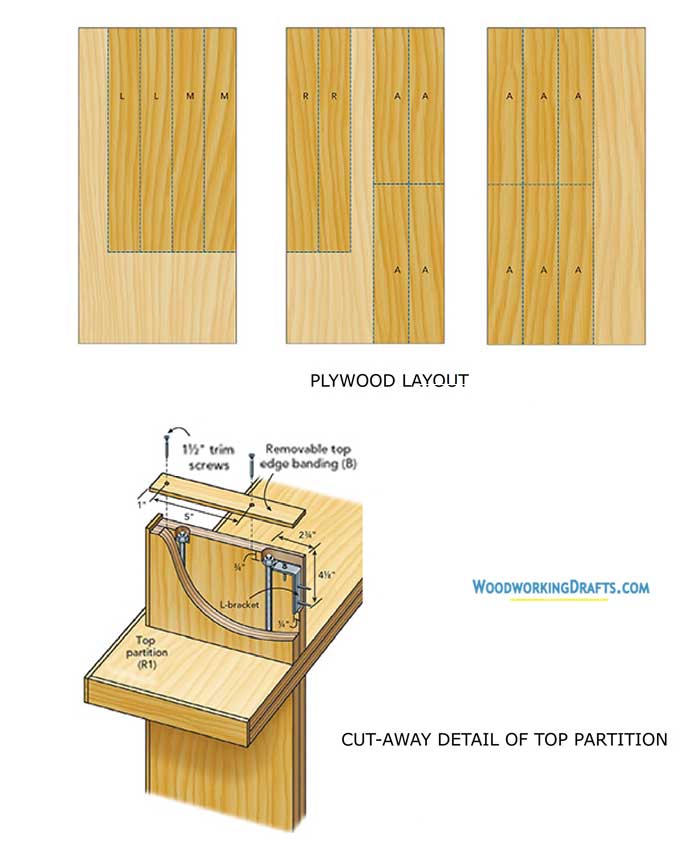
Any number of such cases can be stacked on top of each other or side by side. The bookcase is structured such that when they are stacked, the top of the lower case also acts as the bottom of the upper case.
You will have to precisely craft each unit to exact dimensions so that they can pair with other units correctly.
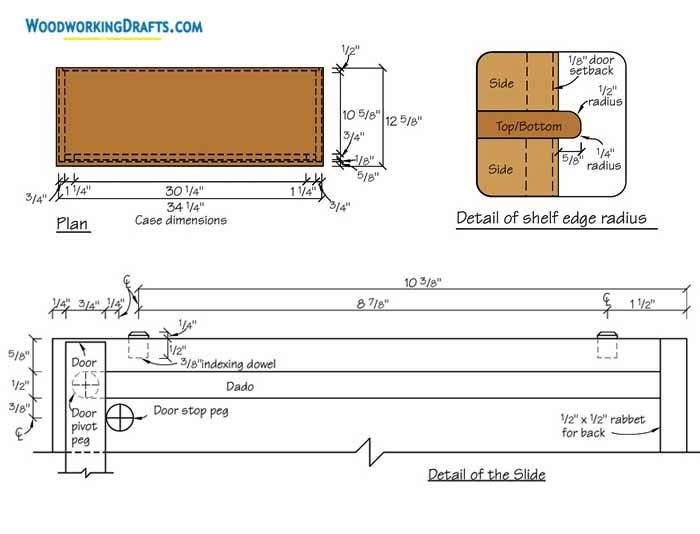
After you have decided how many cases you are going to build, start crafting the panels needed for the cases and sand them to equal thickness.
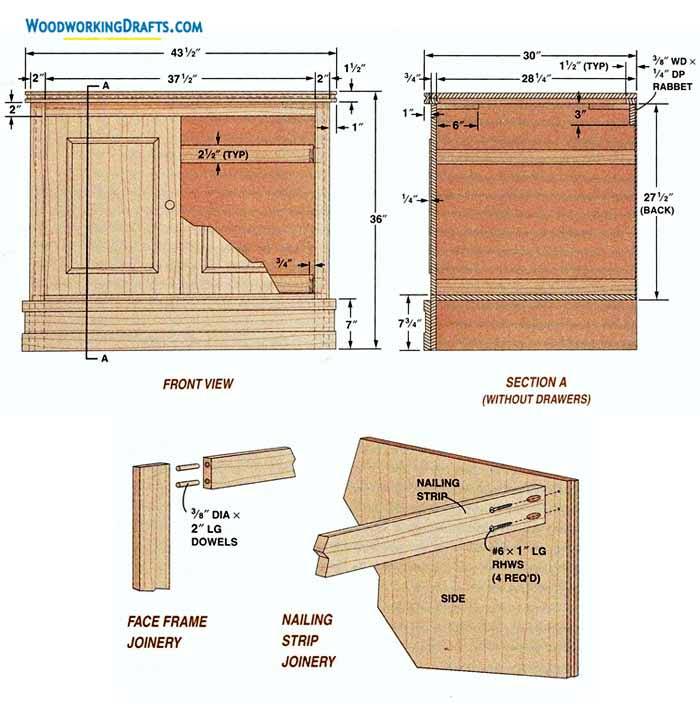
The back plywood is seated in a rabbet cut into the side frame and then seated with biscuits.
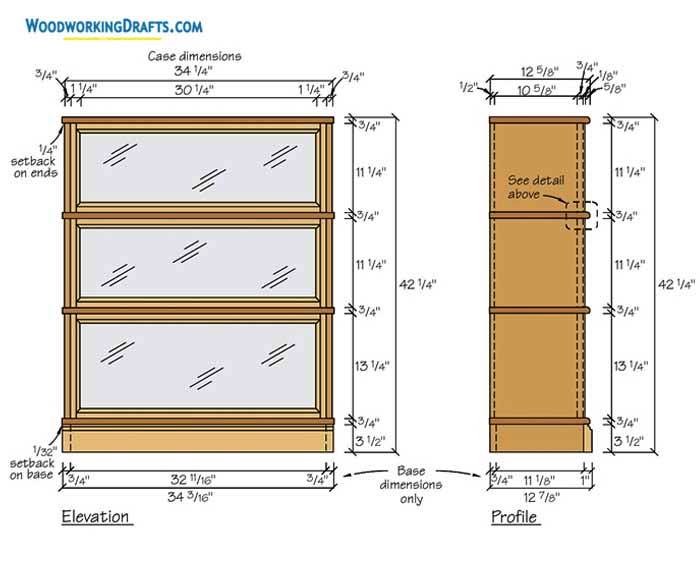
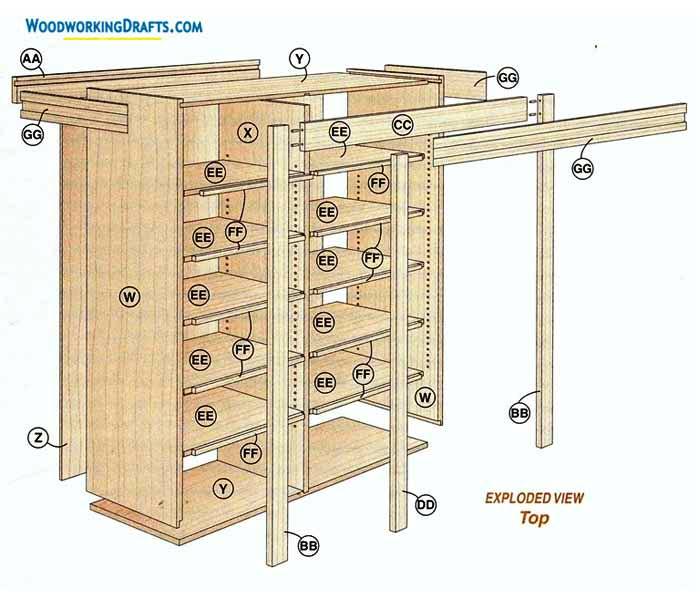
Before you begin construction, craft all the parts for the top, bottom, left, and right sides and organize them by type. Stack them in such a way that you don’t get them mixed up.
Make pencil markings on each part to make them easy to identify.
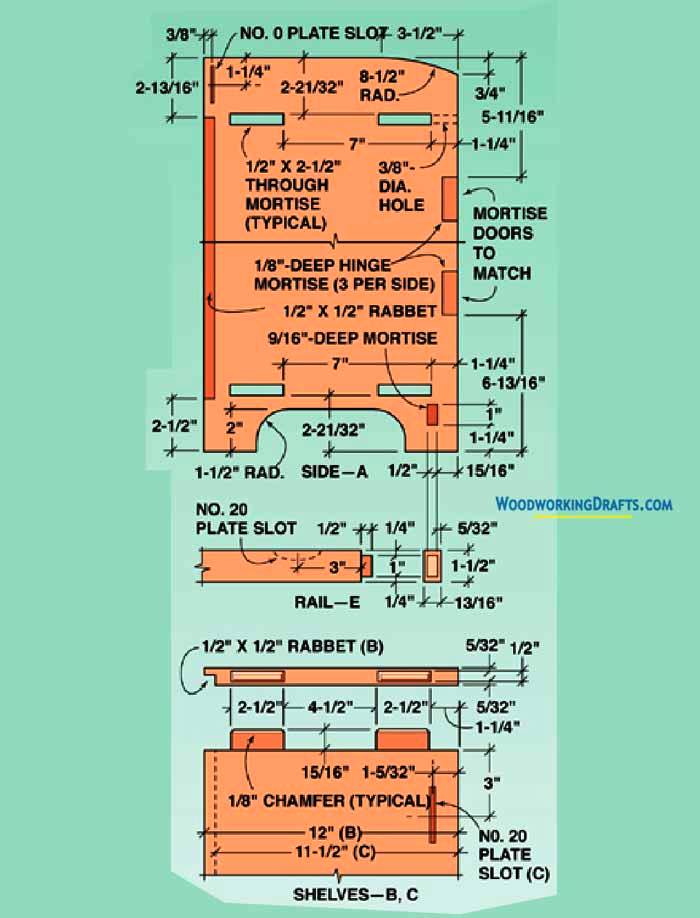
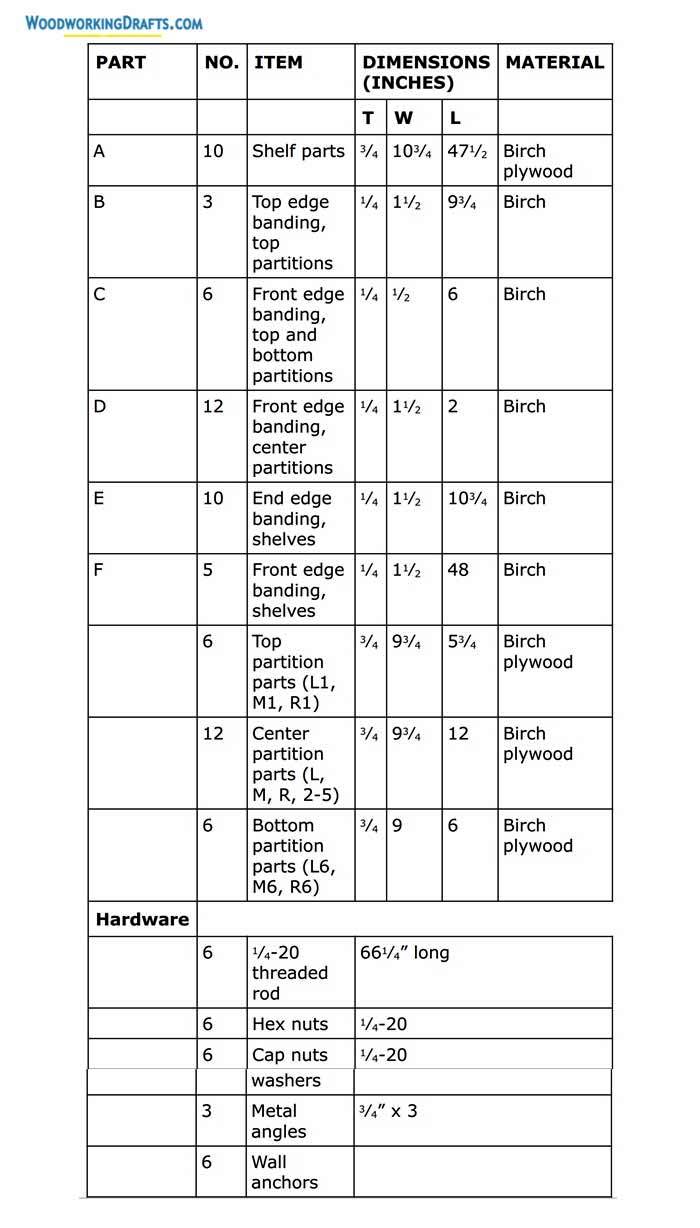
Route the stopped dadoes inside the sides of the case that will hold the mechanism for the sliding door.
Drill holes into the bottom of the cases that will be used for inserting the indexing pins. These pins keep the stacked cases interlocked and prevent them from sliding.
Note that these holes are at different distances from the back and front edges. Use a doweling jig to drill these holes at the precise locations, as shown in the diagrams.
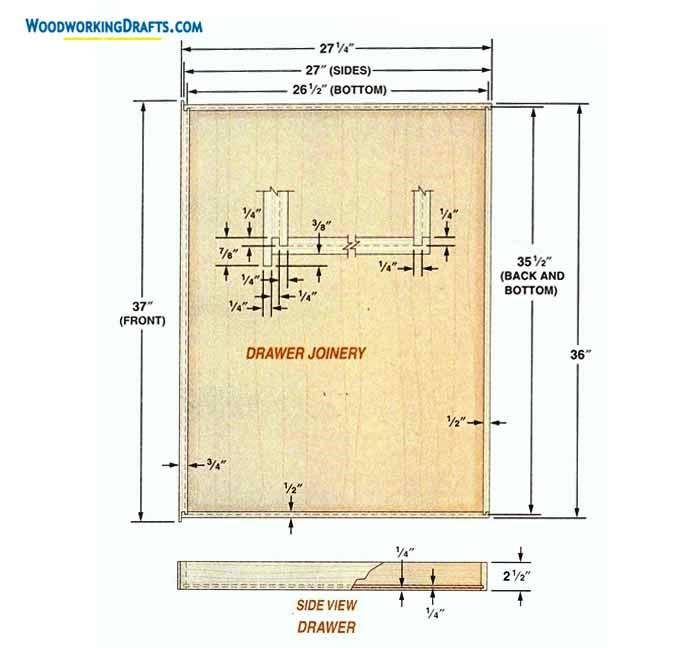
Craft the slots for inserting biscuits to join the sides with the bottom. There will be three biscuits used for joining each side.
Then do some roundover detailing on the front bottom edges using a routing bit.
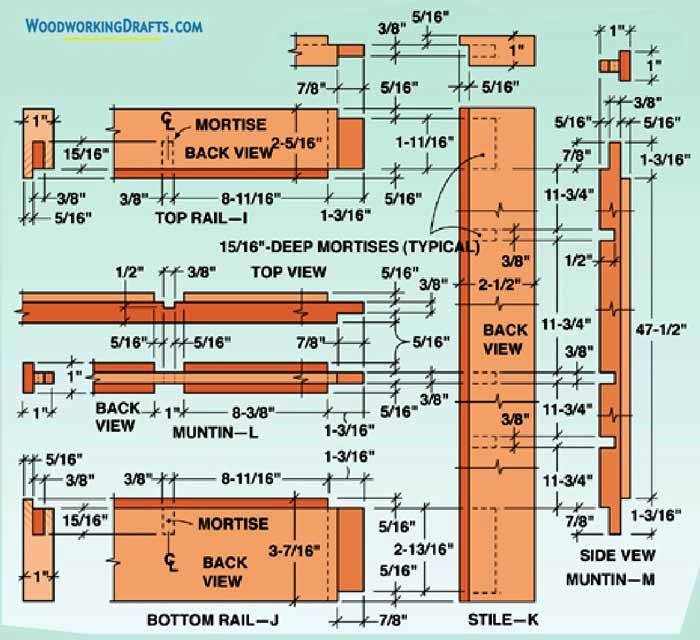
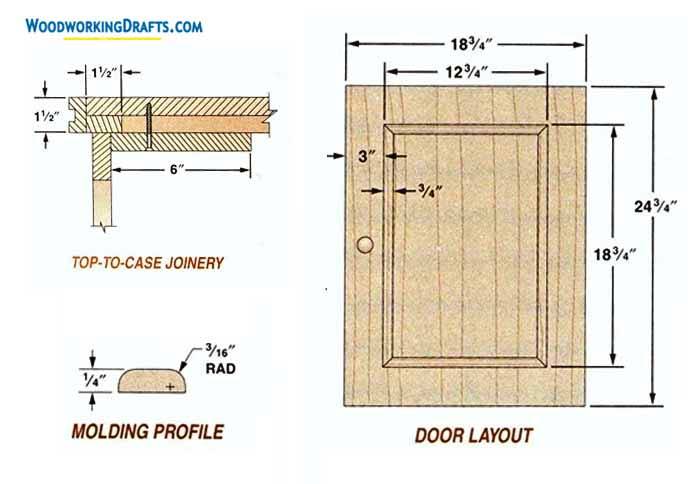
The stiles and rails that hold the glass panes in the door frame are 1 1/4 inches wide. Use a stop block to cut the rails and stiles to precise dimensions and ensure that the frame will be exactly square.
Cut away a section of the door frame’s back edge detail and transform it from a groove into a rabbet. This will allow the glass panes to be removable.
Scribe the location on the stile where the cut should stop, and then scribe the fence of the table saw at the height where the saw blade juts above the table.
Grip the part tightly with the fence and gently bring it down onto the blade until the cut matches the lines on both the part and the fence.
Now glue the rail assembly and stiles, making sure they are square.
After the frame dries, use a chisel to chip away the waste piece from the stop cut.
Check that the doors have a gap of 1/8 inch on the top and 1/16 inch on the sides and bottom. If the door fits well, then drill a half-inch wide and a half-inch deep hole in the door’s edge precisely in the center on both edges. Do this for each door.
Insert a half-inch wide dowel into holes and slide the door into the grooves on the side of the case.
Move the doors forward and slowly lower them into the correct location.
Now we can set the pin below the grooves in which the doors slide. If you position the pin precisely, the doors will rest easy when opened and slide into the correct place when closed.
Sand all exposed surfaces, and stain or paint them as per your choice.
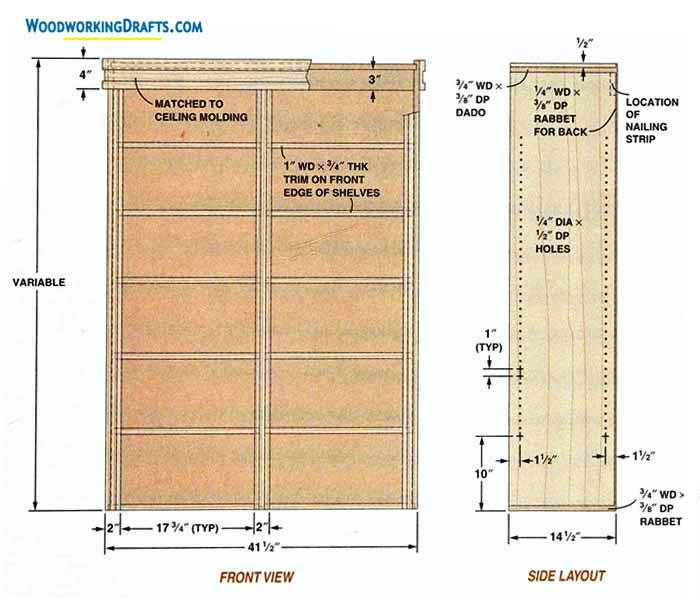
Basic Bookcase Woodworking Blueprints

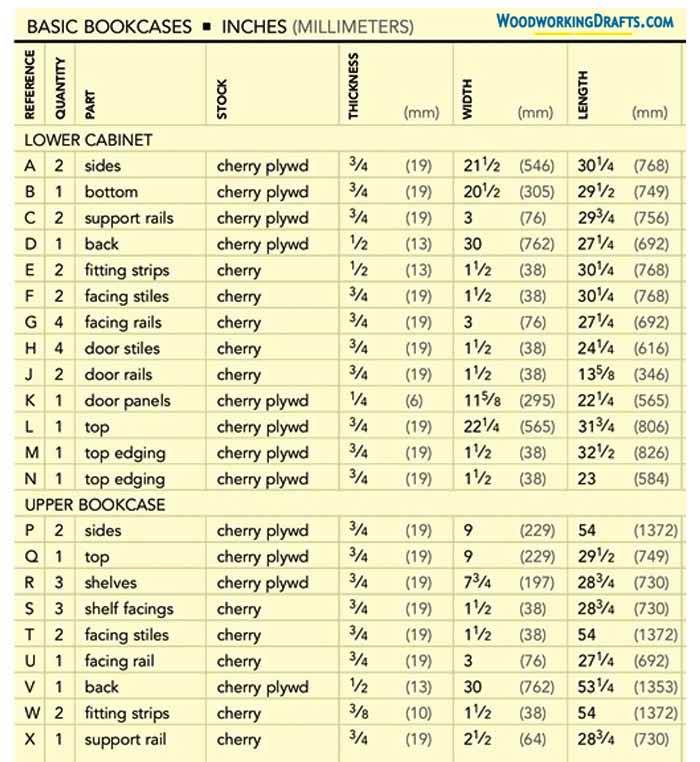
These basic bookcase plans are easy to implement because of their simple face frame layout.
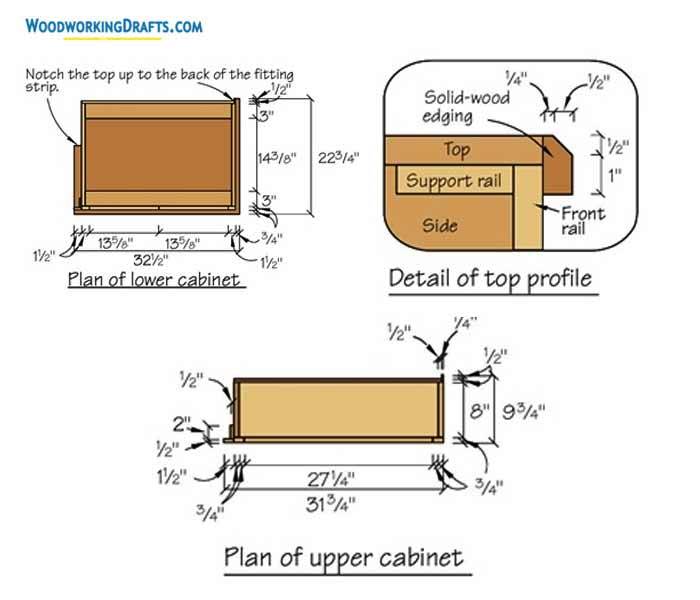
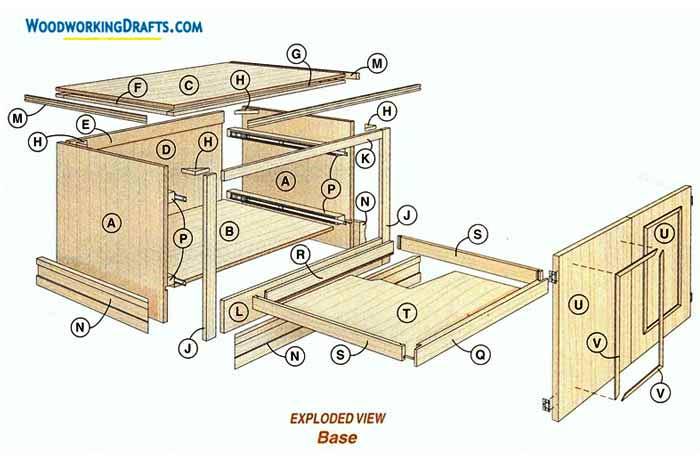
Begin by crafting the bottom and sides of the carcass.
Cut a dado on the inner face of each side 3 inches above the bottom. Then cut the rabbet on the inner face of the top edge to hold the support rails.
Construct the lower cabinet with nails, clamps, and glue. Check that it is square and temporarily fasten the back to brace the case.
The top shelf section is crafted similarly with the dado cut at the top of the sides about 1 1/2 inches below the top.
The bottom rail is connected to the sides using biscuits.
Now we craft the face frames such that the stiles for the lower case overhang the inside by 3/4 inches. Sand the outer overhang flush with the sides after you glue it.
Cut the top for the bottom cabinet to proper dimensions as shown in the blueprints. Then biscuit the two visible edges at the corner with a miter joint.
Next, construct the shelves to accurate size and glue a rail to the edge in front. This edge prevents the shelves from bending under the load of the books and also enhances the beauty.
Adjustable shelf pins are inserted into pre-drilled holes to hold the shelves in place.
The door has a very simple design and doesn’t use any complex joinery. But they need to be aligned carefully when fastening the hinges.
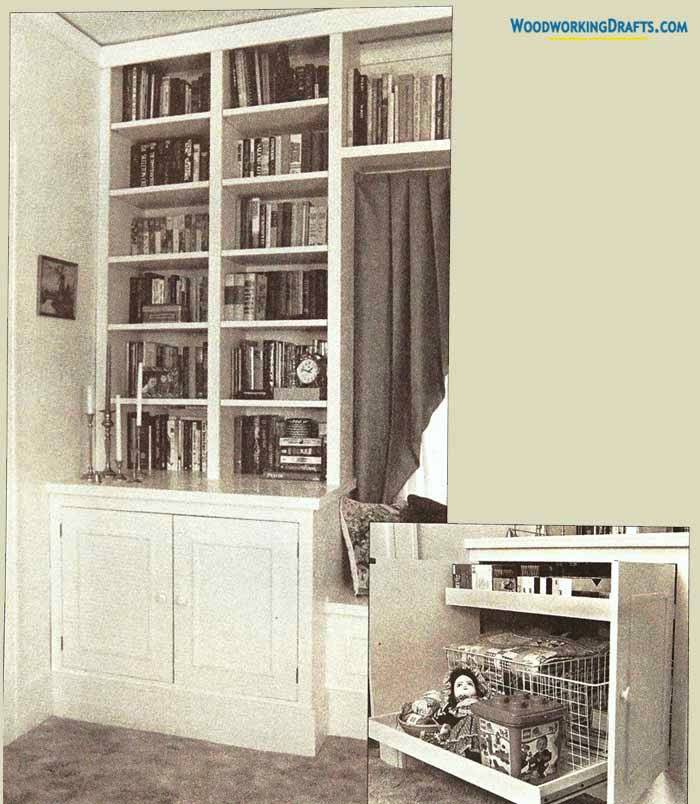
We installed three inner drawers inside the lower cabinet, but you can change this as per your requirements.
Coat the case with stain or paint to give it a rich finishing.
The bookcase can finally be installed on any wall by screwing it into the wall studs with 3-inch long galvanized screws.
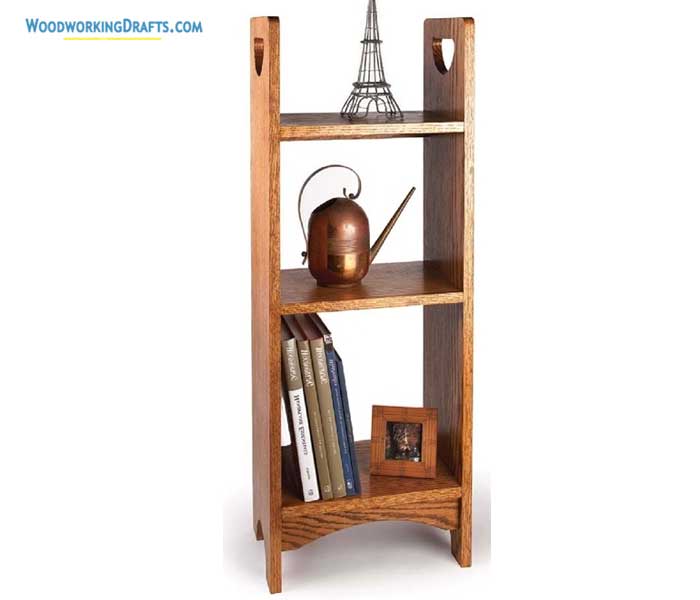
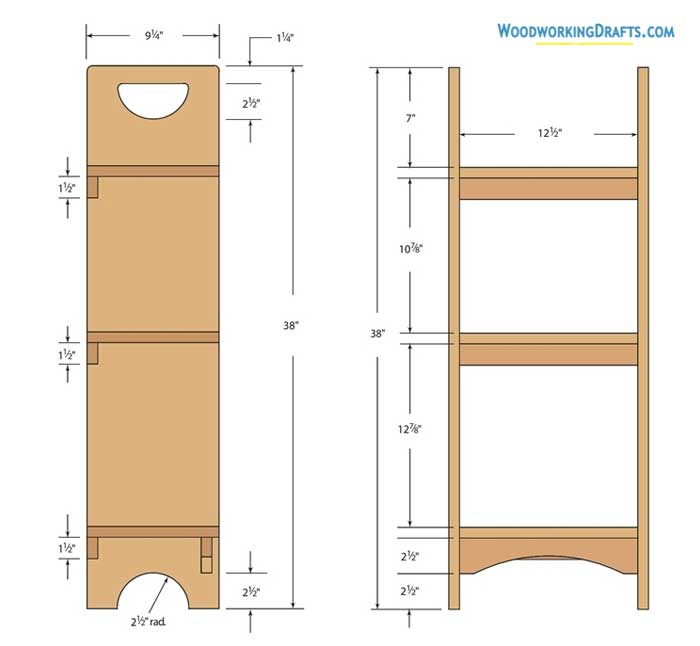
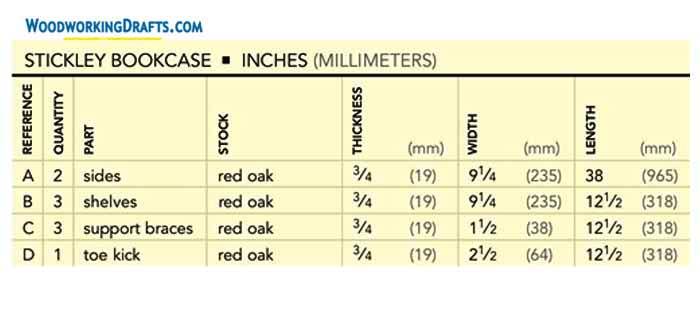
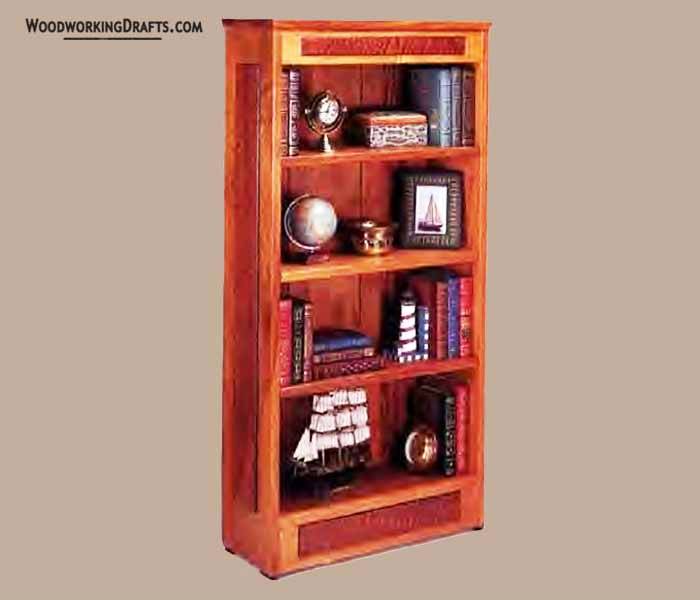
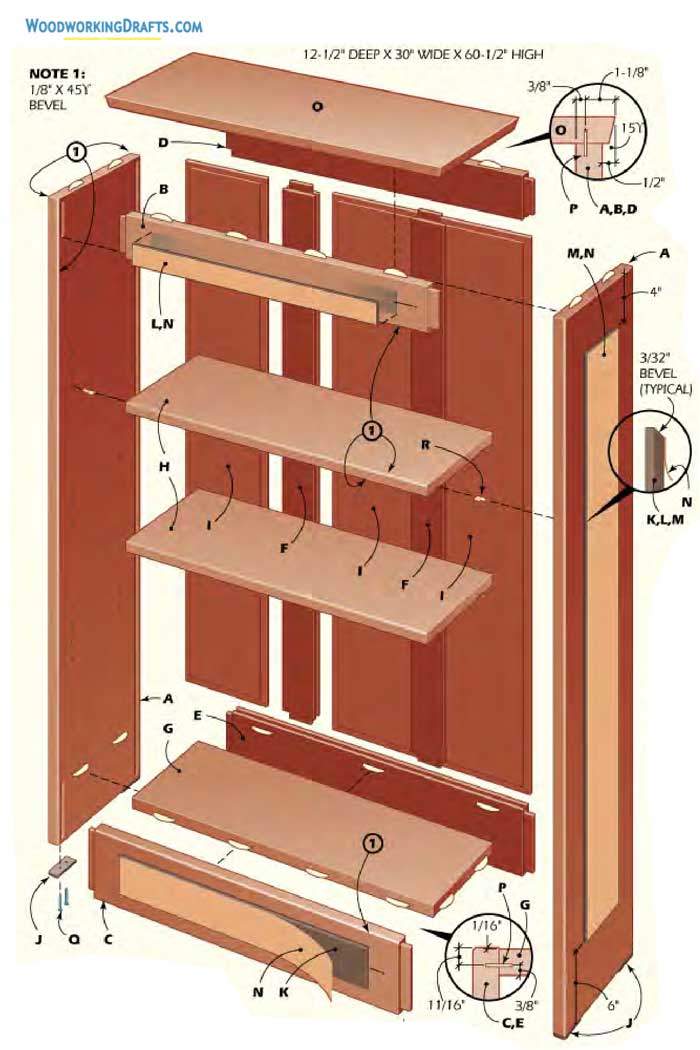
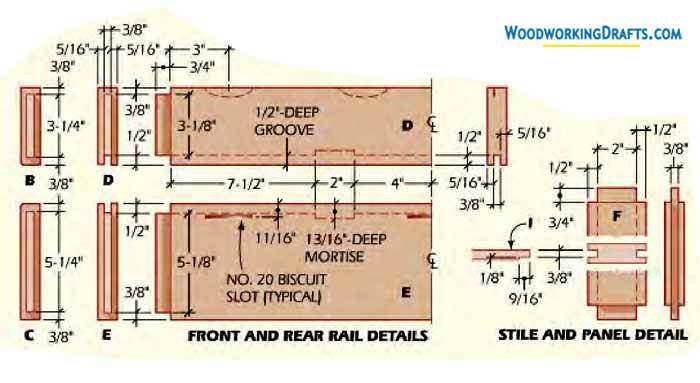
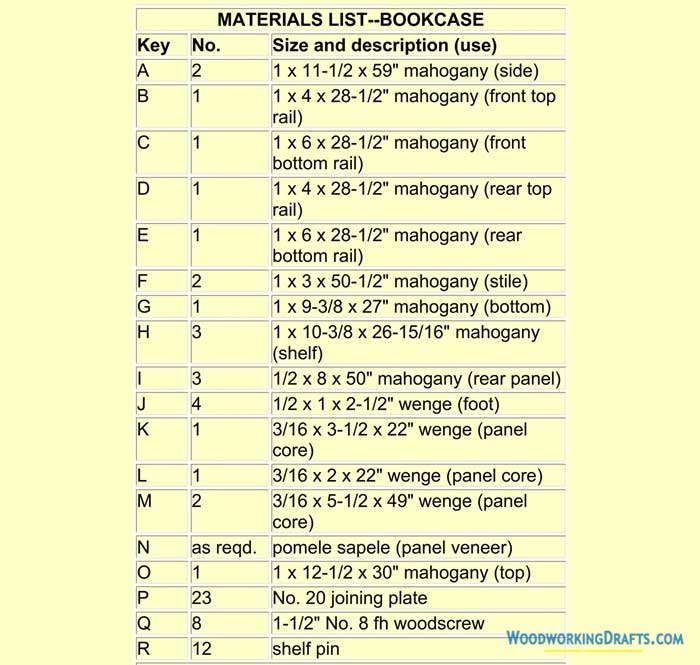
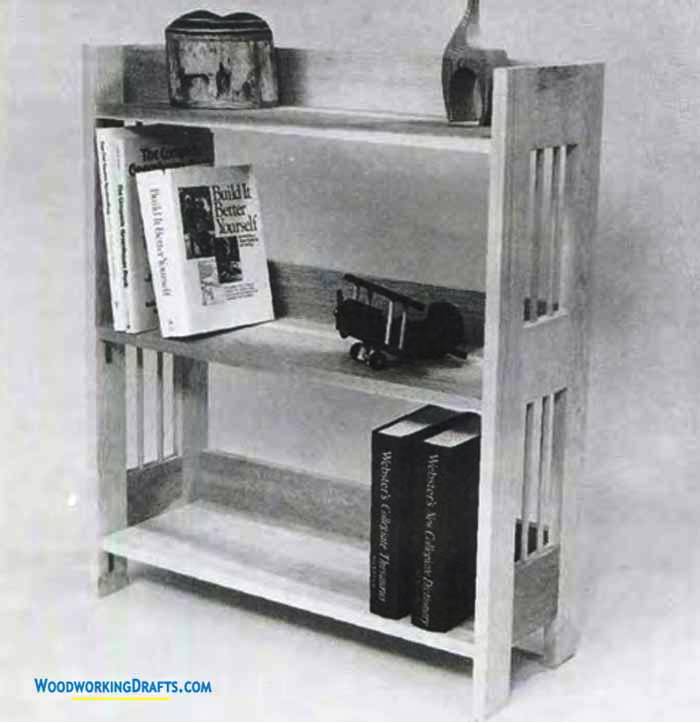
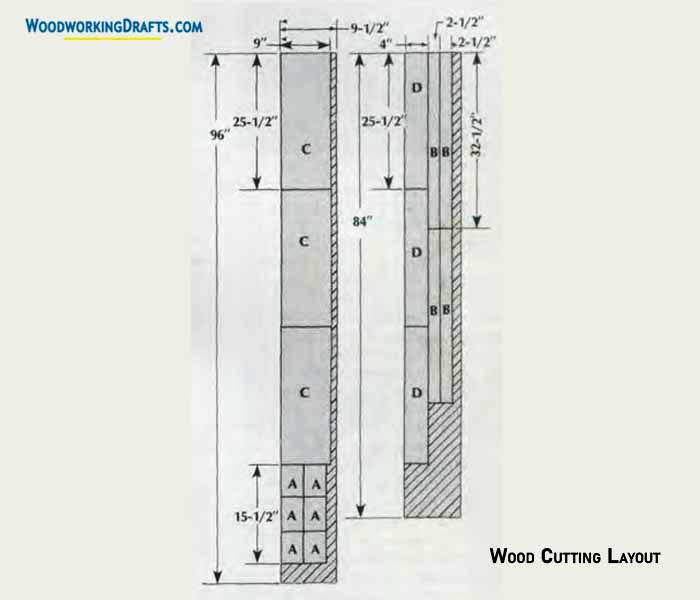
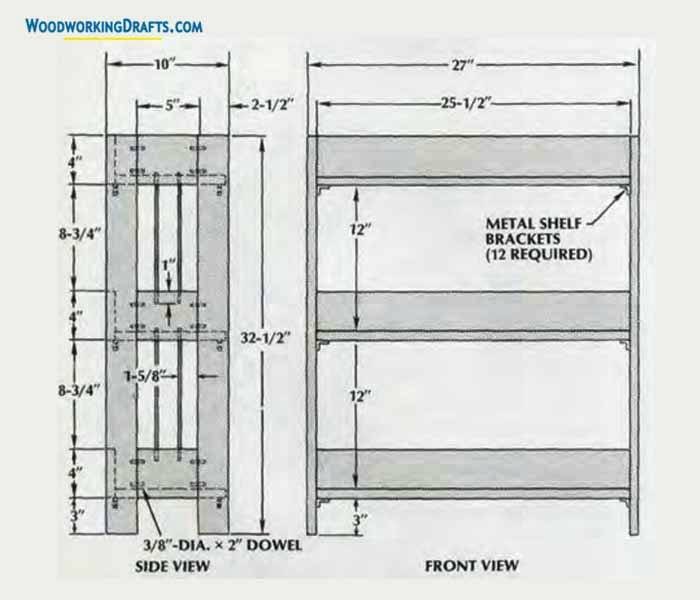
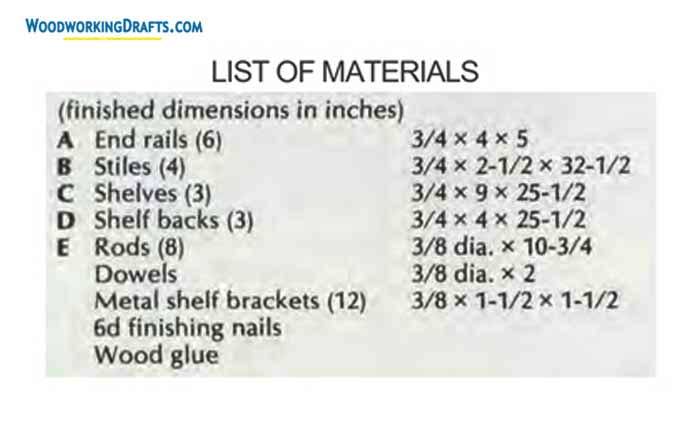
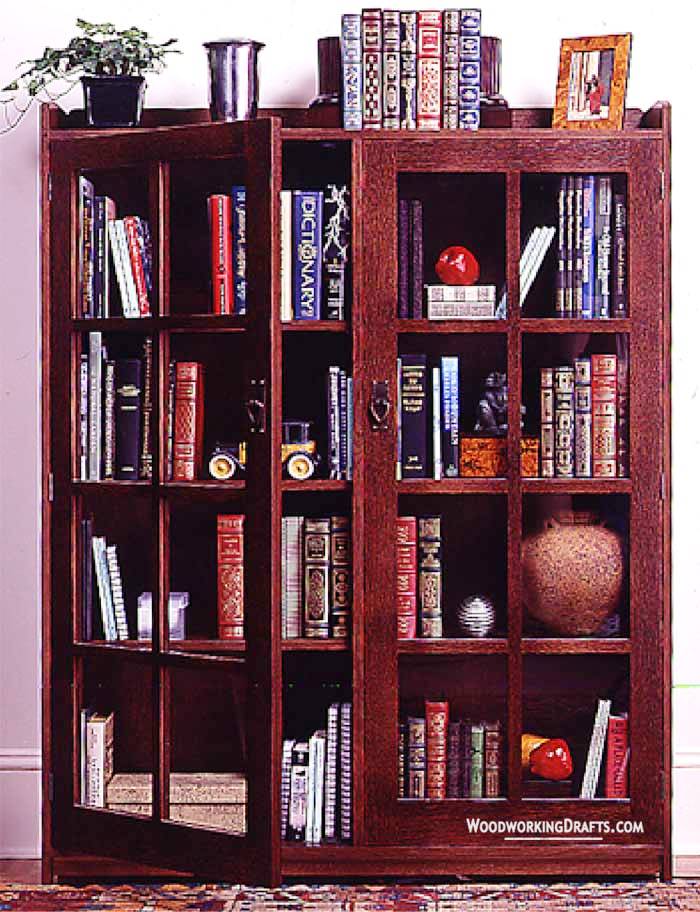
Stickley Bookcase Plans With Materials List
DIY Rustic Bookcase Blueprints

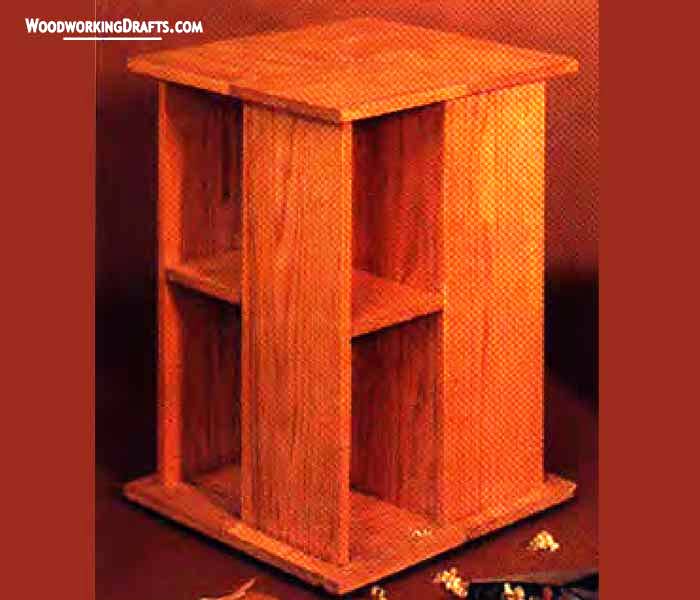
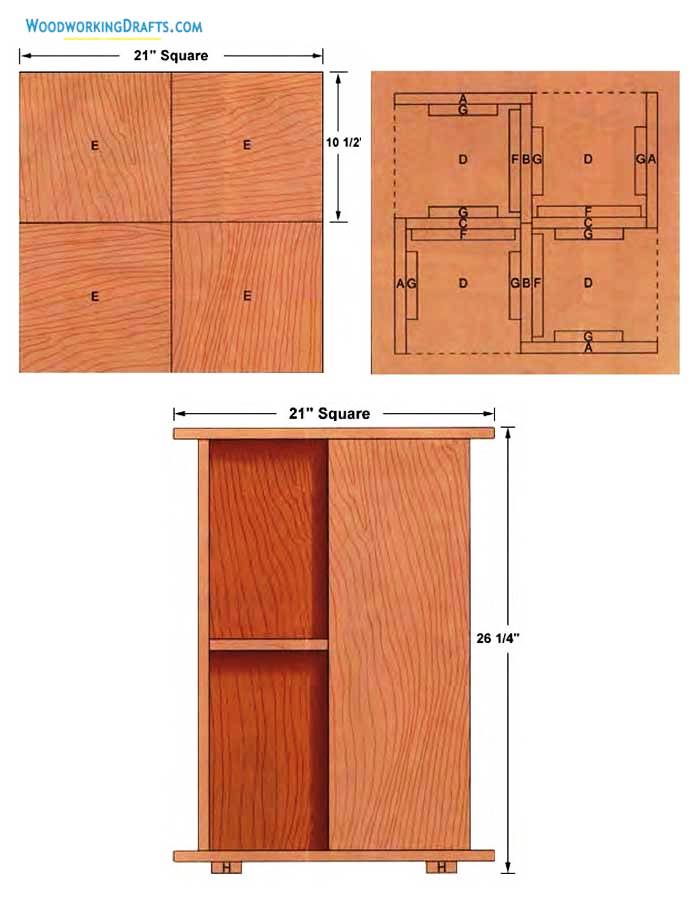
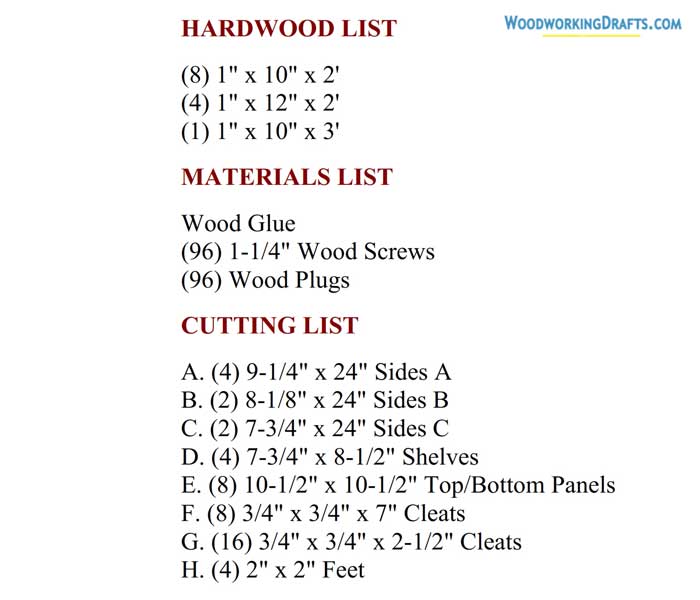
Chair Side Bookcase Plans And Cutting Diagrams

Bookcase End Table Blueprints
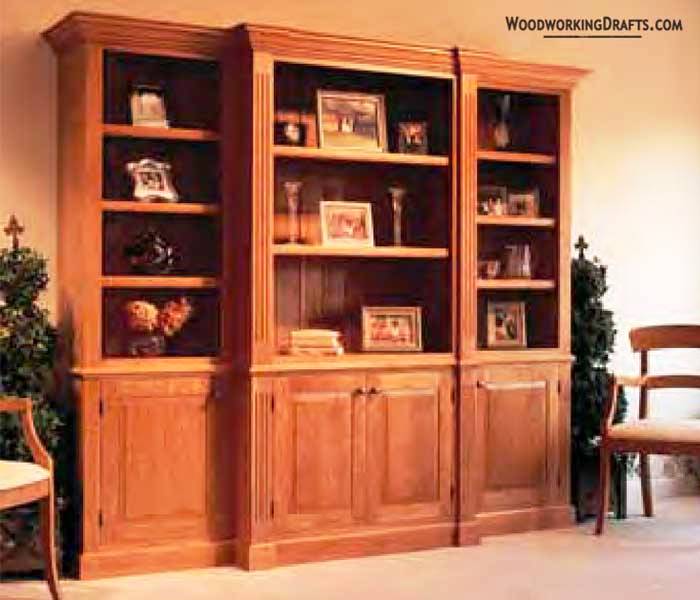
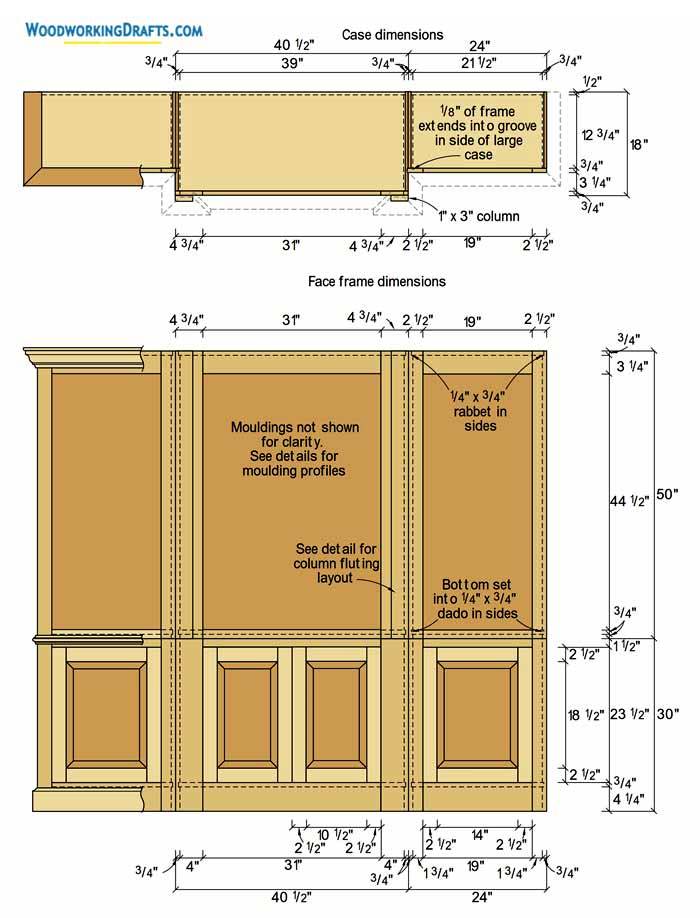
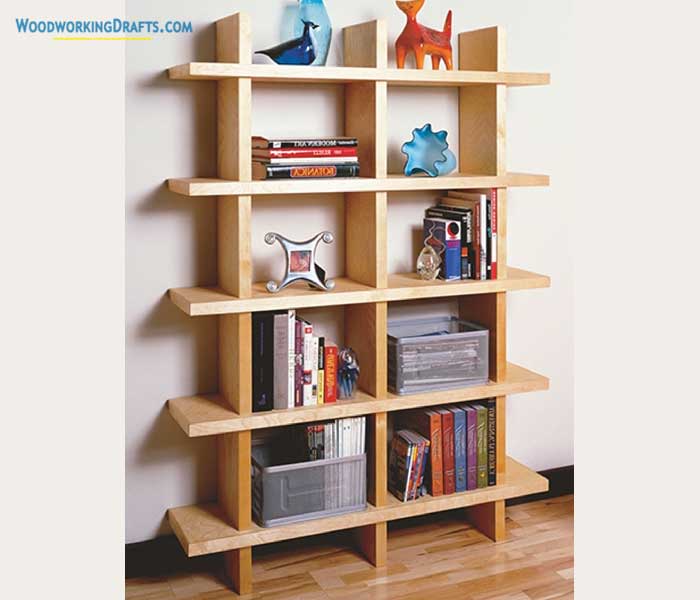
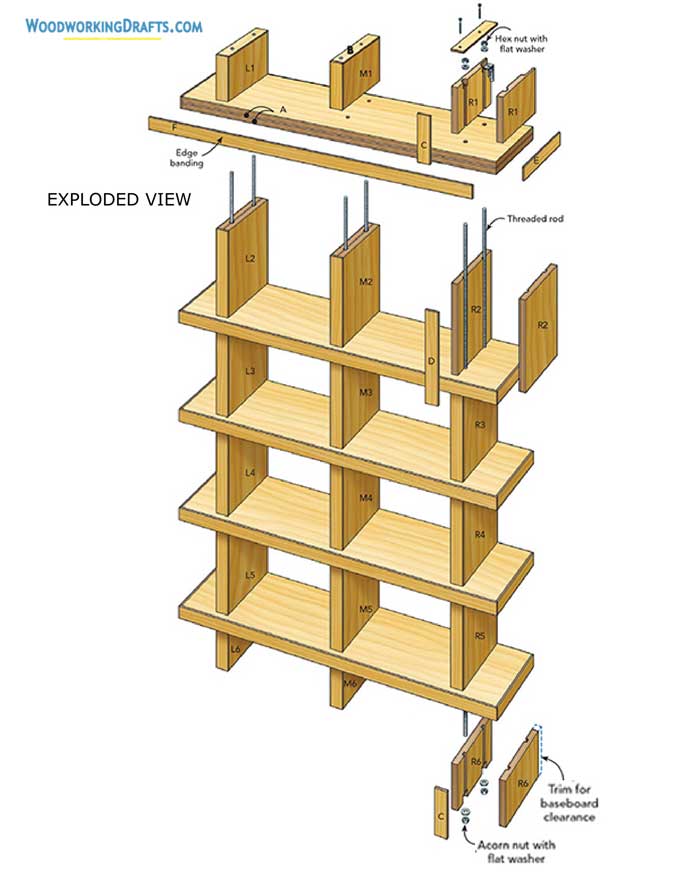
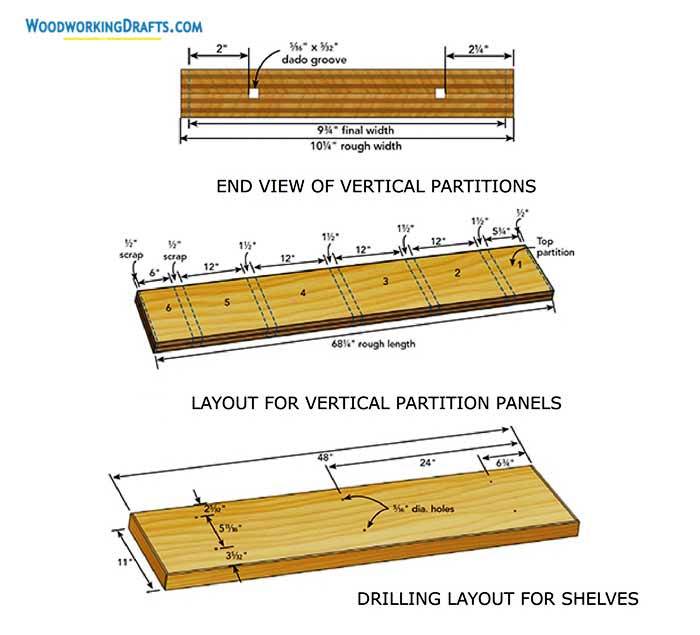
Large Bookcase DIY Plans
Modular Bookcase Building Plans
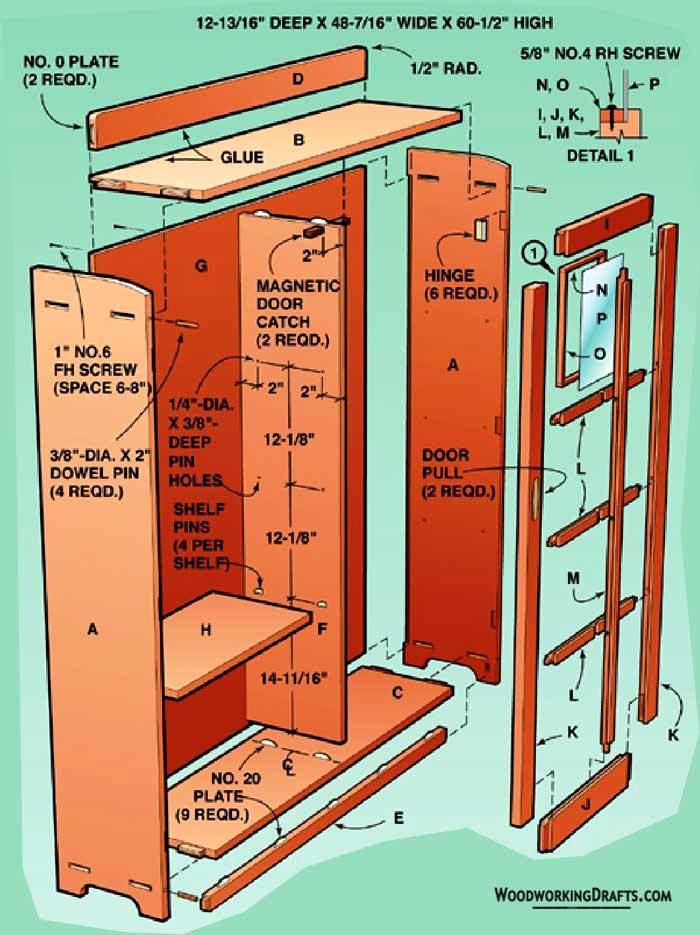

DIY Built In Bookcase With Door Plans


Simple Bookcase Blueprints And Materials List
With some quality lumber and diligent crafting, our DIY bookshelf building plans will allow you to design your own beautiful bookcase in no time.