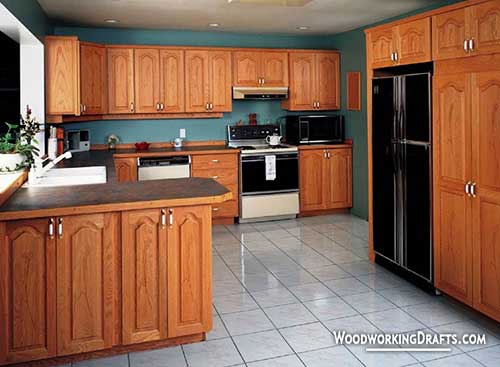
How To Build Kitchen, Bathroom, Sink And Corner Base Cabinets Quickly And Easily
You can use our simple DIY base cabinet plans to construct all the storage units you need for your home.
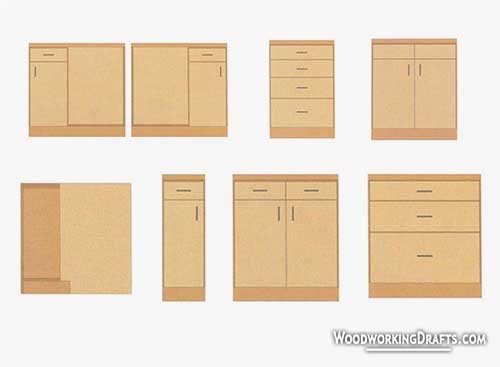
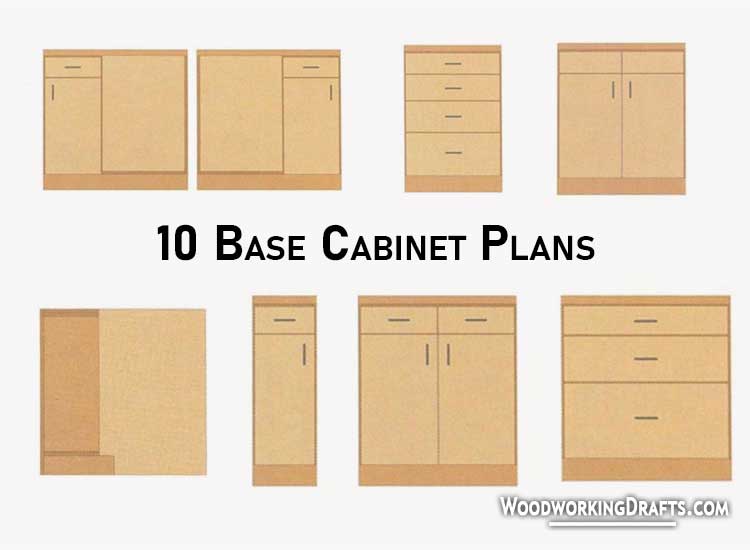
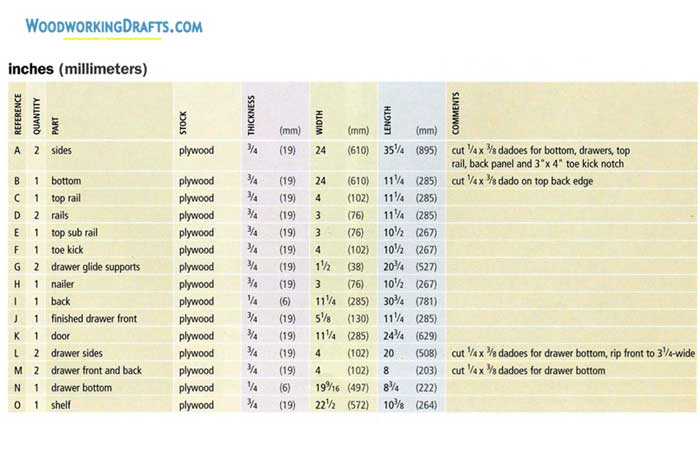
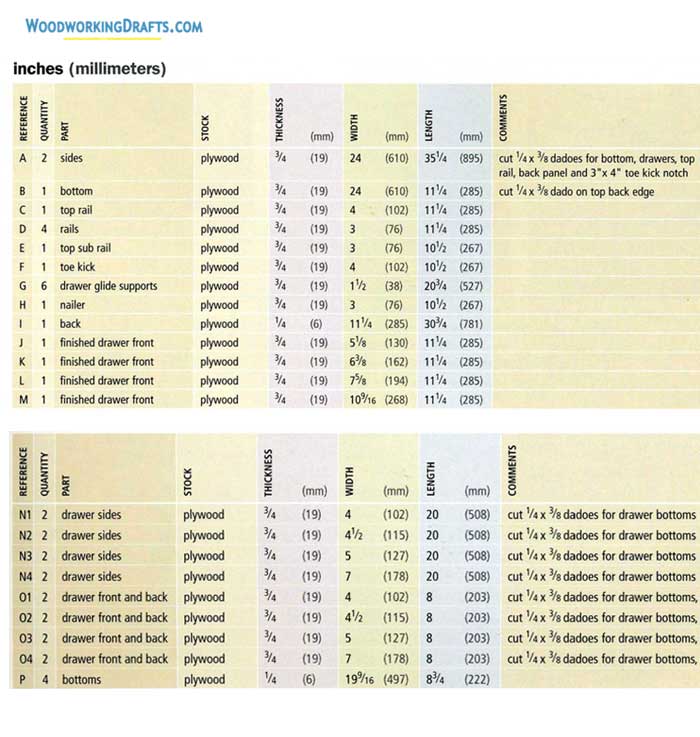
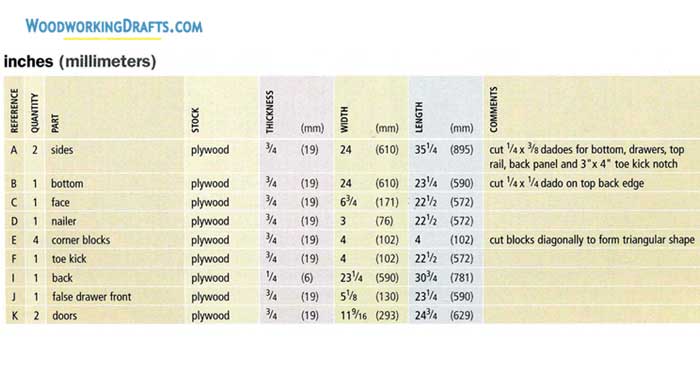
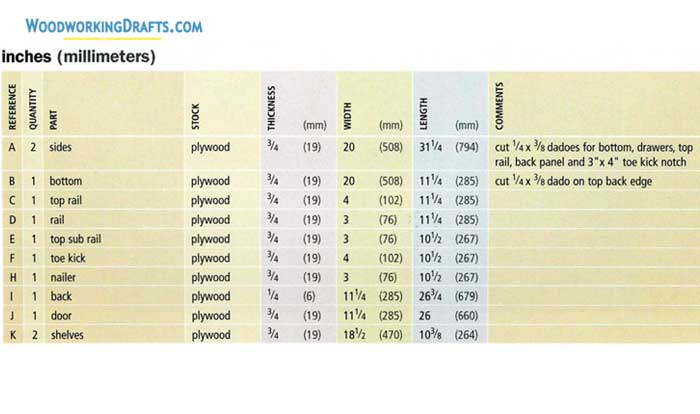
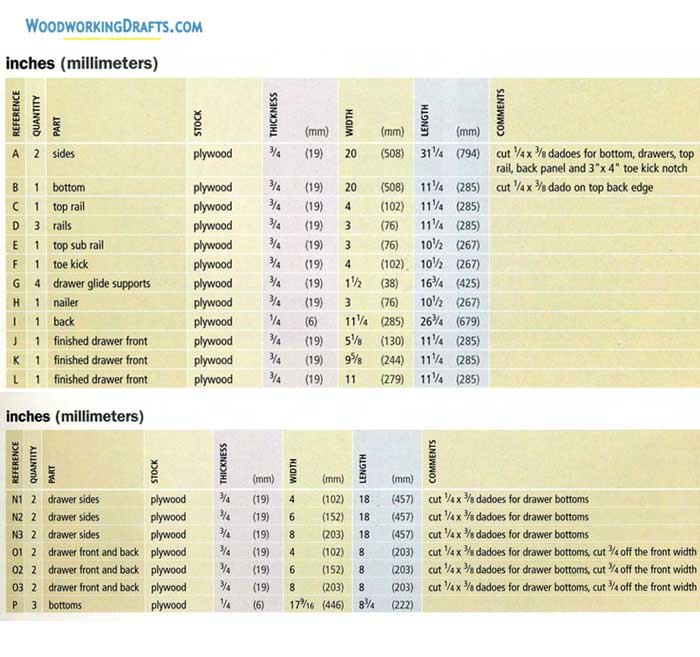
Our designs include blueprints for corner cabinets, bases without drawers, bathroom cabinets, sink bases, and drawer bases. The material lists for building these projects are also included below.
You can craft these cabinets at a much lower cost than buying them. If you are relatively new to woodworking, these projects will also enhance your cabinetmaking skills.
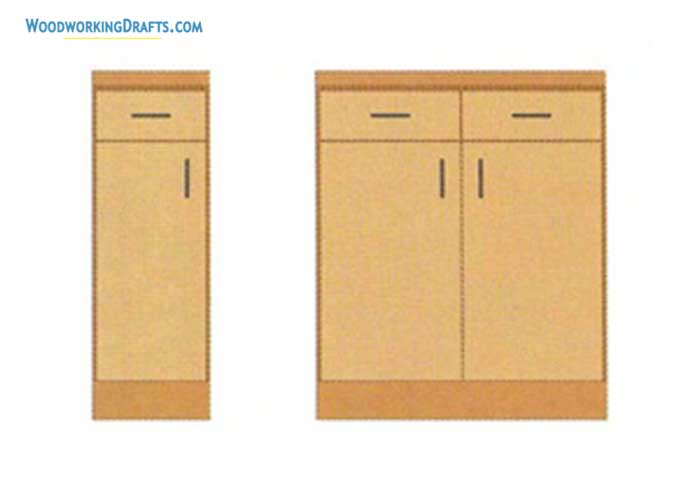
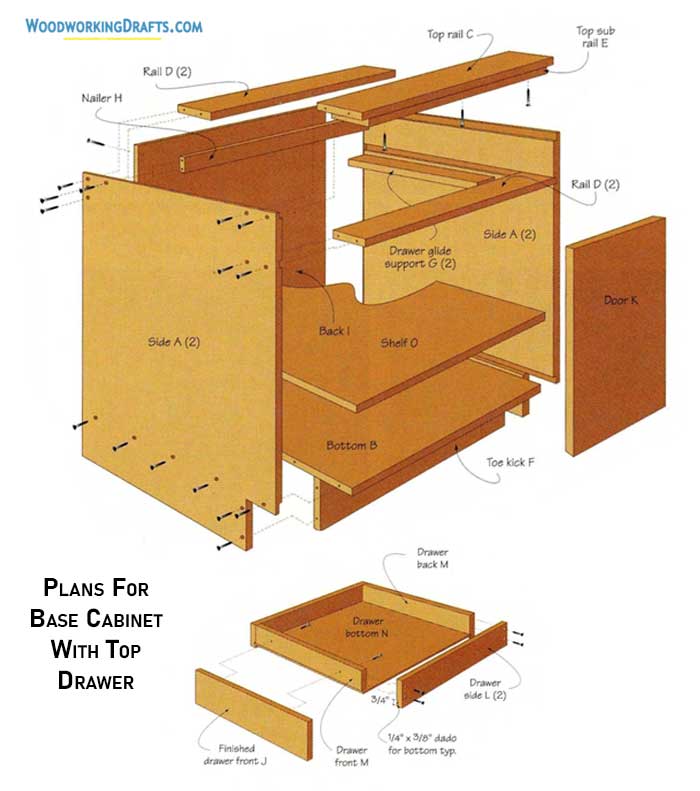
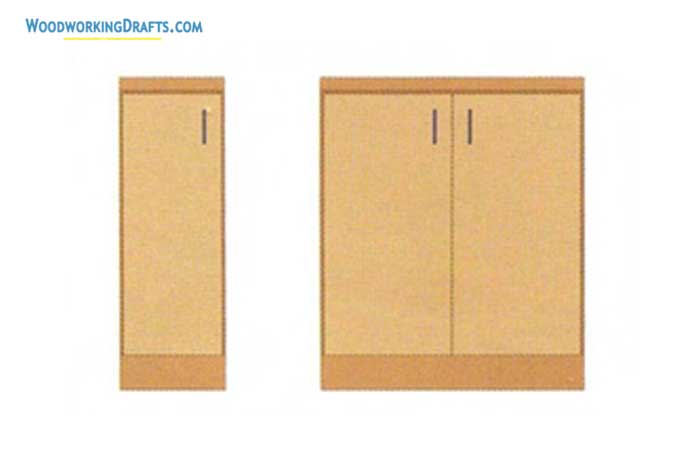
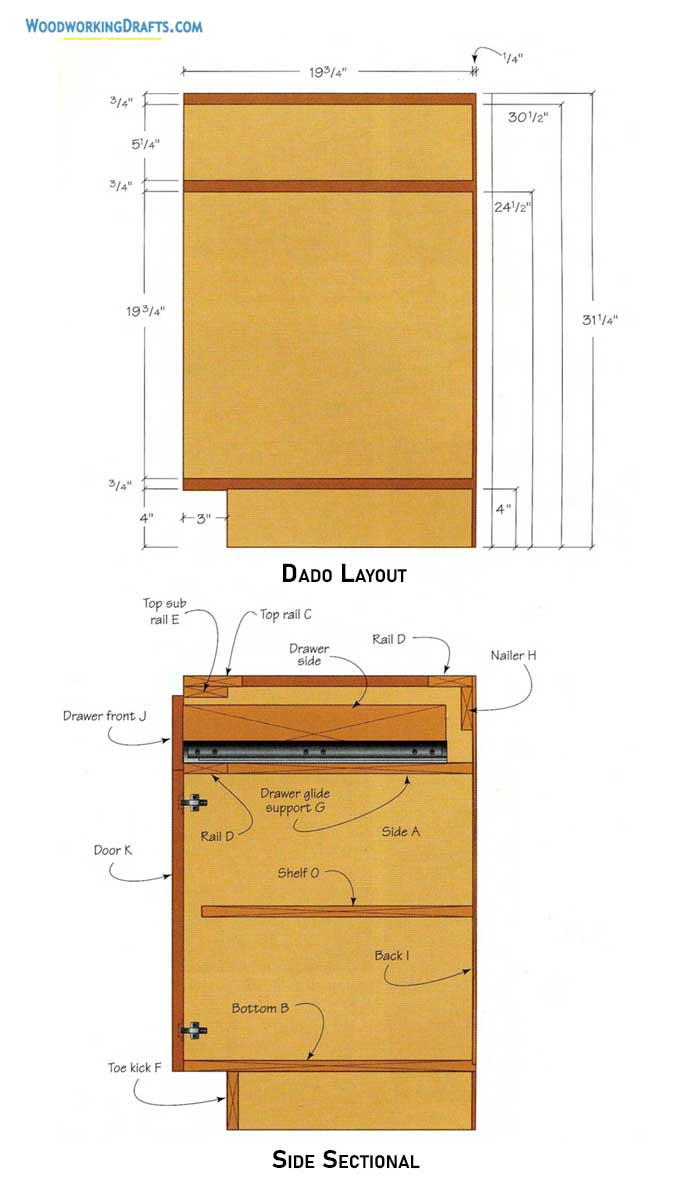
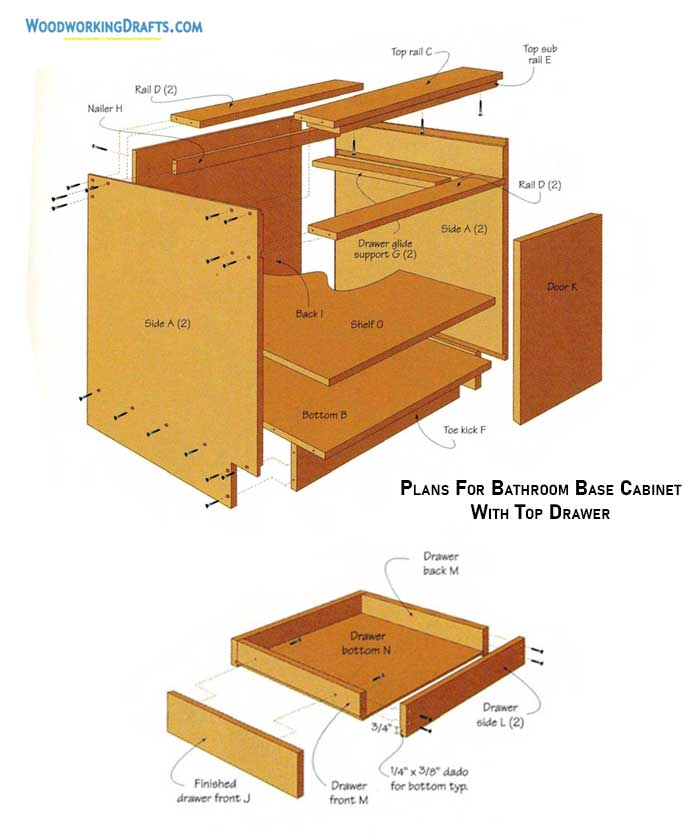
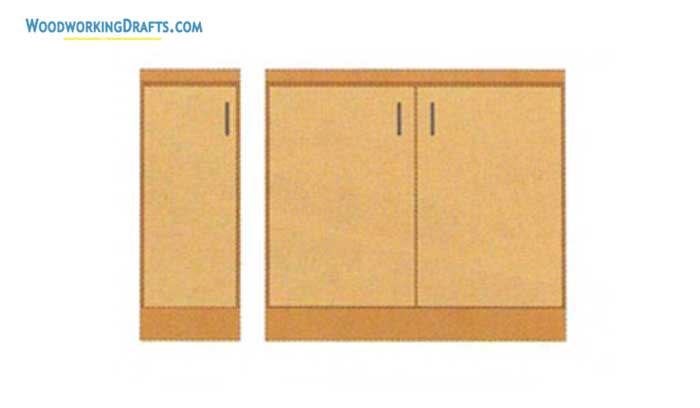
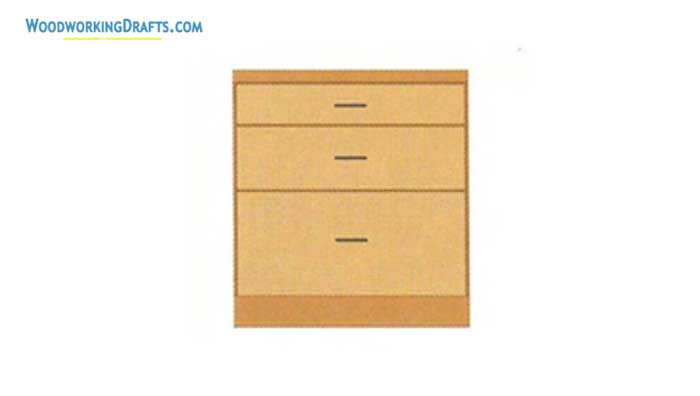
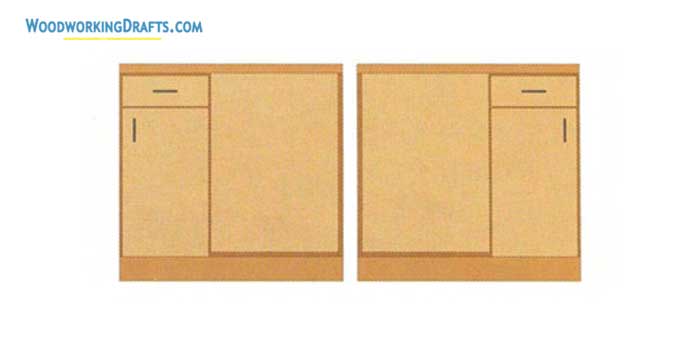
Base Cabinet With Top Drawer Plans
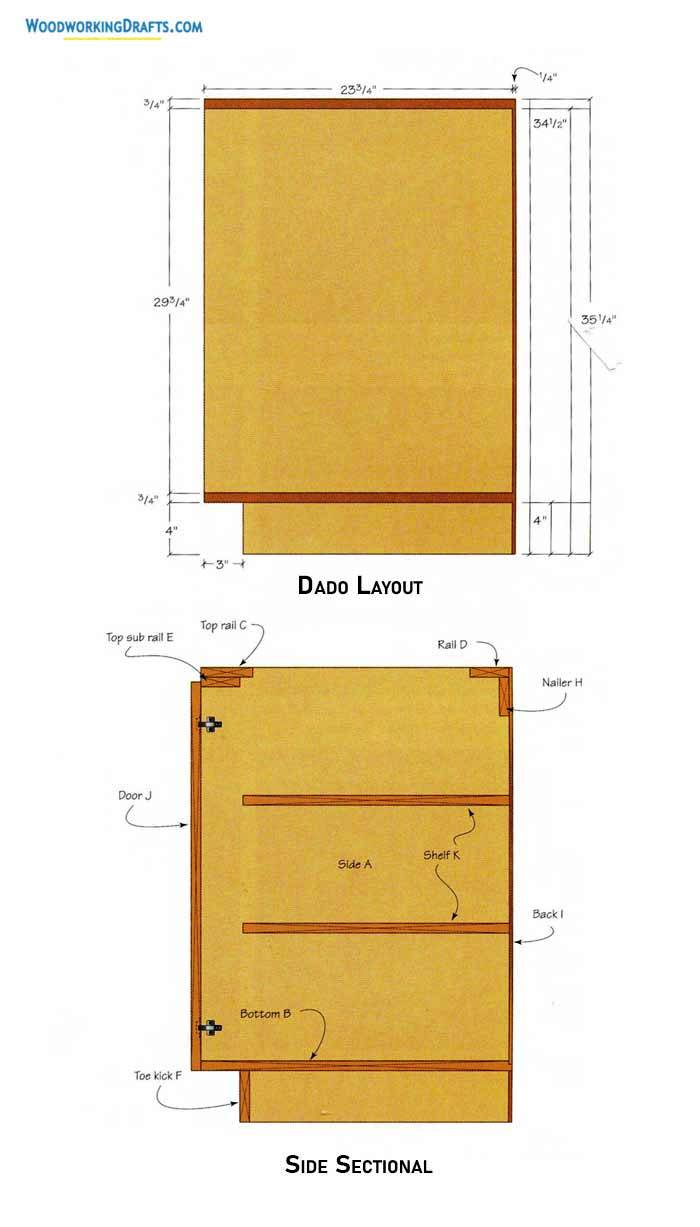
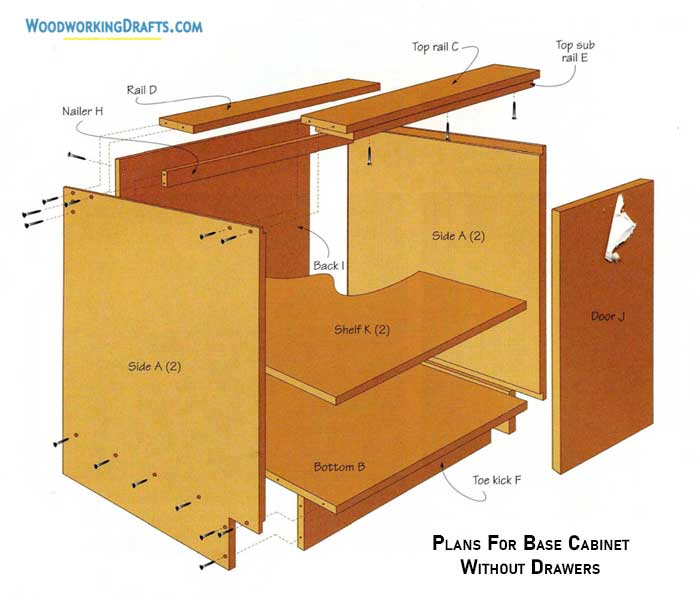
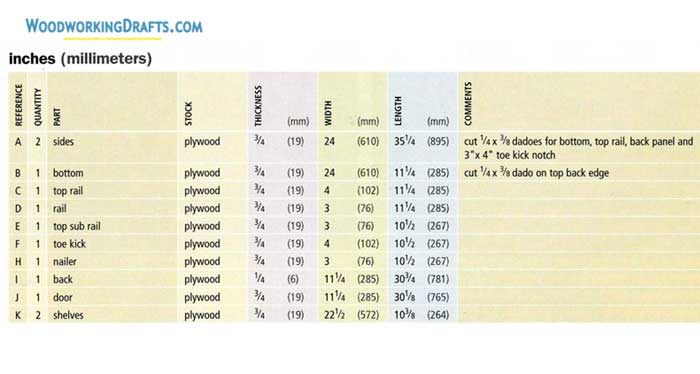
Basic Base Cabinet Without Drawers Plans
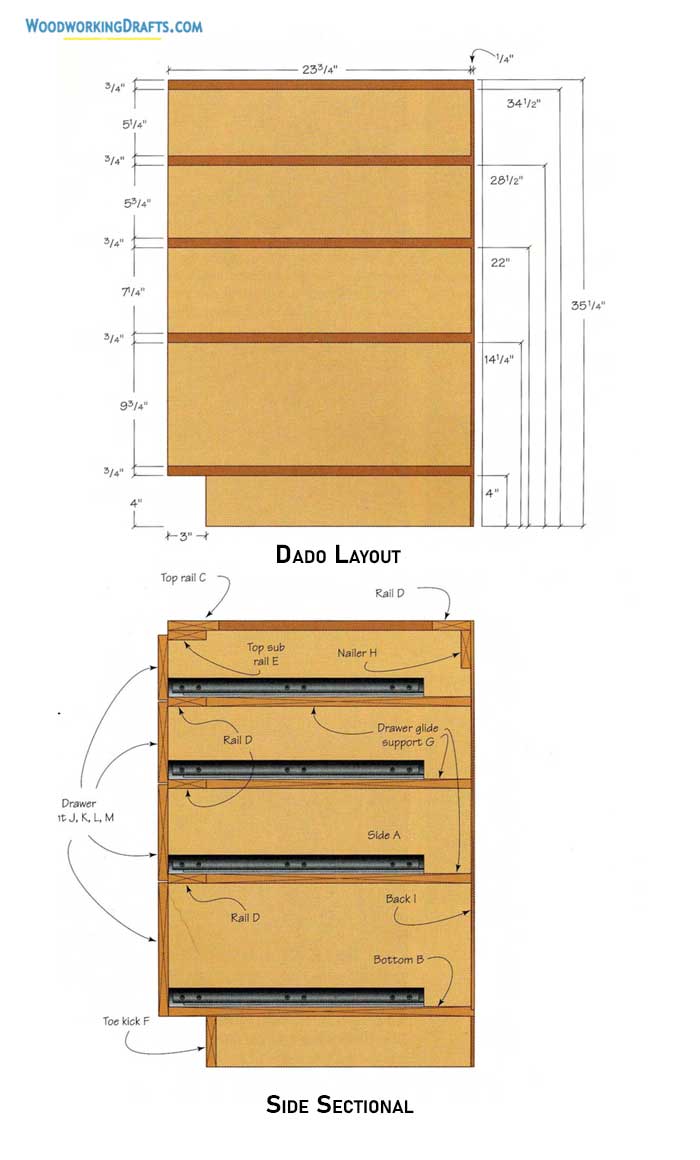
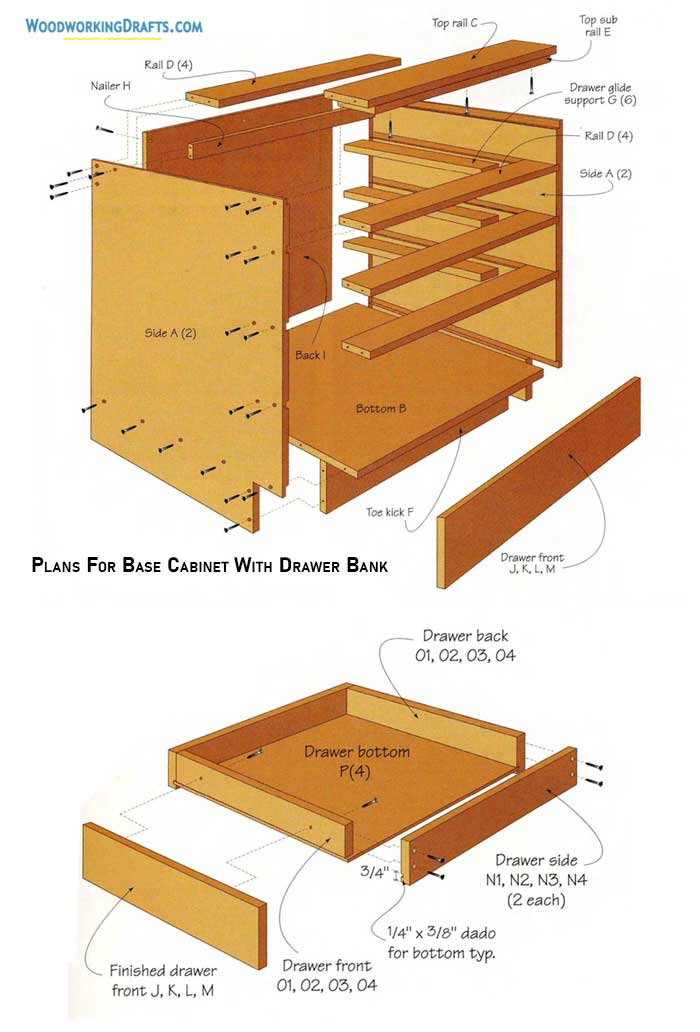
Base Cabinet With Drawers Plans

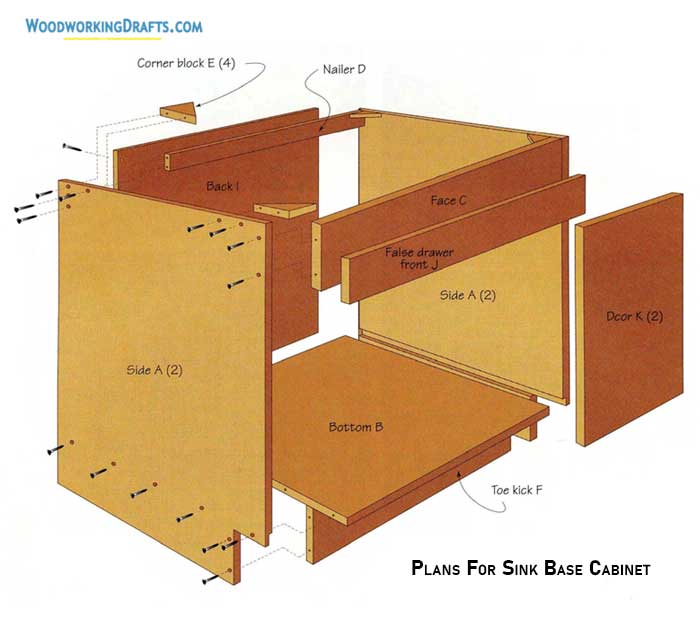
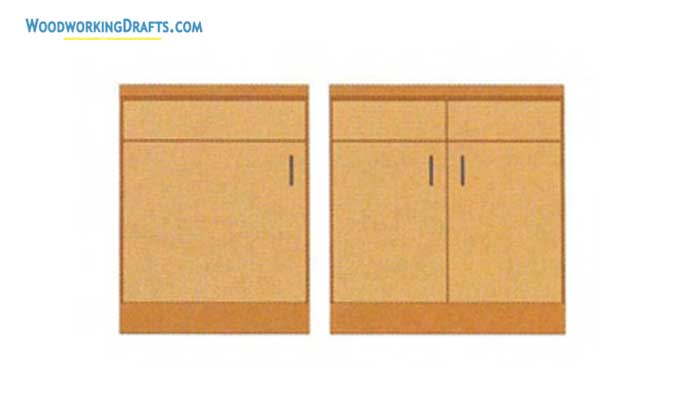
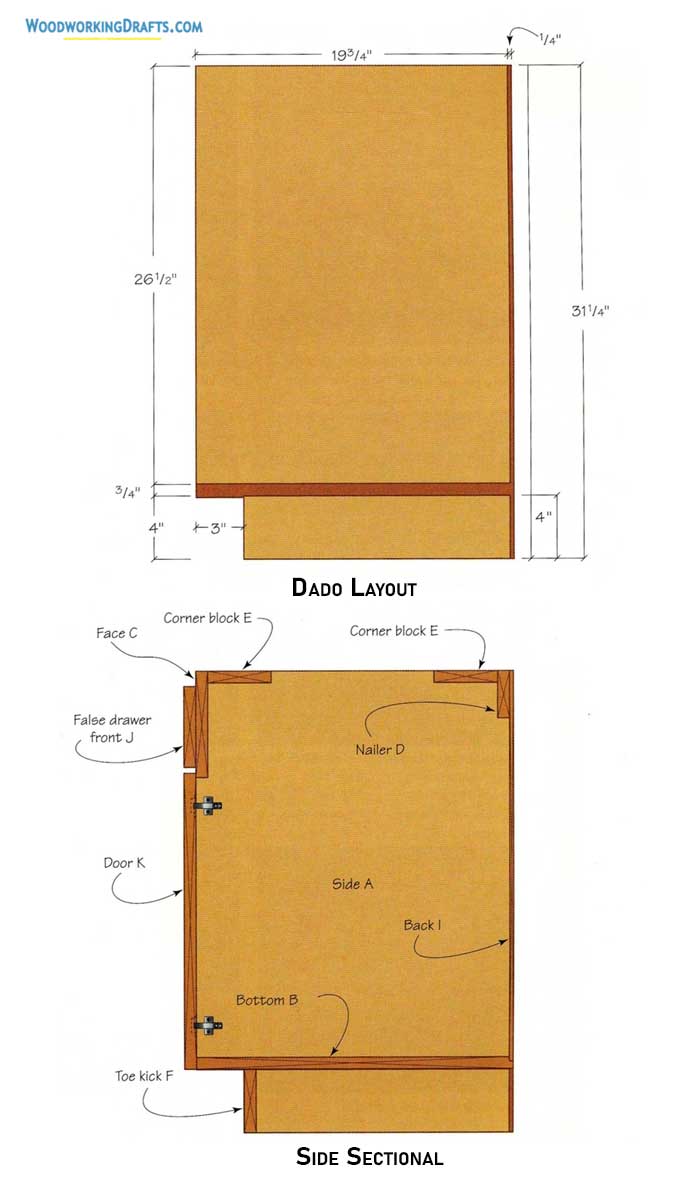
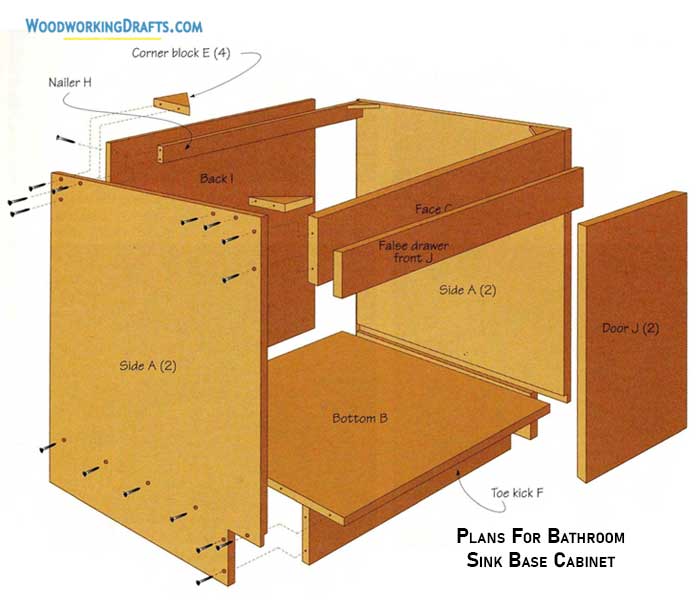
Sink Base Cabinet Plans

Bathroom Vanity Base Cabinet With Top Drawer Plans


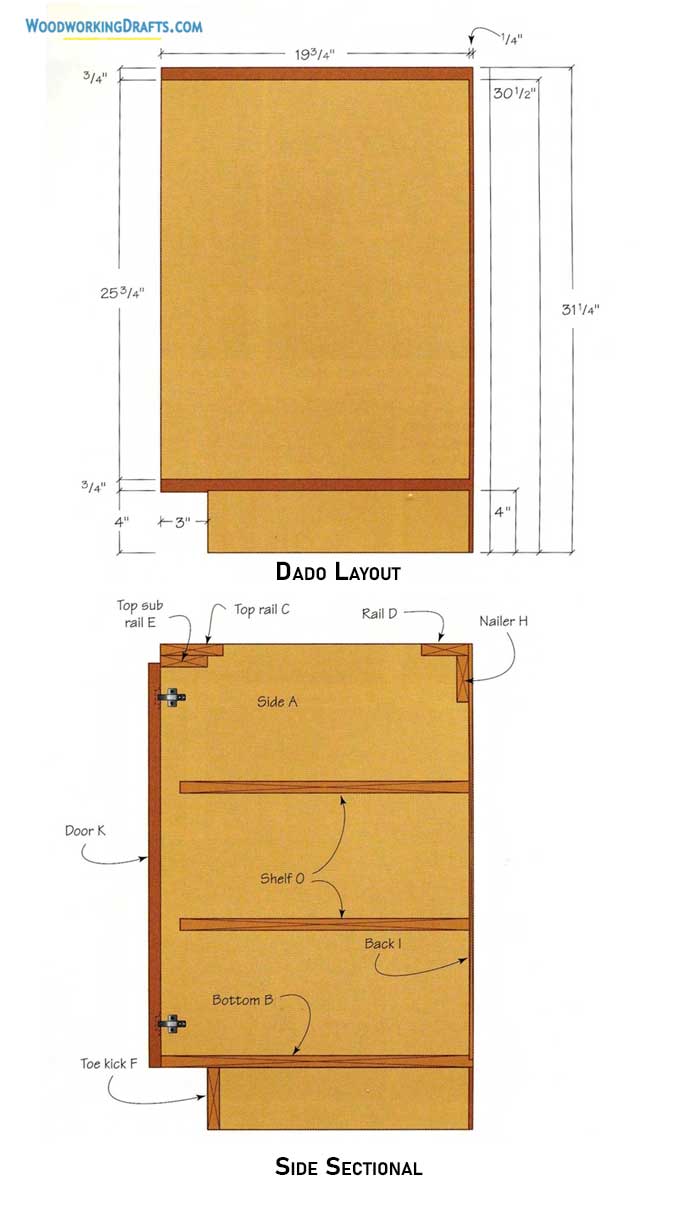
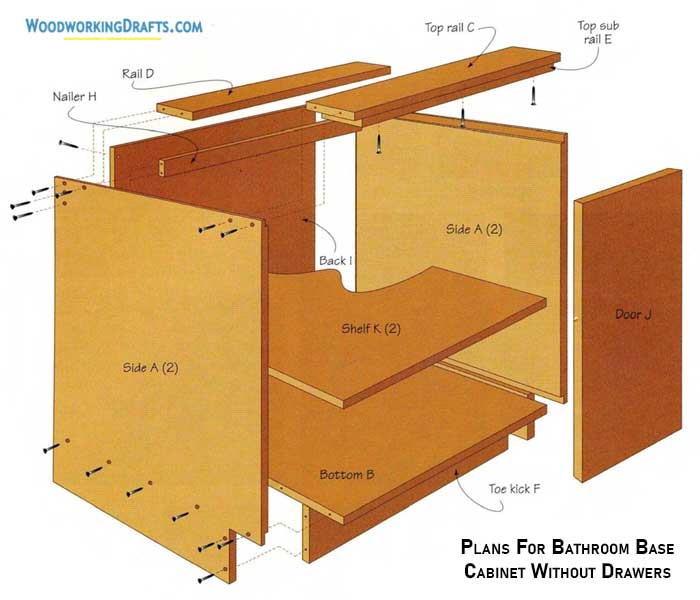
Basic Bathroom Vanity Base Cabinet Without Drawers Plans
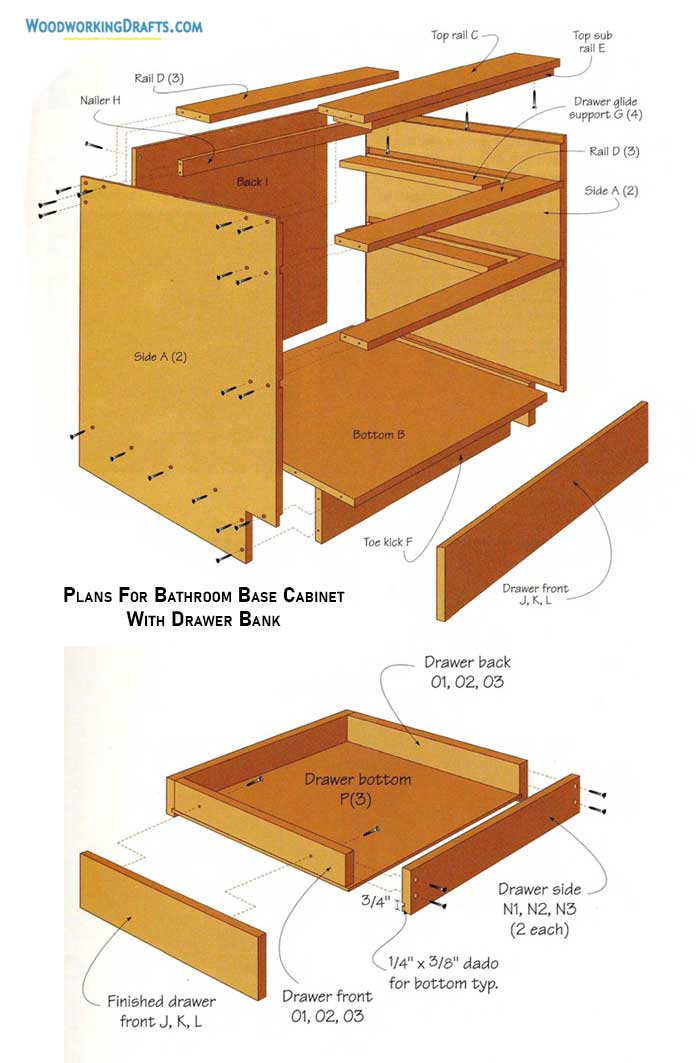
Bathroom Vanity Drawer Bank Base Cabinet Plans

Bathroom Vanity Sink Base Cabinet Plans
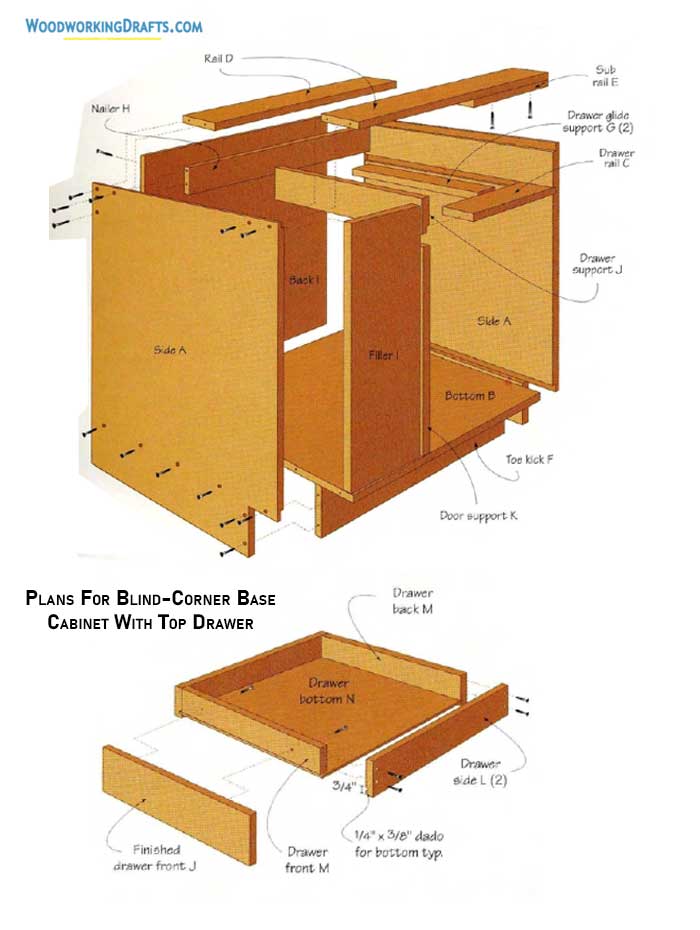
Blind Corner Base Cabinet With Top Drawer Plans

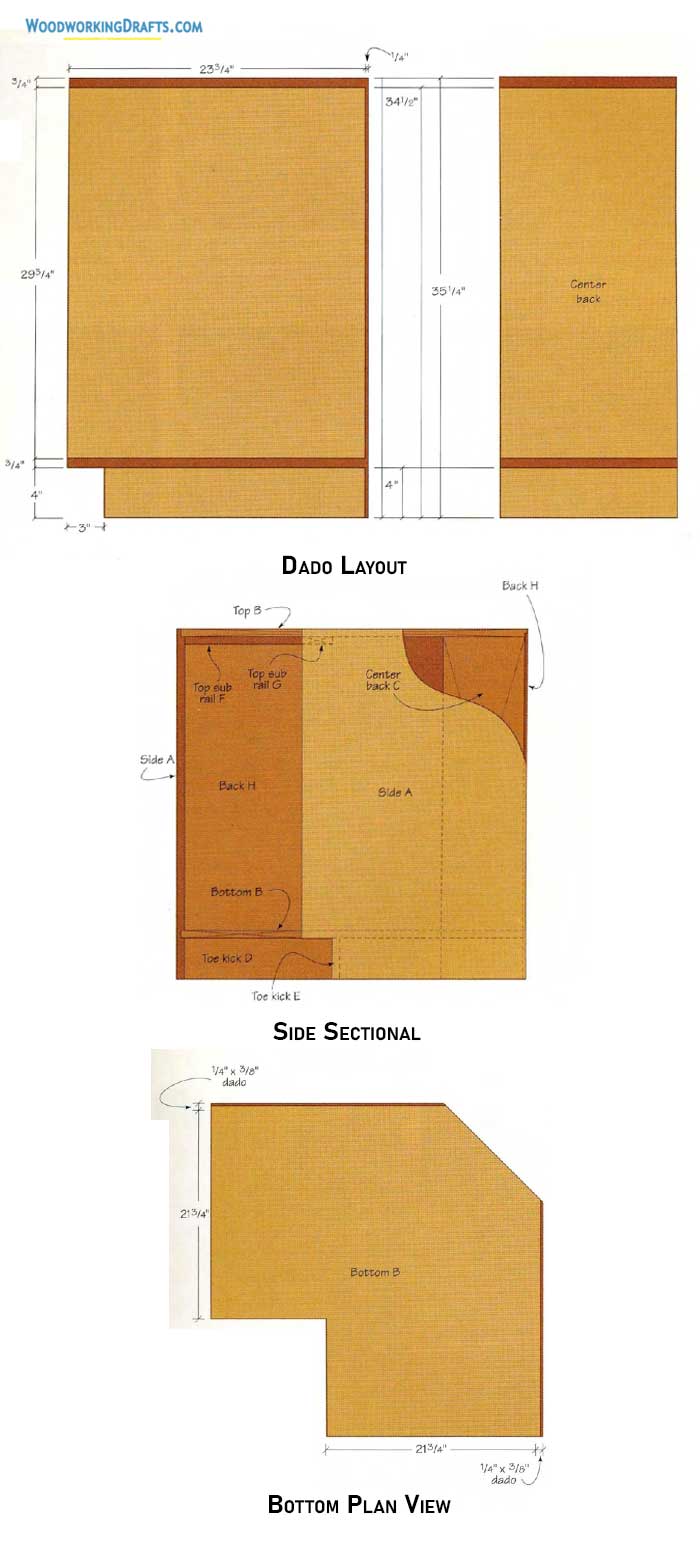
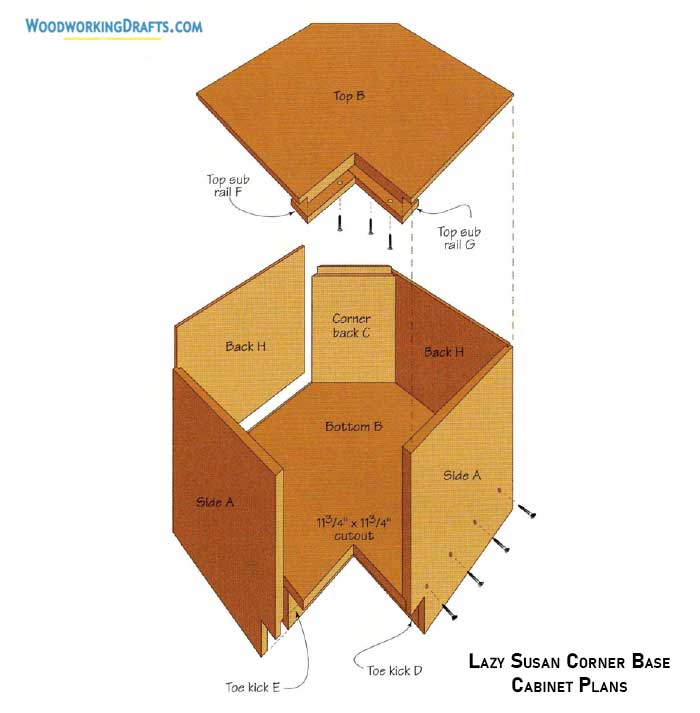
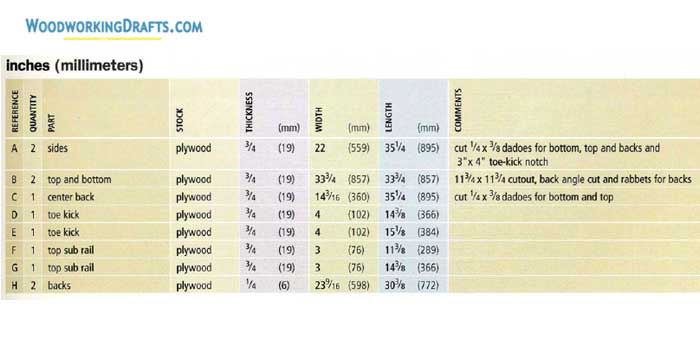
Lazy Susan Corner Base Cabinet Plans
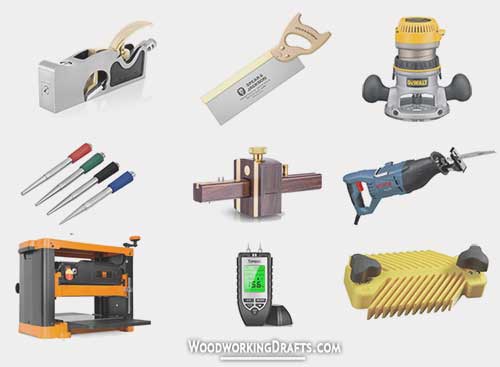
Tools For Building Base Cabinets
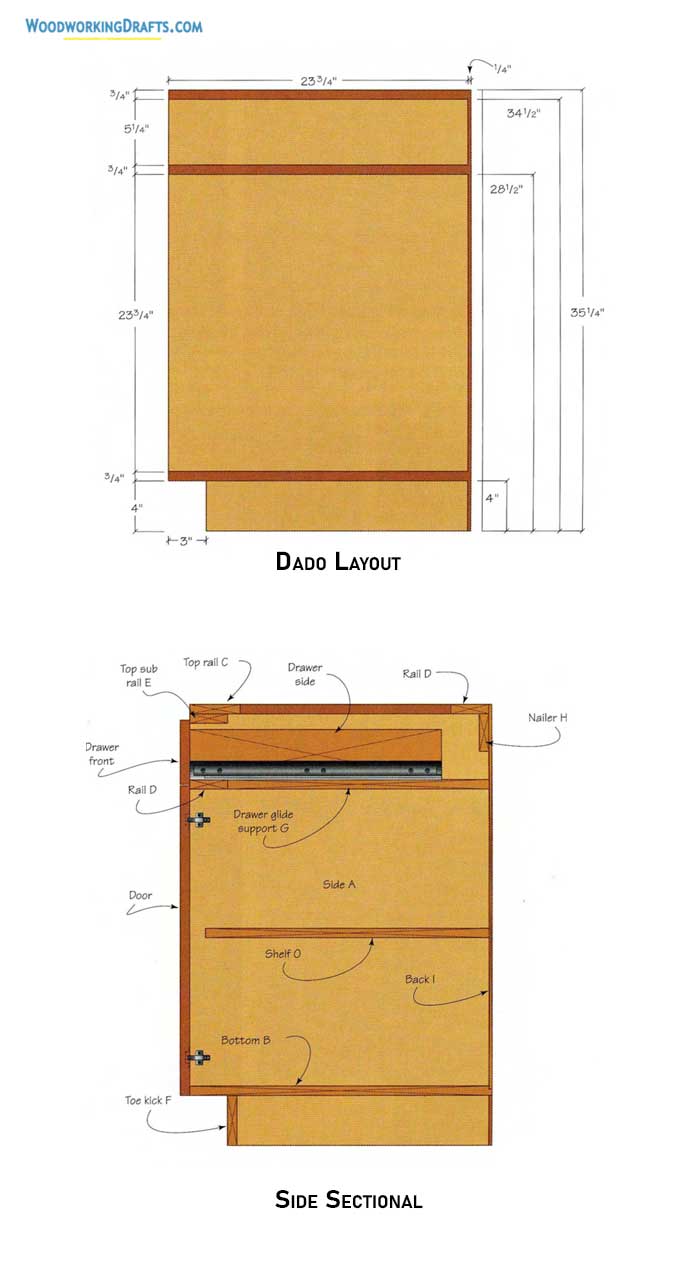
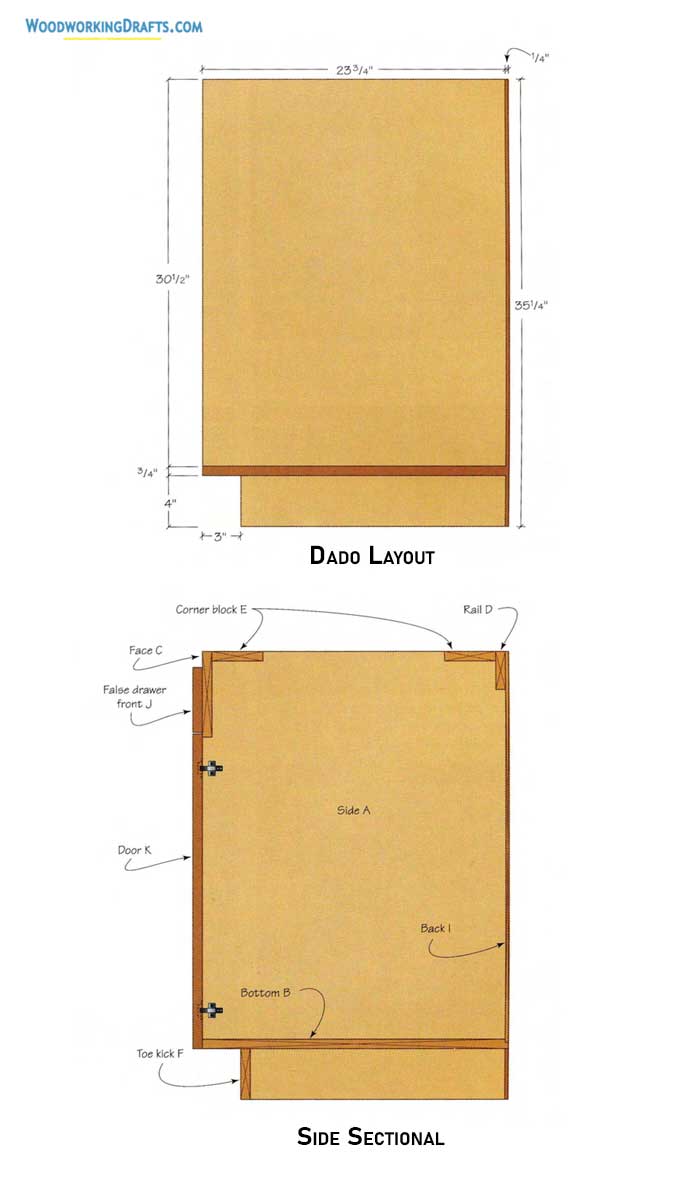
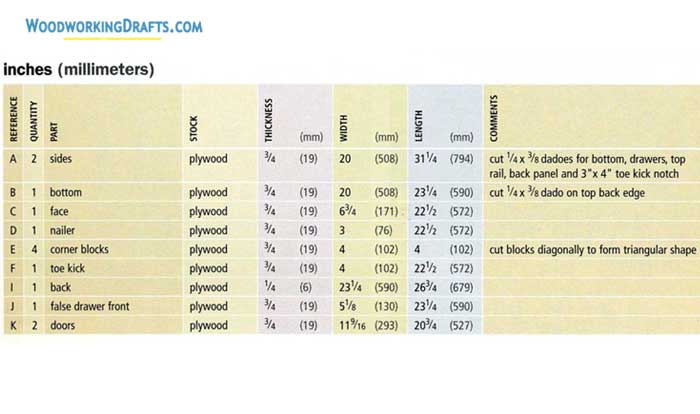
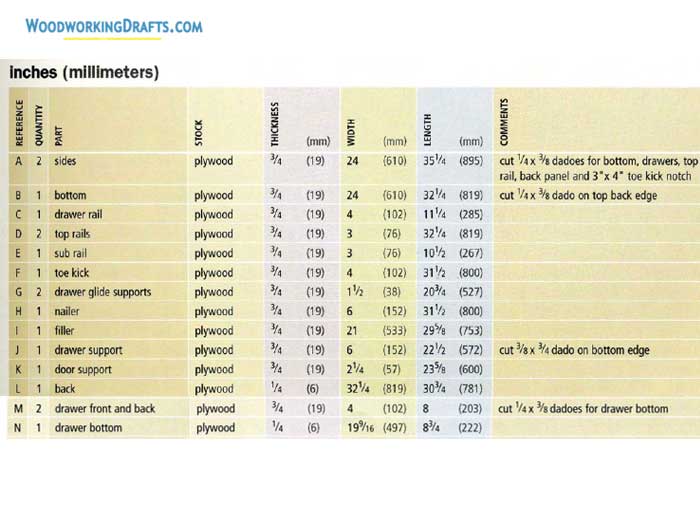
Each base cabinet blueprint shows the location of the dado cuts, the drawer sizes, and the layouts for the doors and drawer fronts. This should make it easy for you to build any cabinet, even if you are new to cabinetry.
It is recommended to have a table saw because that will make you work on cutting the dadoes a lot faster. A router table will also do if you don’t have a table saw.
You will also need the below tools to craft cabinets.
- Jigsaw
- Belt sander
- Miter saw
- Power drill
- Clamps
- Hammer
- Framing square
How To Cut Toe Kick Notches
The toe kick notches are cut in pairs. Align the sides of the cabinet and scribe the location to cut the notches before you cut the dadoes.
You can use a table saw to cut the toe kick cutouts. Position the outside of the blade to 4 inches and hoist the saw blade to its complete height.
Trace the cutout on the panel and make the first cut.
Reset the rip fence and do the next cut such that the debris from the cutout falls on the outer side of the blade.
The kerf cuts get concealed after the outer part of the cabinet is coated with veneer or laminate.
The toe notches can also be made using a circular saw, handsaw, or jigsaw.
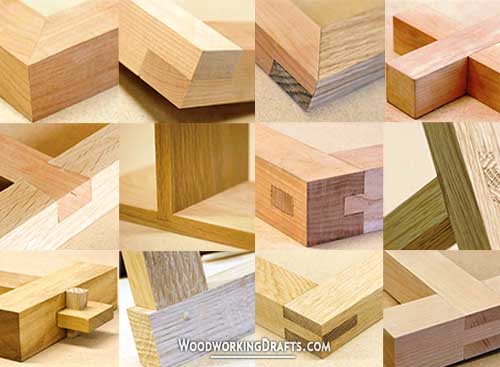
How To Cut Dadoes
Dadoes can be cut using a table saw or a router mounted on a table.
A router with an adjustable fence is a great way to create rabbets for the top rails.
Fix a hardwood lumber guide to the router’s fence. This will keep the router steady as you push it while cutting.
You can cut the rabbet for the cabinet back in one pass, but the rabbets and dadoes that are 3/4 inches wide need to be cut in two passes.
First, make the cut at a depth of 3/16, and then make the second cut at a depth of 3/8. Having a router with an adjustable gauge will make the job a lot easier.
Clamp a straight edge for cutting the drawer dadoes. First, trace a line to mark the dado location. Then find the distance from the router bit to the router’s base. Mark a second line at this distance. Clamp the straight edge at this second line.
After the first cut, change the depth of the bit and make a last pass at the correct depth.
You can build a spacer to make sure all the dadoes are exactly the same. Create a spacer board of the required dimensions and then clamp it flush with the panel. Run the router along the guide to make the cut precisely each time.
How To Build And Assemble Drawers
Drawers are simple to make but must be made exactly as per measurements. First, you should construct the cabinets, check the correct drawer size, and then recheck again.
The drawers in our plans are all built using standard drawer slides that you can buy in a home improvement depot.
The outer width of the drawers is about 1 inch to 1 1/16 inch smaller than the opening width inside the cabinet because of the space left for the drawer slides.
First, cut all parts for the drawers as per the measurements shown in the blueprints. Then set the saw blade to 3/8 inches and adjust the fence to a distance of 3/4 inches.
Begin by cutting test pieces to help you make any adjustments on the blade as needed. Then make the first pass on all drawer components that utilize a dado.
Realign the fence for the second pass and create the dado for the drawer’s lower panel.
Keep making cuts until the bottom panel fits tightly inside the dado.
Once all dadoes are finished, use screws or staples to put together the drawer by sandwiching the back and front drawer parts in between the side components.
Check that the top of the dado is perfectly aligned with the bottom of the drawer front.
Cover the groove for the bottom panel with a layer of glue and then slide the bottom into place.
Use a square to verify the bottom is precisely square, and then secure it into place with nails.
How To Construct Doors & Drawer Fronts
Cut all the components for door and drawer fronts as per the dimensions given in the blueprints.
Now we will cut the bevels on the outer edges.
Install a sacrificial fence over the table saw’s fence at a distance of about 3/8 inches from the saw blade.
Adjust the bevel to 45 degrees and hoist the blade till it nearly touches the fence.
Switch on the saw and keep hoisting the blade till it saws about 1/8 inches into the fence.
Bevel each piece of stock by running it against the fence and over the saw blade. Each bevel must be about half the thickness of the drawer front or door.
First, make the two cross-cuts for each bevel and then saw with the grain for the remaining two cuts. This will stop the grain from ripping out at the cross-cut ends.
Sand the edges of each beveled component to smoothen saw marks, and then finish the cabinet.
While you are building these simple bases from our DIY base cabinet plans, you can also make customizations to increase or decrease the width of the cabinet as needed.