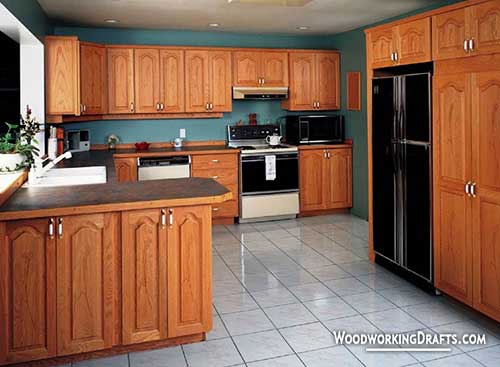
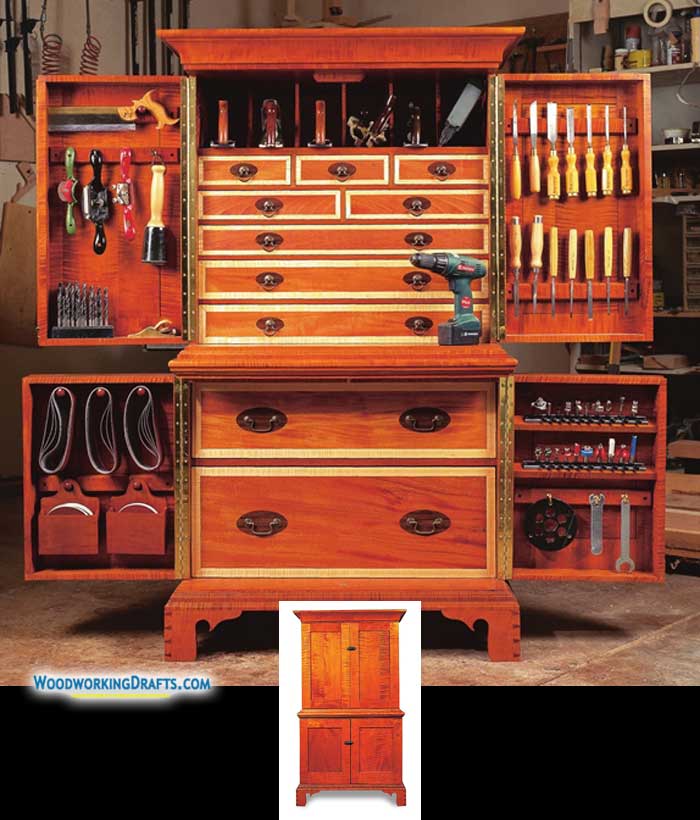
These large DIY tool storage cabinet plans will let you build a chest for safely storing your entire tool collection in one place.
The most frequently used tools are on display right in the front, while the deep drawers store the less used tools.
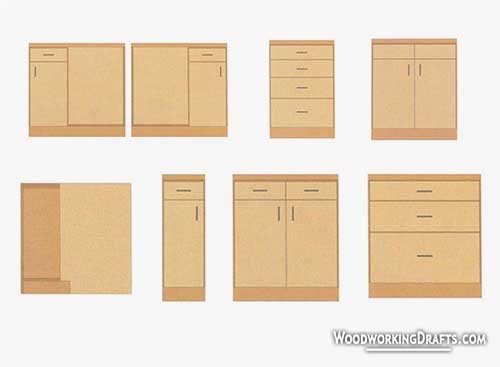
DIY Tool Storage Cabinet Plans And Blueprints
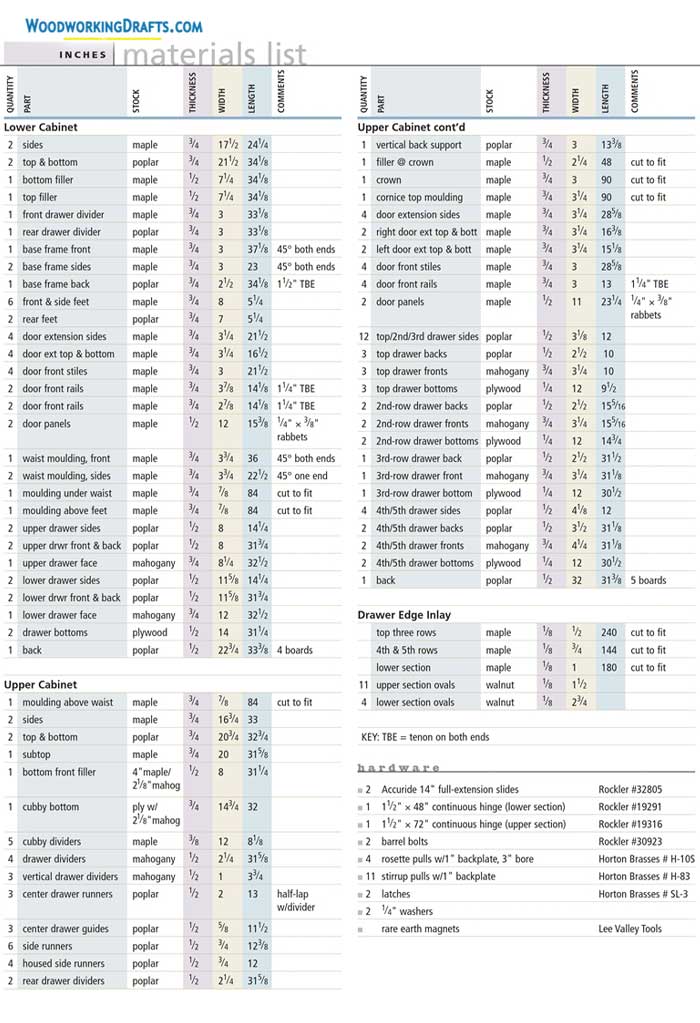
Materials List For DIY Tool Storage Cabinet
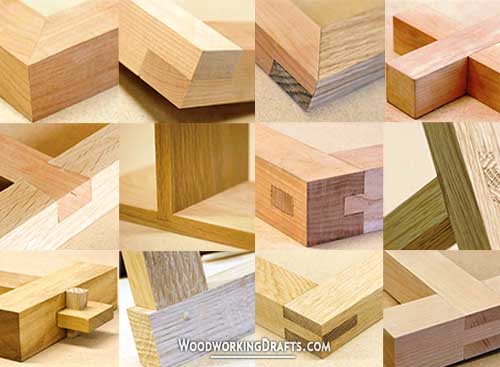
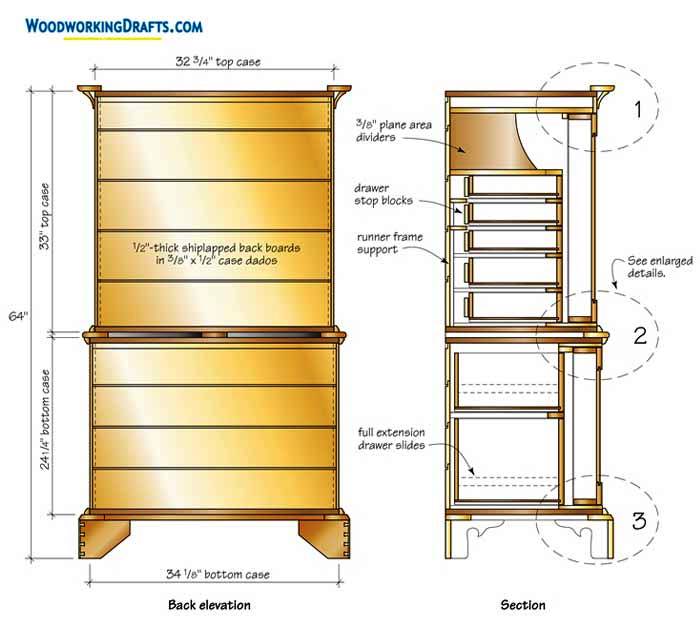
The segments for this cabinet are dovetailed with each other, and the timber backs are installed into rabbets.
Drawers slide over separate mortise-and-tenon frames attached to the sides with dadoes.
The drawers give the cabinet a better appearance and make it easy to find tools that slide all the way to the back.
The bench planes are stored in special compartments above the drawers, and the doors hold the smaller tools.
A special ledge holds the router bits and is fitted into the door. Scrapers and drawknives are hung inside the door from cup hooks.
Drill bits, gouges, and chisels are suspended from magnets fastened to the door.
Sanding belts are hung from shaker pegs secured to the left door. And sanding discs are stored in a special candle box attached to the door.
Instructions For Building Large DIY Tool Storage Cabinet With Drawers
- Start by cutting the panels to size for the bottom, sides, and top sections.
- Created dadoes into the sides for installing the runners for drawers.
- Craft dovetails for attaching the bottom sides and tops of the cabinet, and then assemble the carcass with glue after you have verified it is square.
- Attach the rear and front drawer dividers to the lower cabinet with glue.
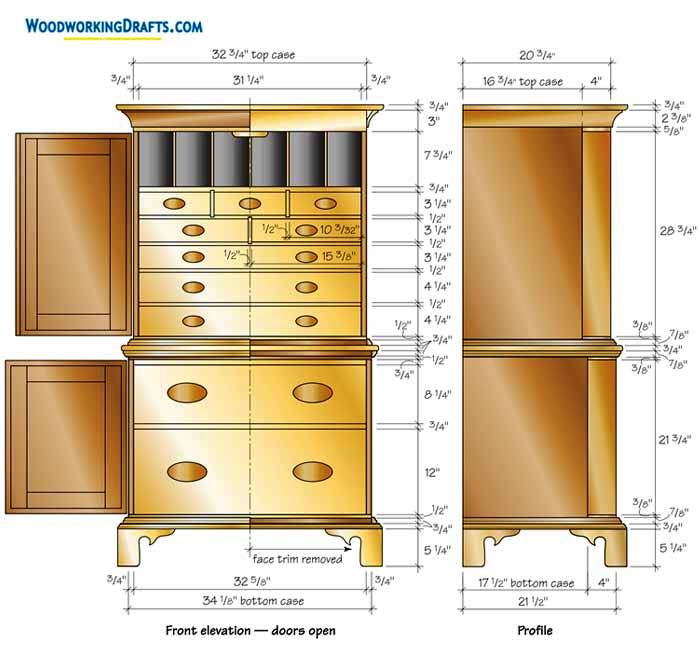
- Scribe and craft the dadoes for the cubby dividers into the bottom of the cubby and the subtop.
- The dividers in front are joined with half lap joints to the rear of the rails. Use dadoes to attach the vertical dividers.
- Test fit all parts together, starting with the section for storing the planes and then the section with drawer dividers. Sand or shave as needed to make fine adjustments, and then assemble the parts with glue.
- Keep the front dividers glued and leave the rear dividers unfastened to allow for the expansion and contraction of wood as the seasons change.
- Drawers for the top cabinet are created by using half-blind dovetails to fasten the fronts to the sides.
- The bottom of the drawer is installed into channels cut into the front and side parts of the drawer and fastened with nails.
- The drawers in the lower cabinet run on slides, while those in the top cabinet rest on runners.
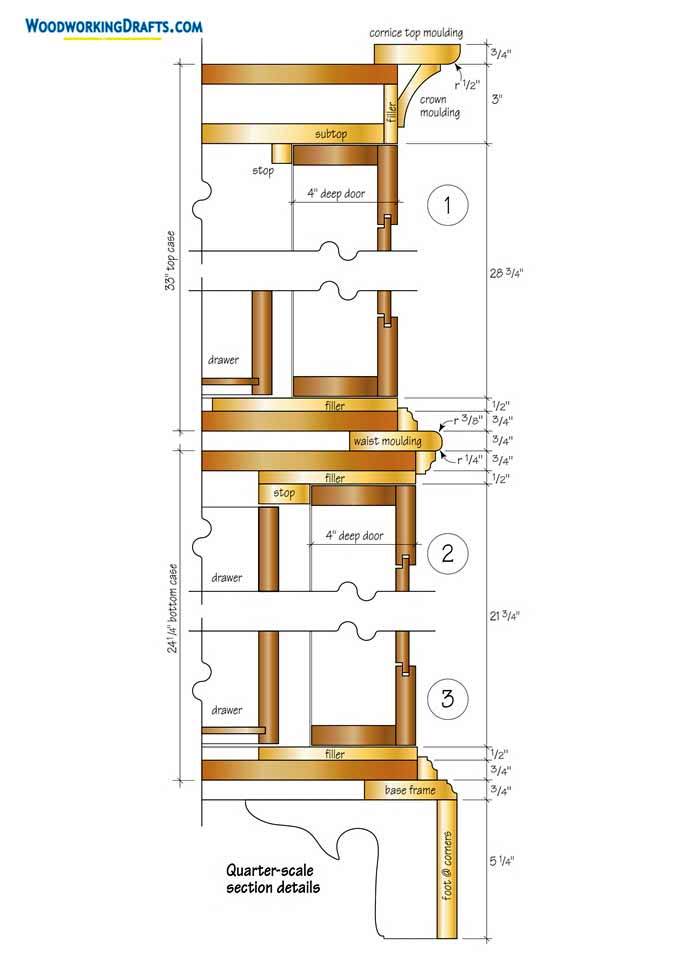
- The gap created by the subtop provides space to fasten crown molding to the sections without hampering the inner space of the cabinet.
- Doors are created like narrow cabinets with a frame and panel structure secured using dovetails.
- Make sure the doors close level with the sides of the cabinet and don’t overhang.