Simple Birdhouse Blueprints For Purple Martins, Sparrows, Bluebirds, Wrens, Robins, Chickadees, And Many More Birds
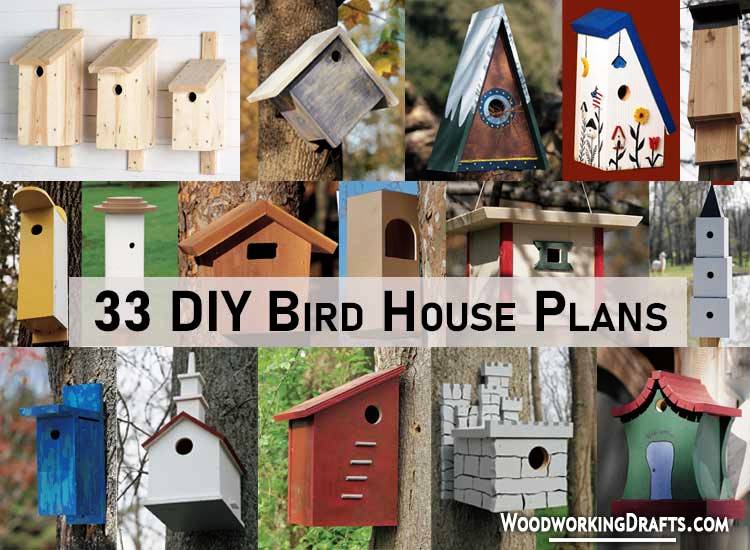
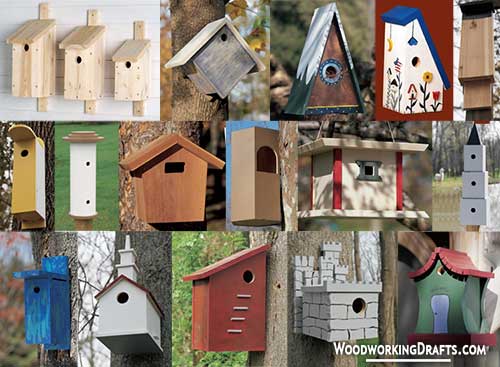
Follow these DIY wooden birdhouse building plans to construct a beautiful habitat that will invite lovely birds into your yard.
The complete cutting list with the material quantity needed for each project is also provided.
You can finish crafting these designs in a single day. Paint your birdhouse in bright colors to make it even more attractive for birds.
Simple Wooden Birdhouse Plans
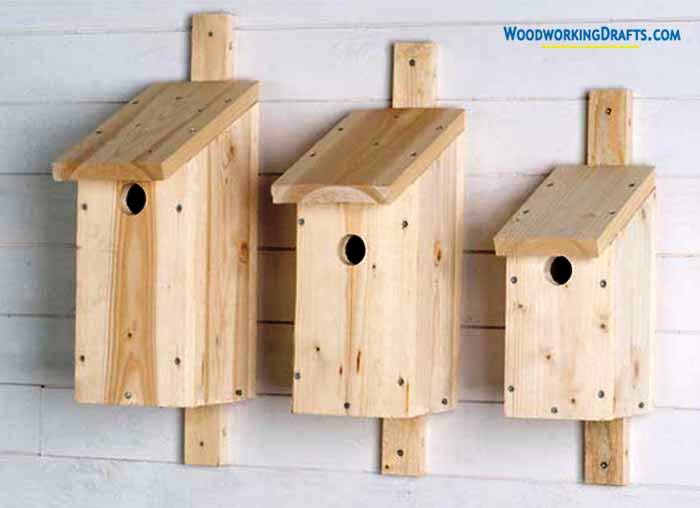
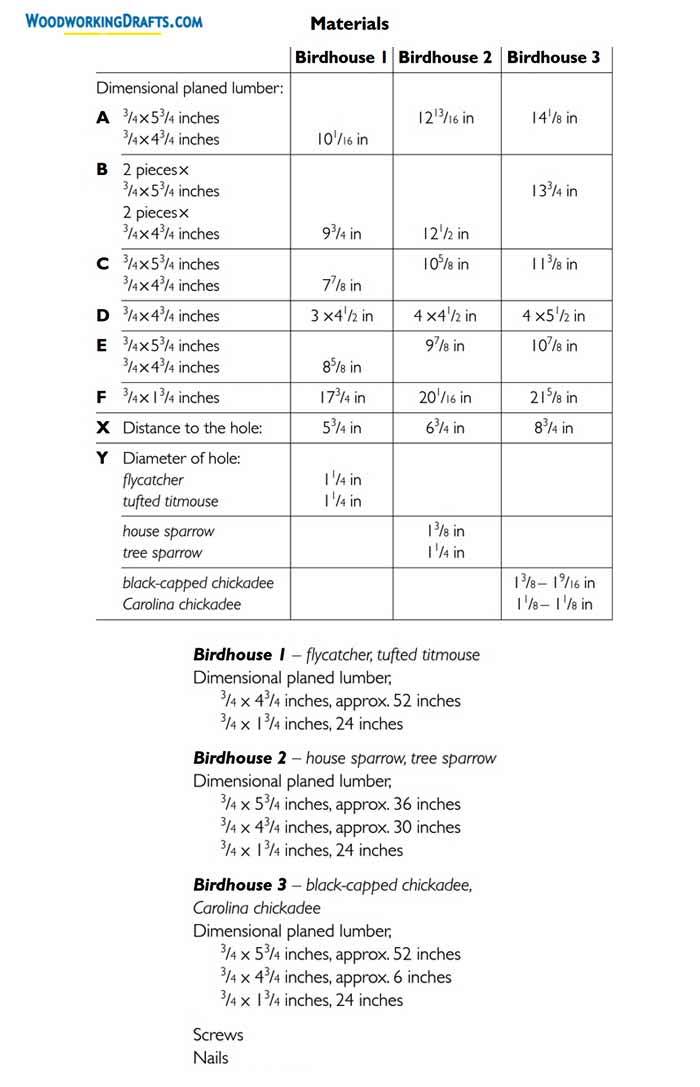
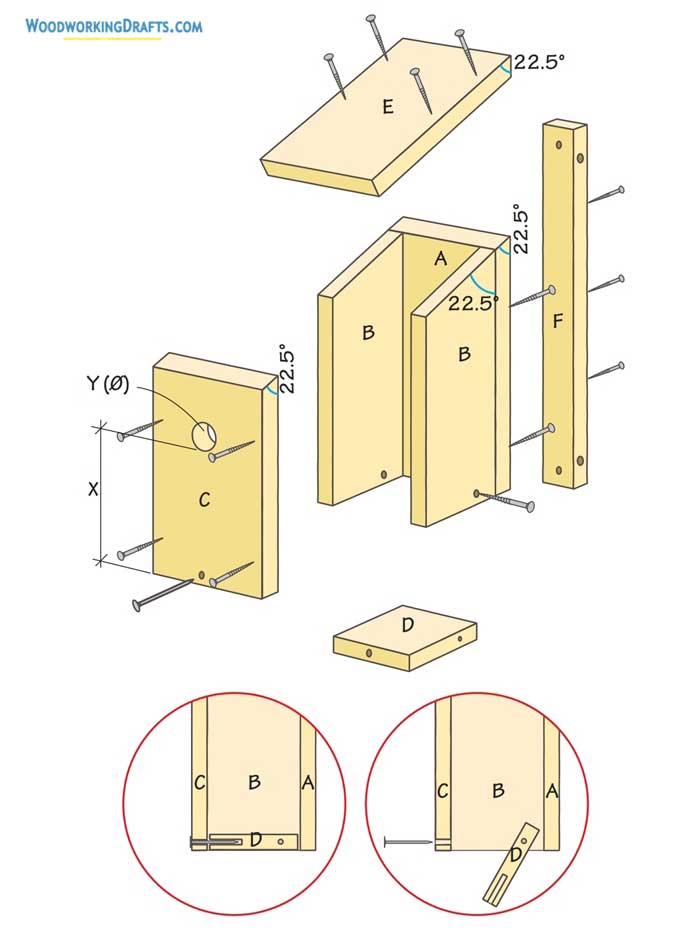
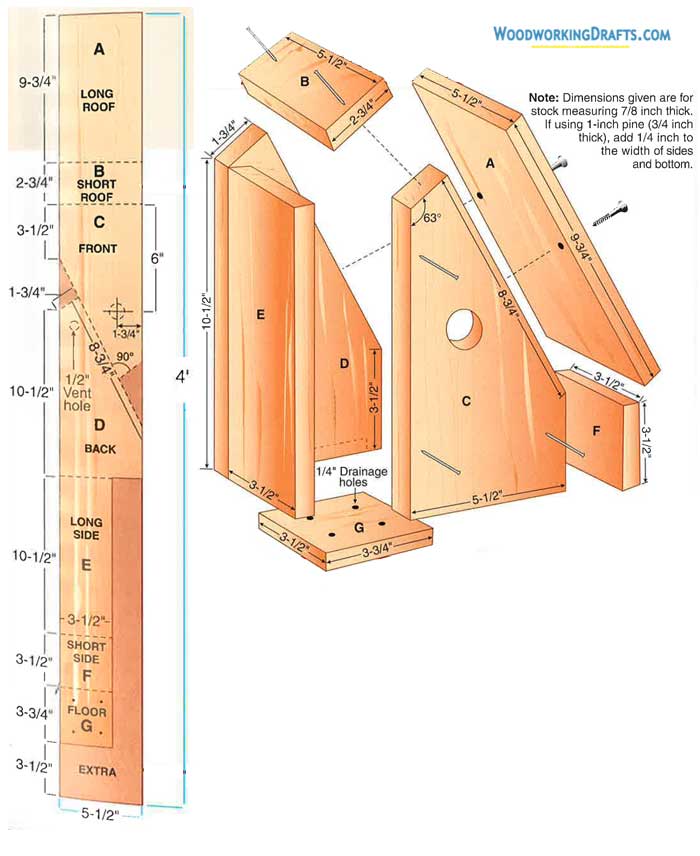
You can use these simple wooden birdhouse plans to quickly build a lovely DIY project.
First, cut all the components of the house. Sections A, E, and C are beveled at an angle of 22.5 degrees. The same is done for section B but only on one side.
The unplaned side of the section will face inwards to help the birds grip it with their feet effortlessly.
Use a hole saw to drill the hole into section C, which will act as the entry point.
Fasten front section C to B sections, then fasten the B sides to back section A using screws.
Craft the lower section D such that it has a loose-fitting with a gap on all sides to all water drainage from the birdhouse.
Secure screws into pilot holes driven into lower ends of B sections.
We use pilot holes so that the screws can be inserted easily and removed later on to clean the bottom. Make sure to fit the screws loosely for easy removal.
Grip section D in place and drill a hole through component C and into section D.
Then insert a nail into this hole. This can be removed easily by opening the bottom while cleaning.
Now secure the roof component E on the house.
Create pilot holes in board F, which will be used for mounting the birdhouse. We use this mounting board to avoid drilling into trees directly as it can damage them.
Thread a rope through the drilled holes in board F and tie it loosely around a tree branch.
Clean your birdhouse every year to ensure the birds keep returning to it every season.
Easy DIY Purple Martin Birdhouse Blueprints
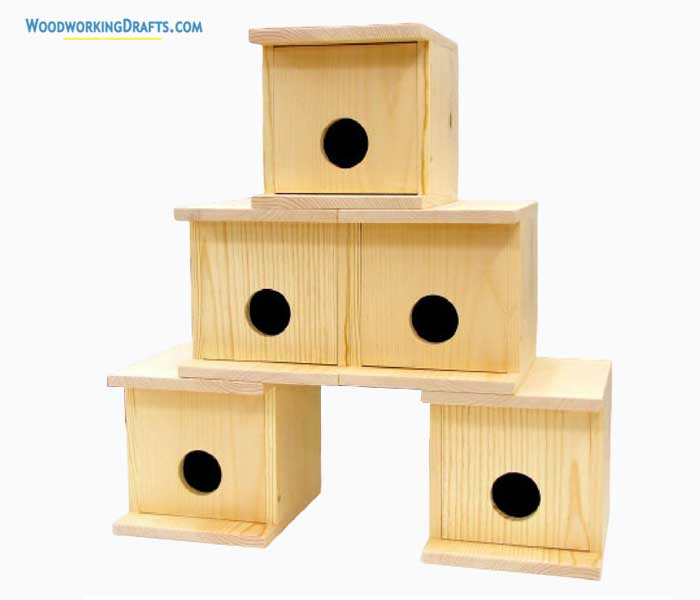
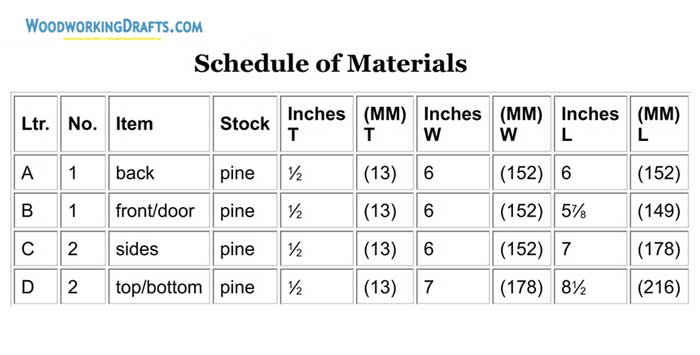
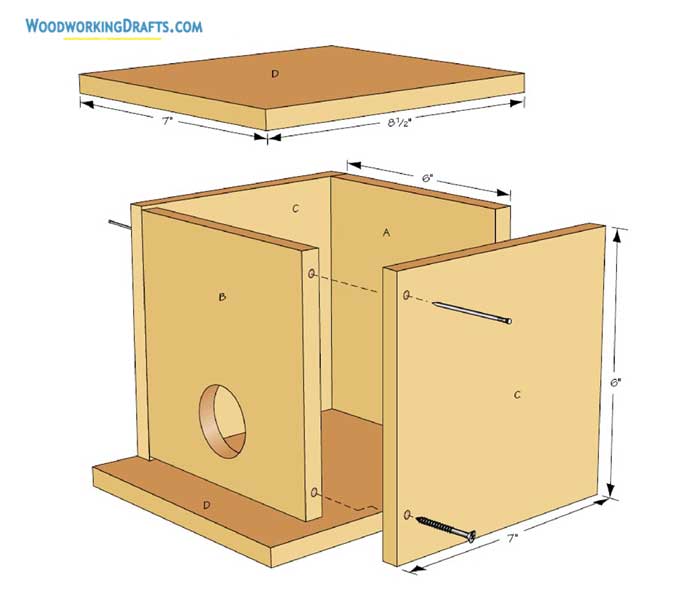
These DIY purple martin birdhouse plans show how to quickly build some easy birdhouse projects.
You can create as many units as you like and arrange them in a symmetric order to build a whole colony for purple martins.
Each unit is a cube that is 6x6x6 inches and made of pine boards. You can use plywood or any other solid lumber as well.
Once you have decided the number of units you want to build, you can craft the sections for each birdhouse in bulk.
First, craft all the backs for the houses, then the sides, then the fronts, and so on. This will save you time as you won’t have to keep changing the saw settings.
Mark each component with a pencil to help easily identify them since many parts for one unit look similar to each other.
To assemble a birdhouse, use glue and nails to first fasten the sides to the back.
Then secure the bottom and top sections.
The entrance hole is 2 inches wide and drilled at the height of 2 inches from the bottom. Secure the front to the sides with galvanized nails.
Note that the front piece is a little bit shorter in height than the back so that there is a tiny gap left at the top and bottom.
The top gap allows ventilation, while the bottom gap allows water drainage. These gaps also allow the front to be lifted easily without brushing against the upper and lower sections.
Drill a pilot hole on the right side of the front piece about one inch from the bottom. Then insert a screw into the hole to fasten the front piece securely.
The birdhouses for purple martins should be installed at least 30 feet from your house and 8 feet above the ground.
American Kestrel Birdhouse Plans
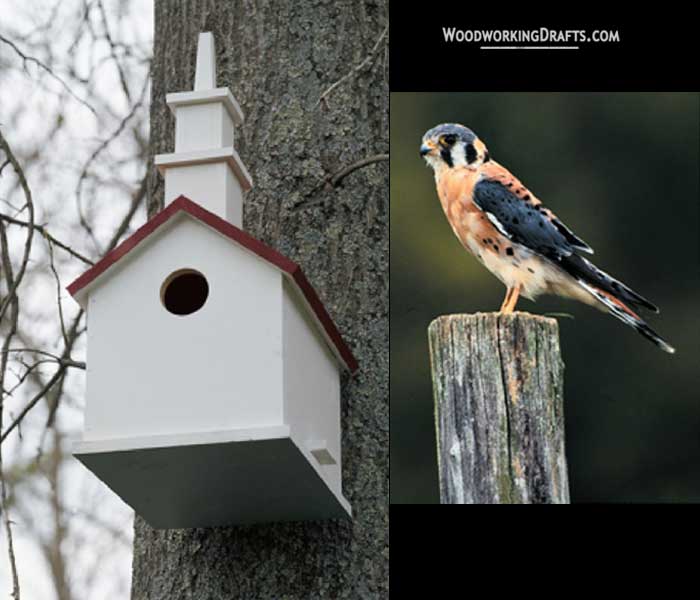
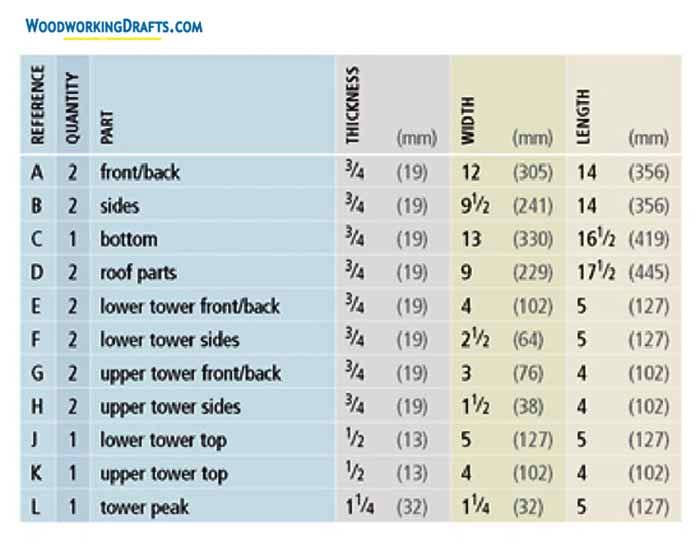
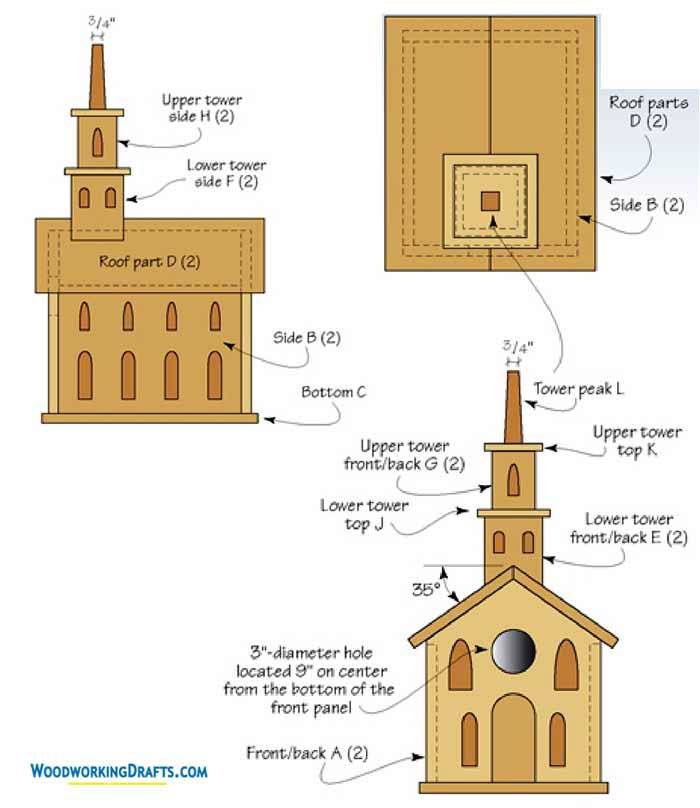
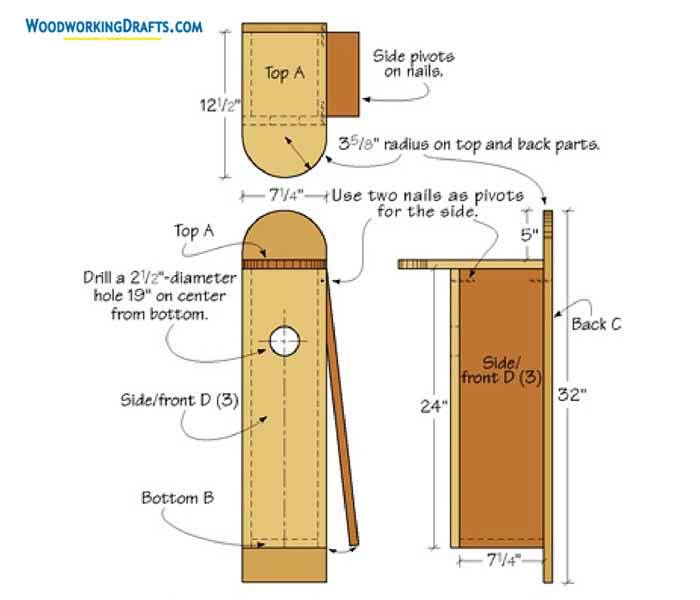
These American kestrel birdhouse plans will show you how to build a large nesting place that will be ideal for the colorful raptors called kestrels.
Construct the sections as shown in the materials list.
Fasten a side section to the bottom with nails, and then secure the back and front pieces to the sides and bottom.
Drive two nails on top of a side to use like hinges for opening the sides when you have to clean.
Lastly, secure the roof sections in place with nails.
The upper and lower towers are cut with a saw to make the pieces fit accurately on the roof and then secured in place with nails.
Taper the peak of the tower and use a sander to give it a smooth finish.
Lastly, put together all the sections as shown in the blueprints.
DIY American Robin Birdhouse Blueprints
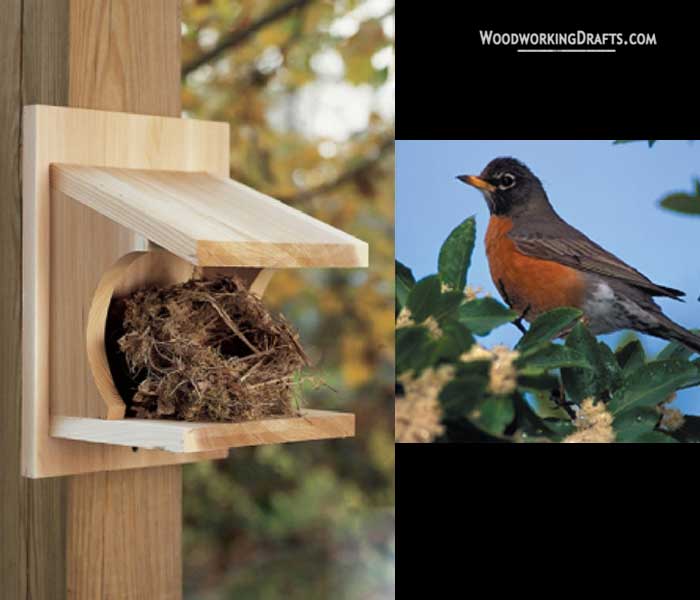
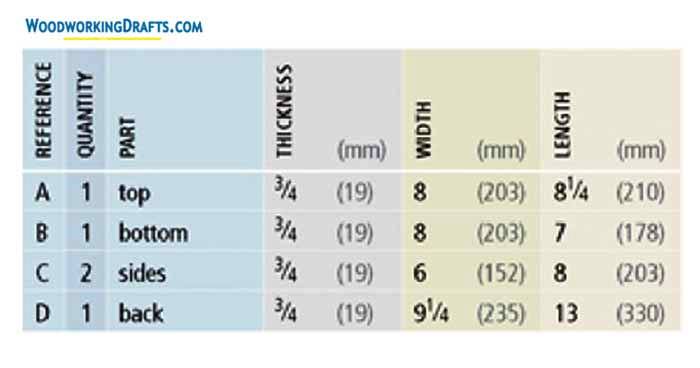
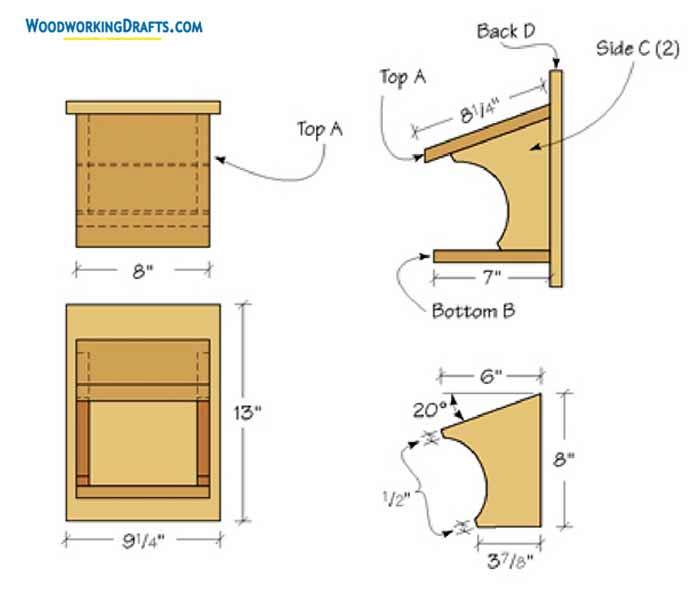
Robins love to live in an open nest built on branch forks in trees.
So our DIY American robin birdhouse plans show you how to build an open nesting box for inviting robins.
Create the sections as shown in the cutting list.
Use a jigsaw or coping saw to make the radius cuts as shown in the blueprints.
Sand the curves with a sander or sandpaper to smoothen the surface completely.
Fasten the sides with the bottom and the top with the sides by gluing and driving galvanized nails.
Place the assembled house with it face down and similarly secure the back section to the assembly with nails and glue.
Sparrow Birdhouse Plans
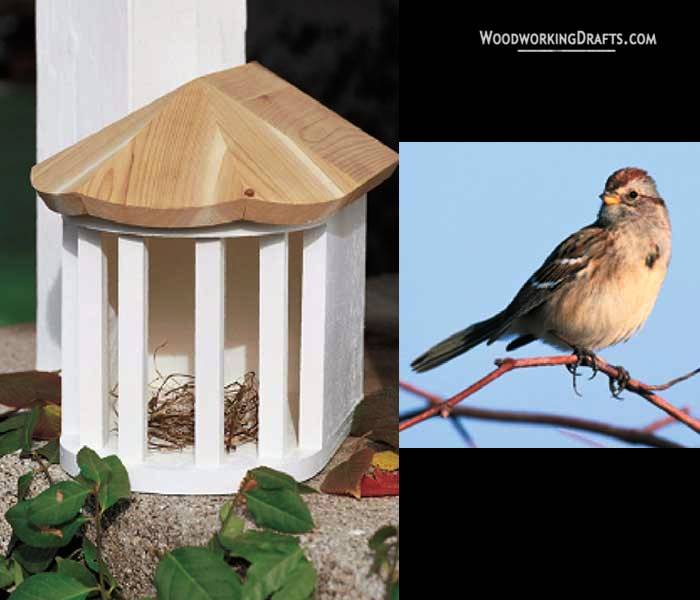
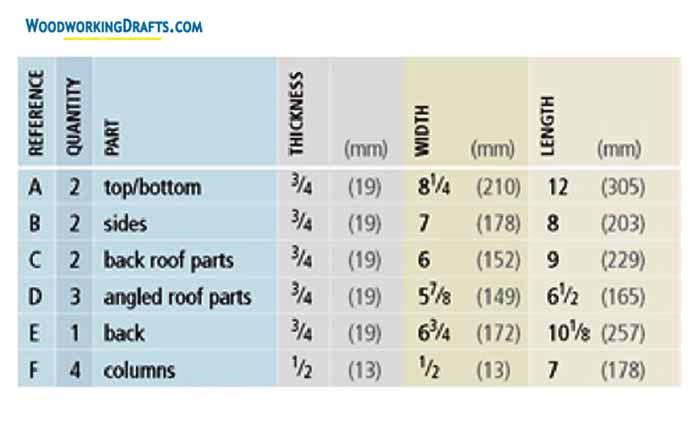
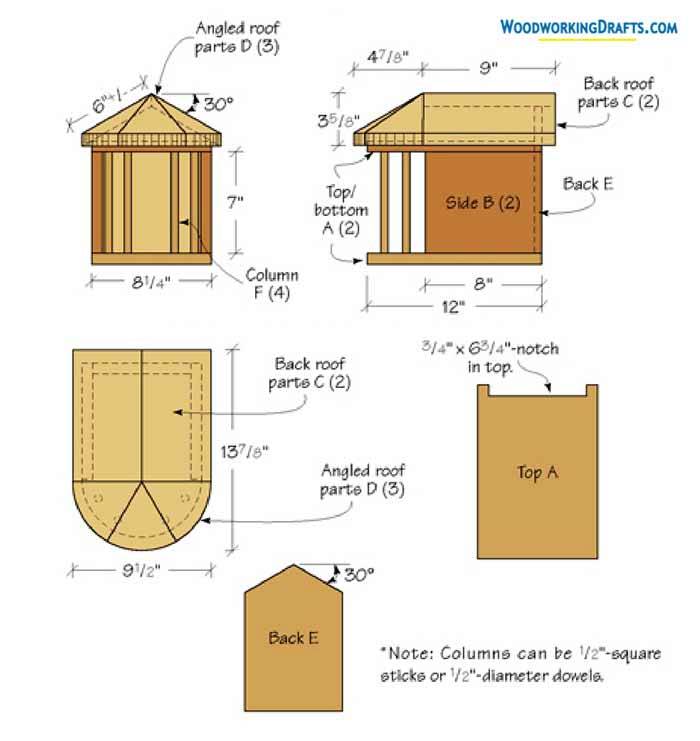
Here are some American tree sparrow birdhouse plans to build a lovely nesting area for these lively birds.
The columns on the shelf prevent larger birds from using it, so if you want to use this design for larger birds, then adjust the column spacing accordingly.
Cut out the back and side parts as per the dimensions shown in the blueprints and fasten them together with nails.
Create a notch in the top section with a saw that will accommodate the back section.
Use a saw with a fence and adjust the depth to cut the notch.
Now cut both the 30-degree angled bevels on the back section.
Complete the radius cut on the lower and upper parts and fasten them to the back and side assembly with nails and glue.
Construct both the roof sections as per the measurements in the diagram. Then create a 15-degree angled cut on one long edge of each section. Glue and clamp the miter joint.
Use a miter saw to cut out the bevels on the roof parts and then clamp the assembly in place beside the back roof sections.
Use a compass to scribe a radius around the assembly and cut along the line.
Apply glue on all the miters in the roof assembly and to the remaining roof components.
Put all pieces together and clamp them to let the glue dry.
Finally, secure the roof assembly with the base using galvanized nails.
Flycatcher Birdhouse Blueprints
Barn Swallow Birdhouse Plans
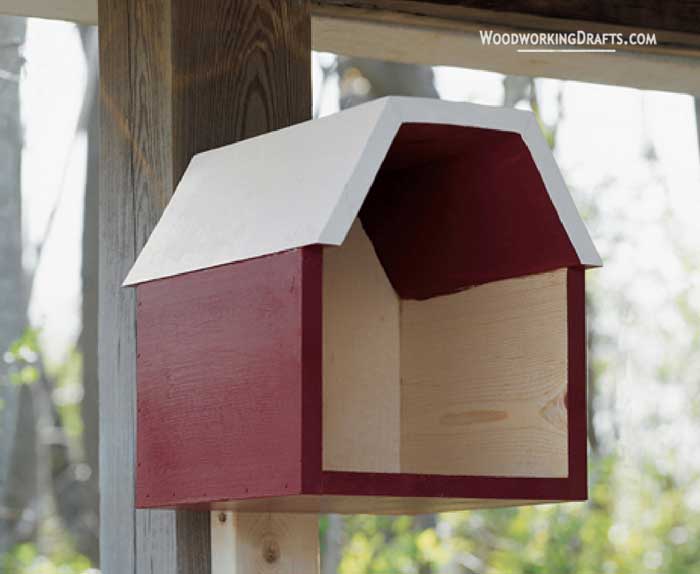
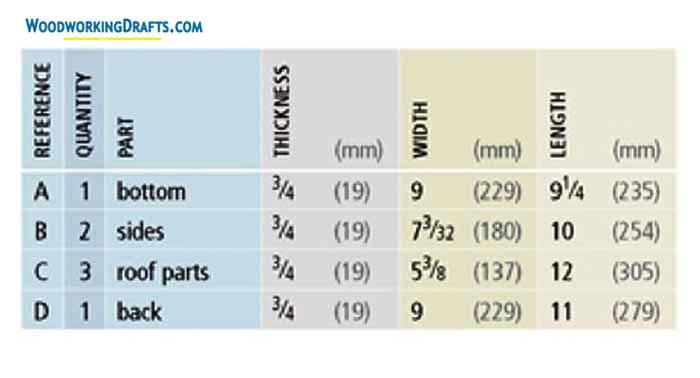
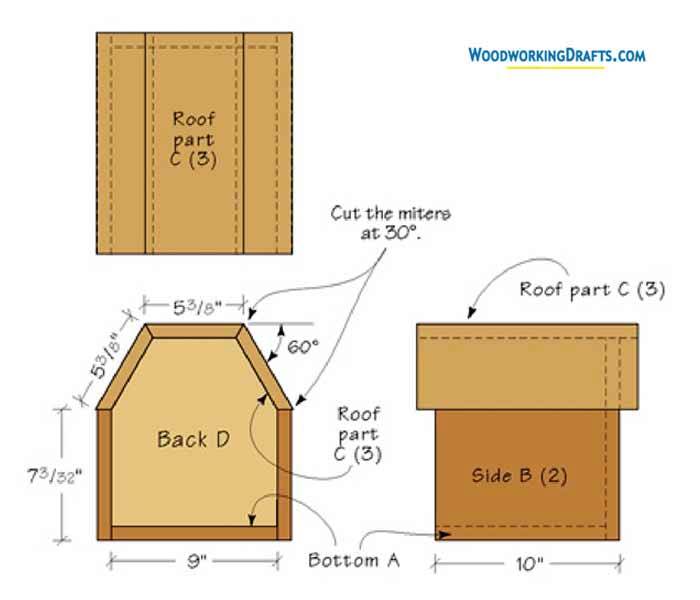
Barred Owl Birdhouse Blueprints
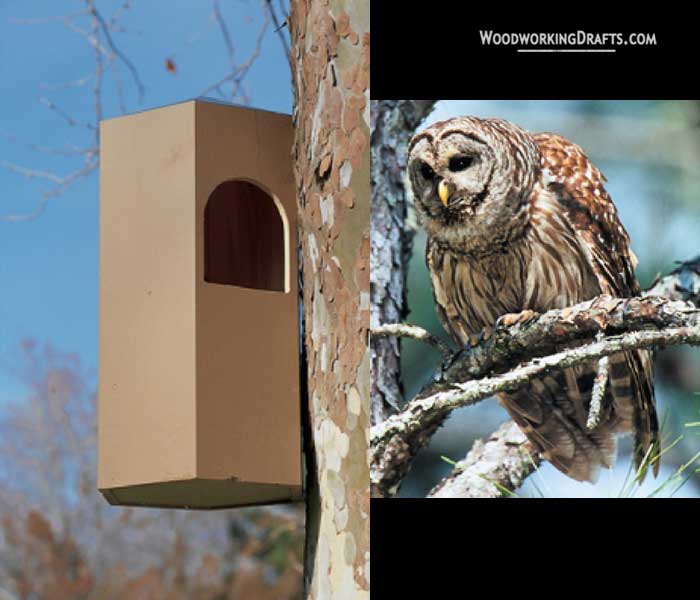
Bat Birdhouse Building Plans
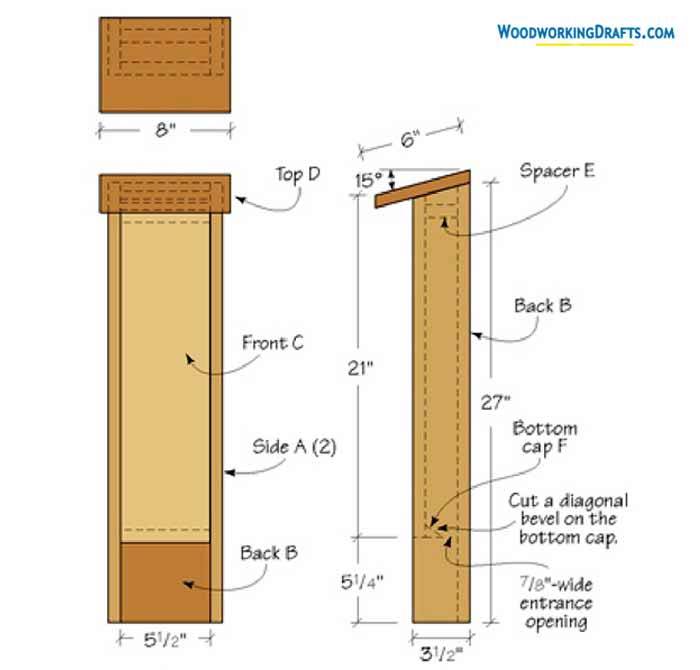
Black Capped Chickadee Birdhouse Blueprints
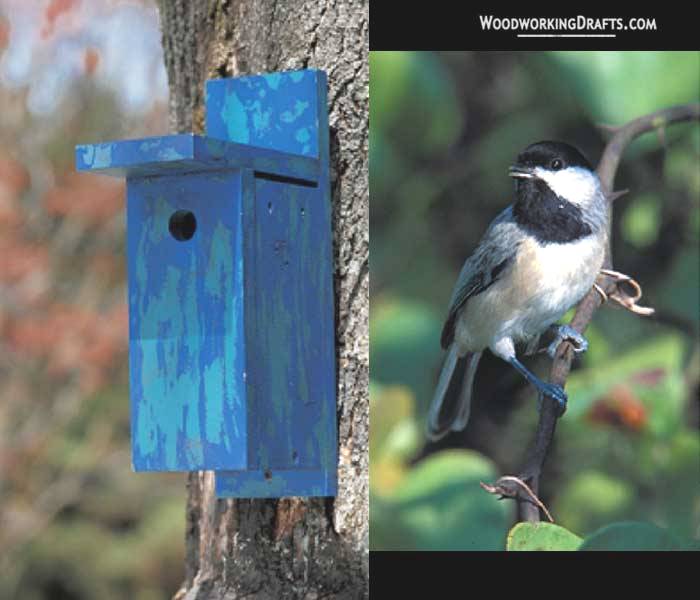
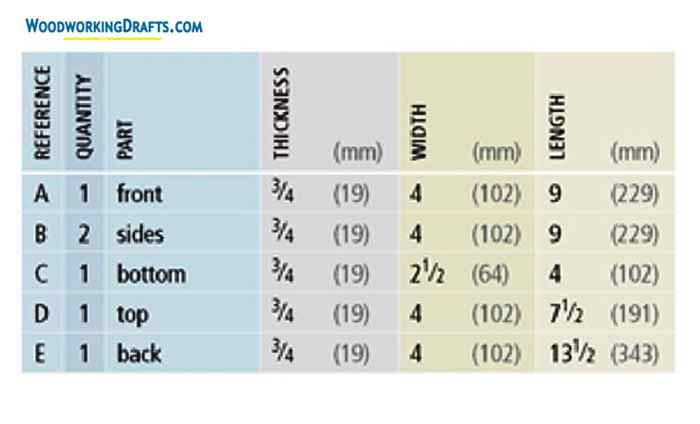
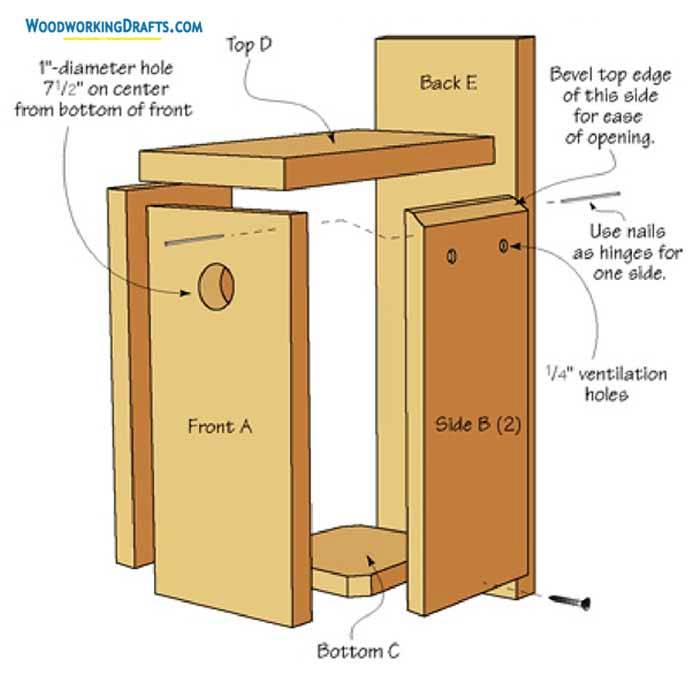
Chickadee Birdhouse Plans
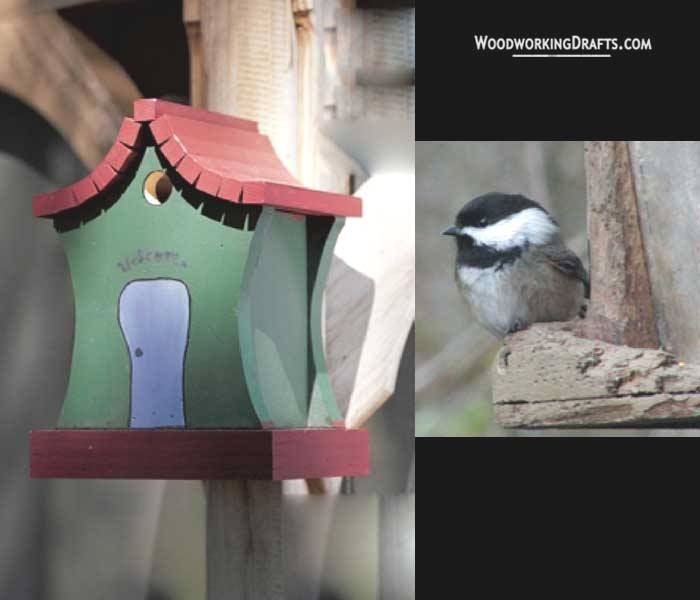
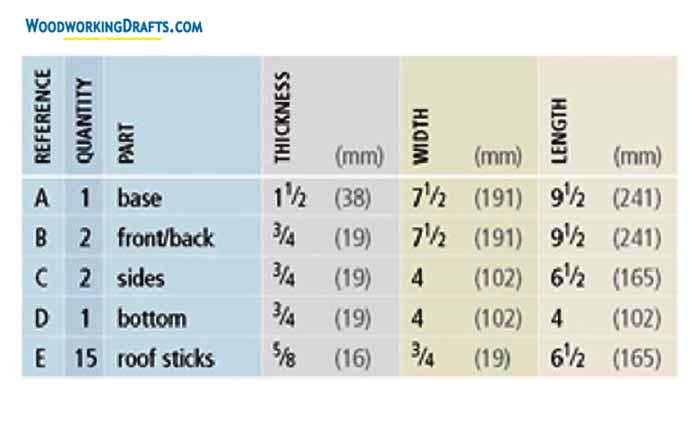
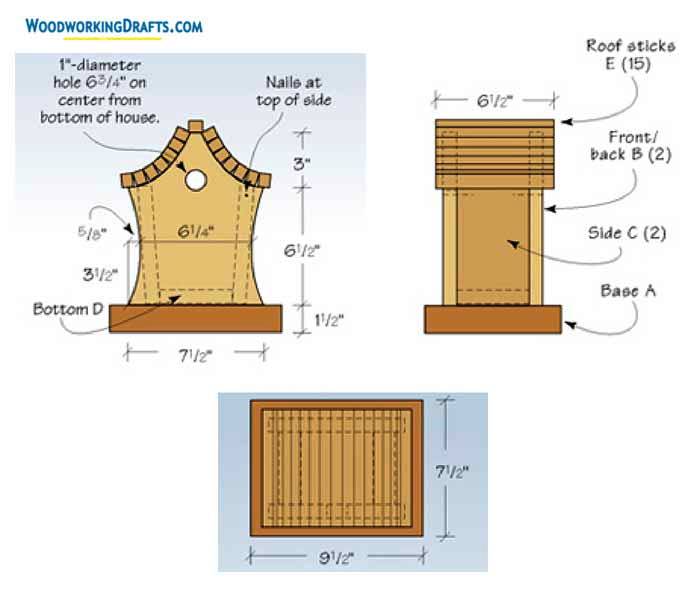
Eastern Bluebird House Blueprints
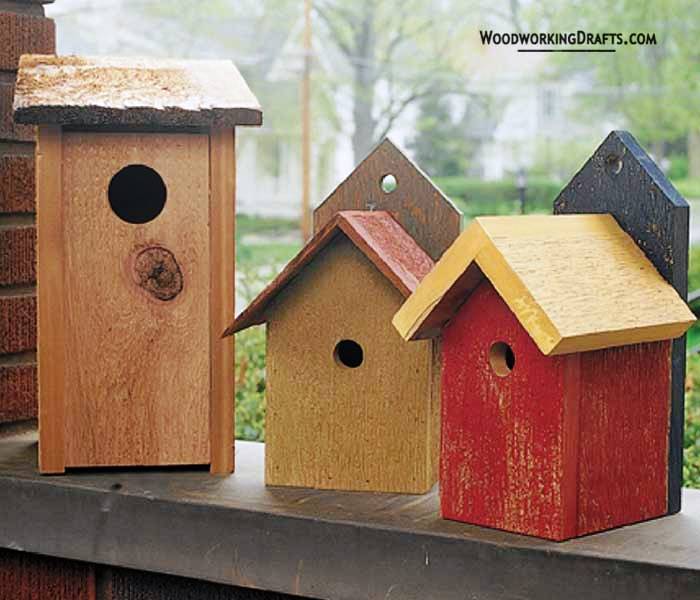
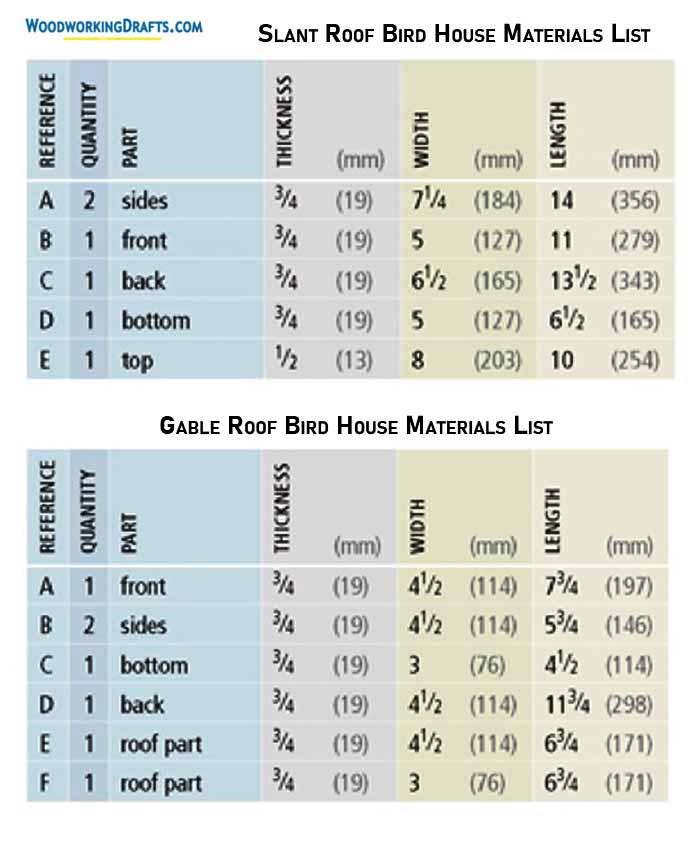
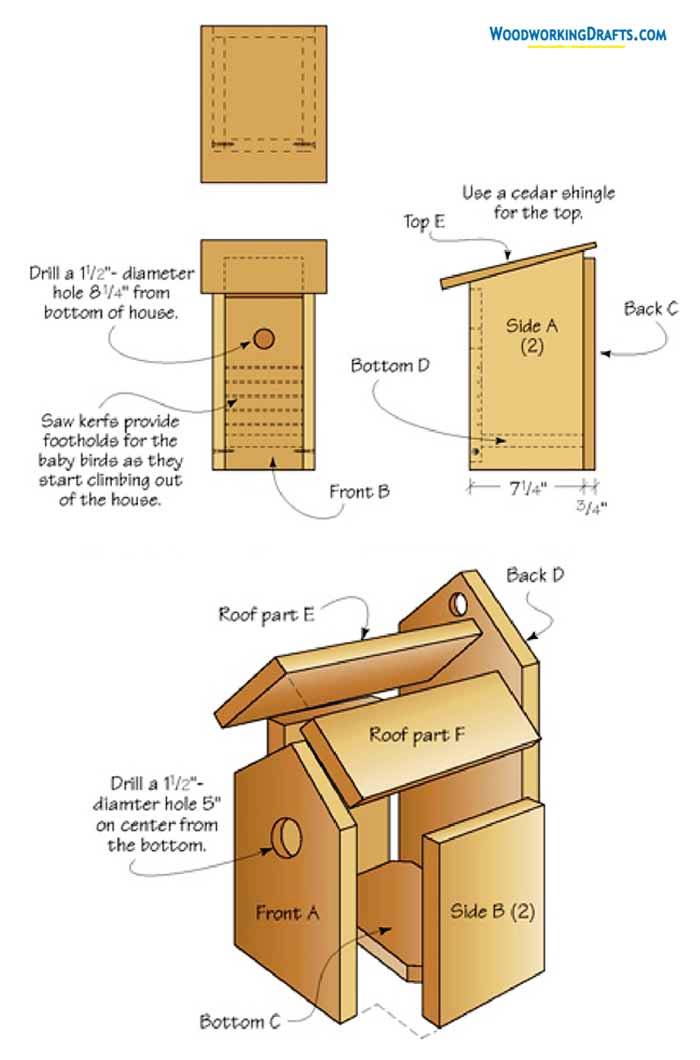
Simple Bluebird House Plans
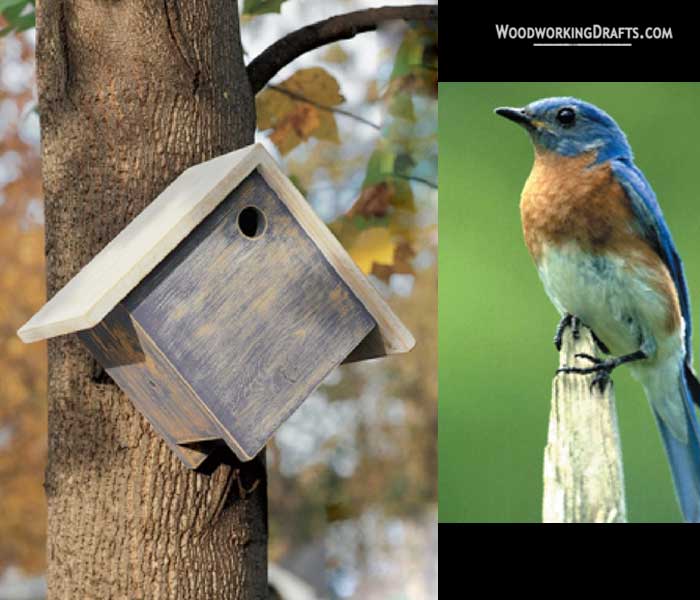
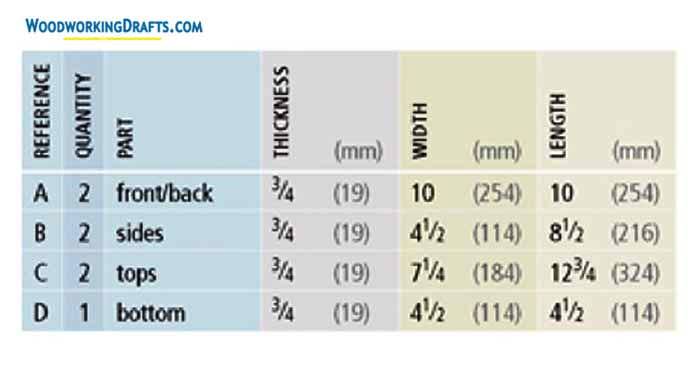
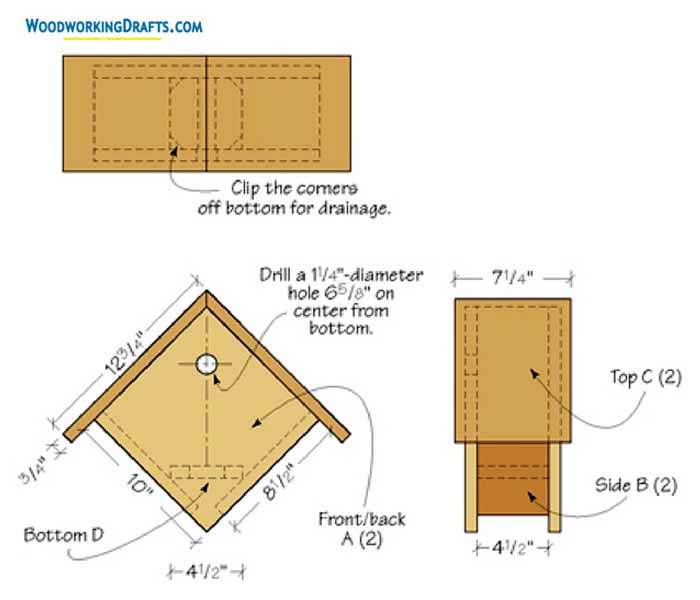
Phoebe Birdhouse Blueprints
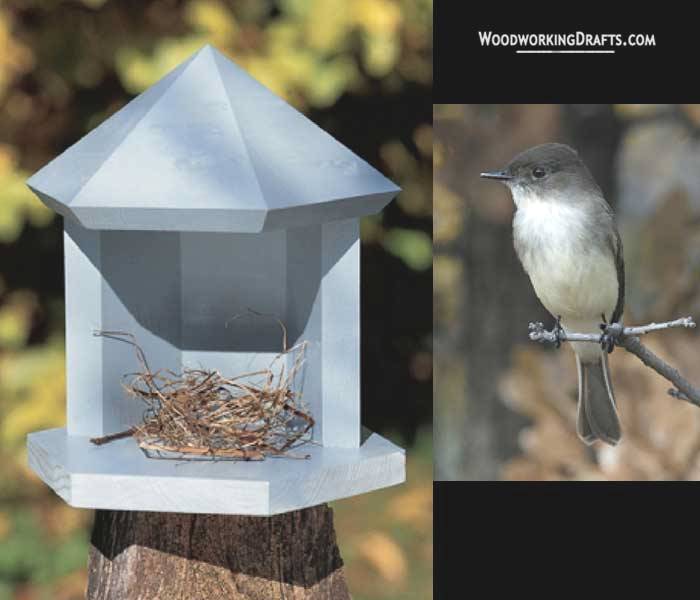
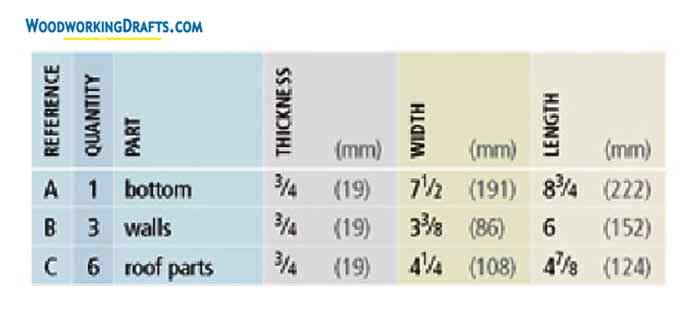
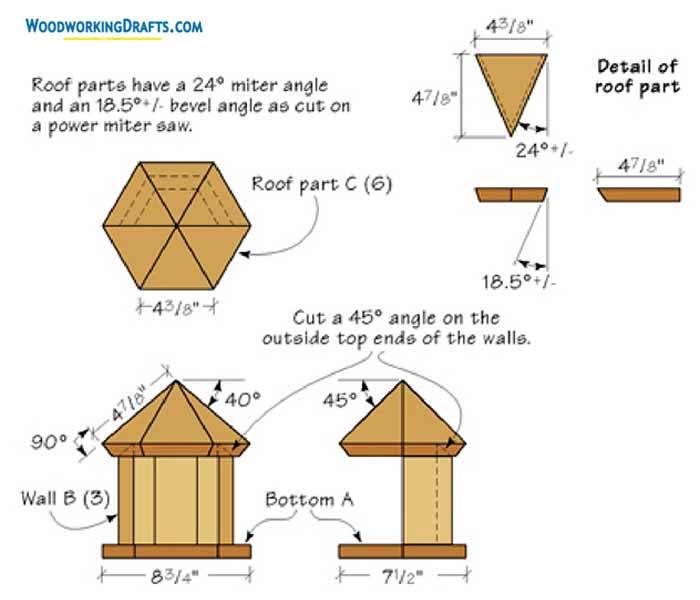
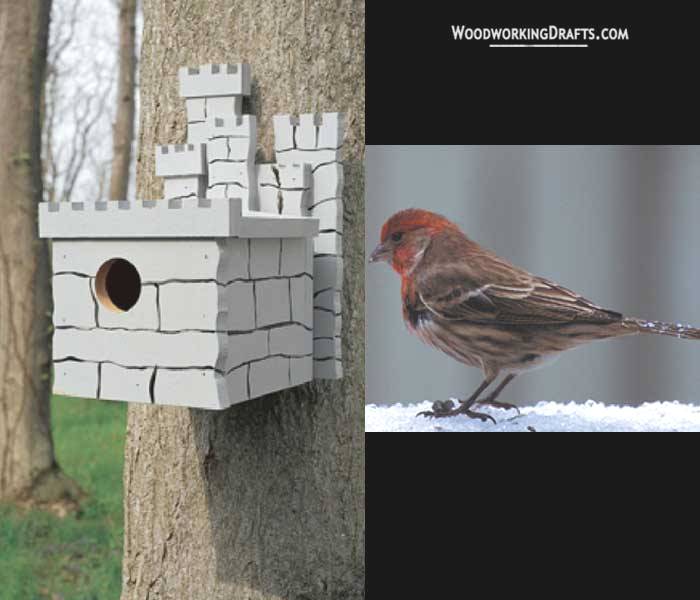
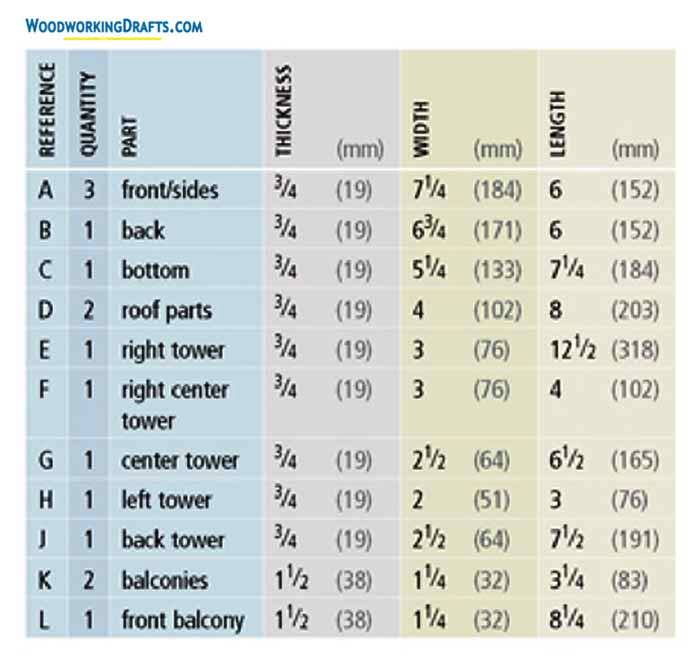
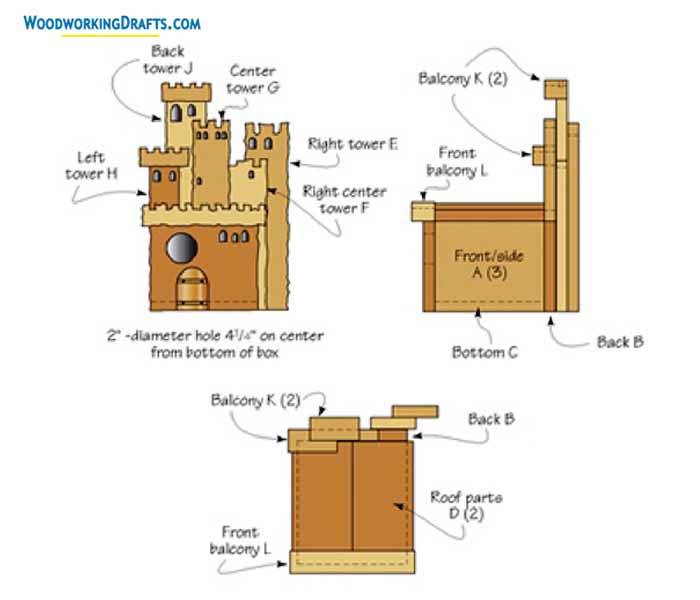
House Finch Birdhouse Plans
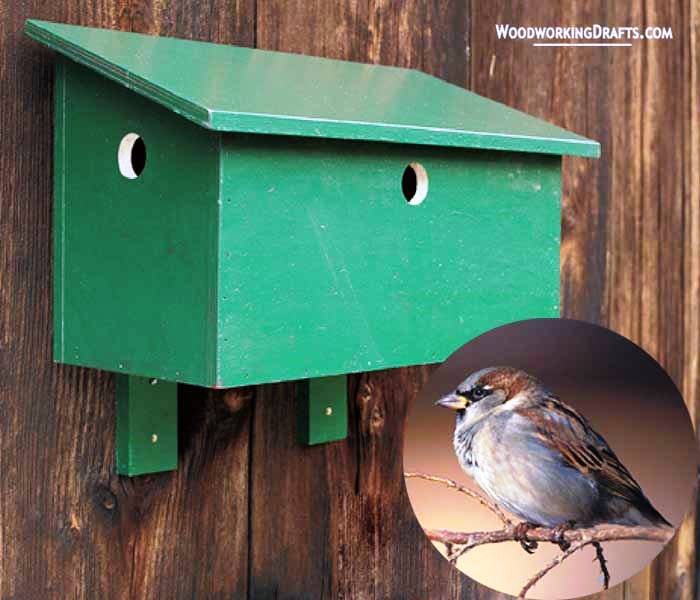
Sparrow Birdhouse Blueprints
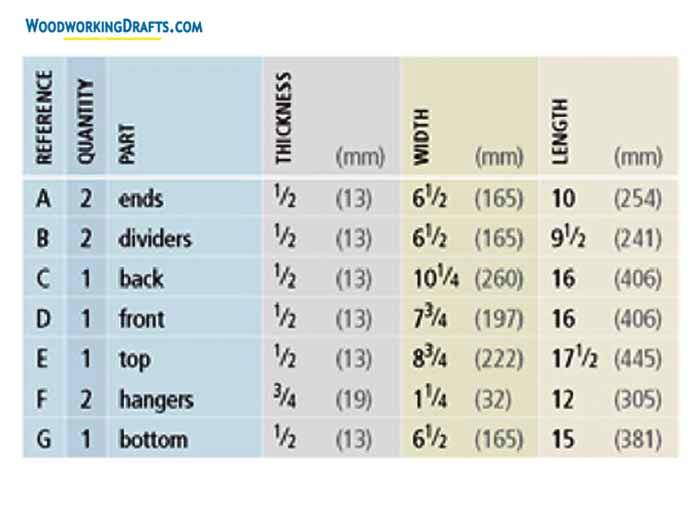
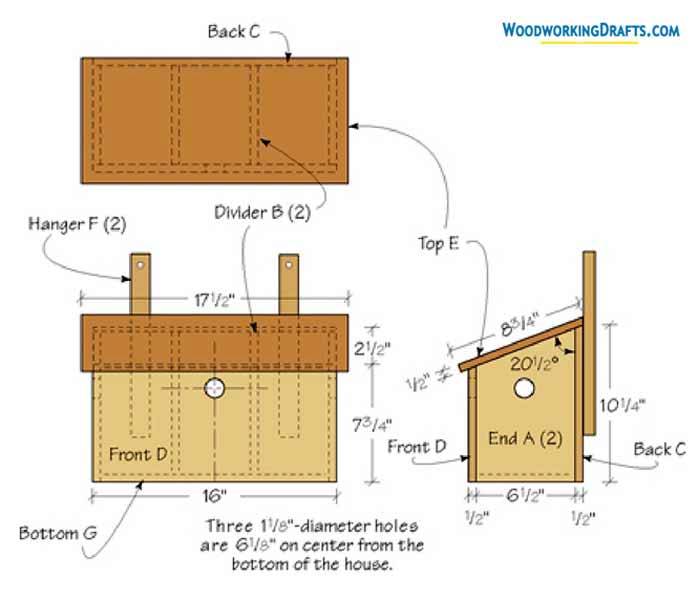
DIY Wren Birdhouse Plans
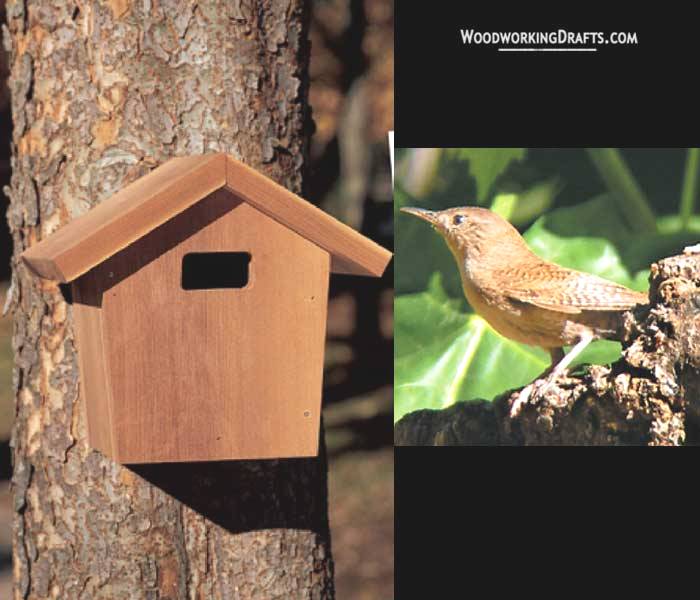
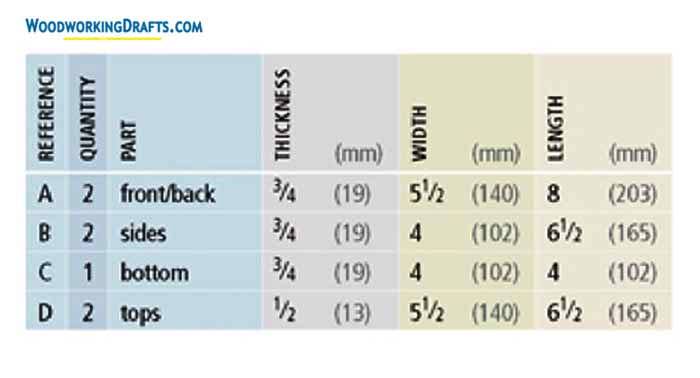
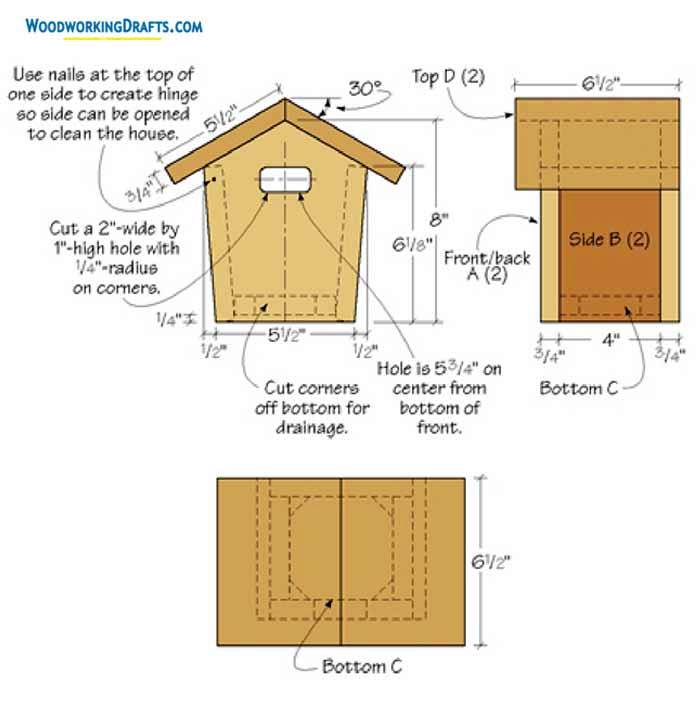
Japanese Style Wren Birdhouse Blueprints
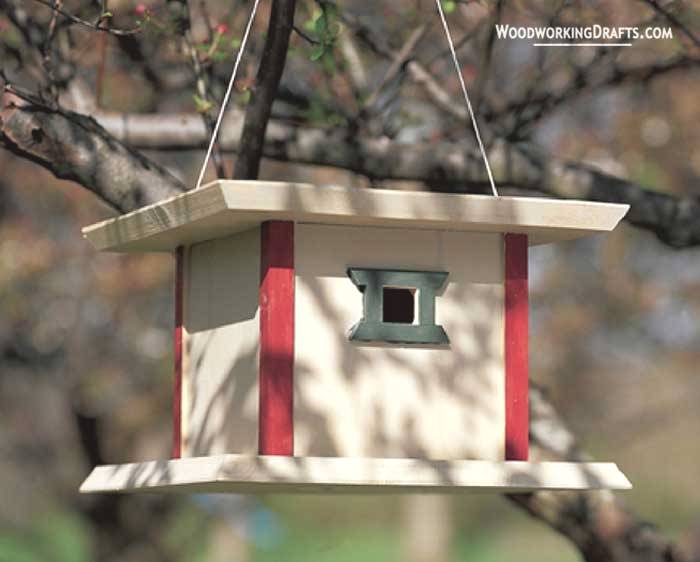
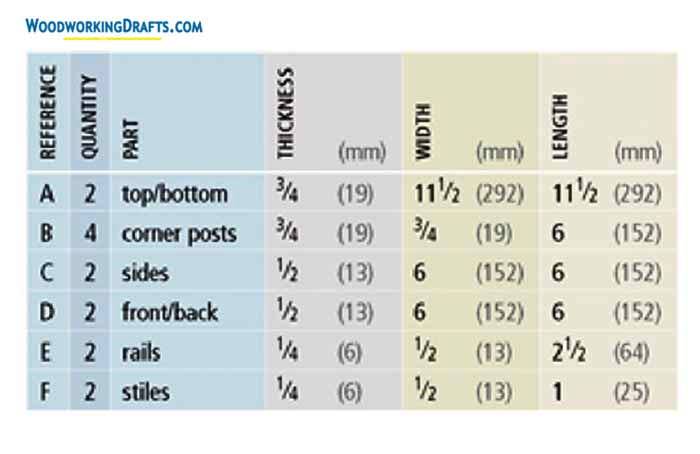
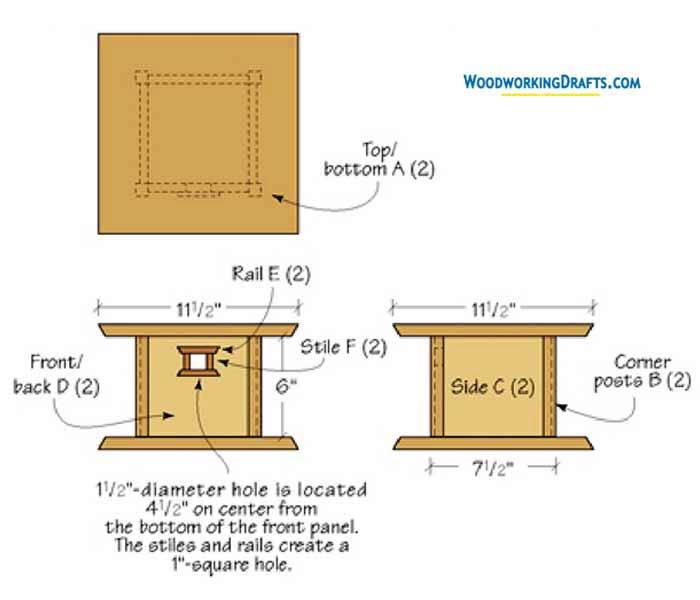
Simple Wren Birdhouse Plans
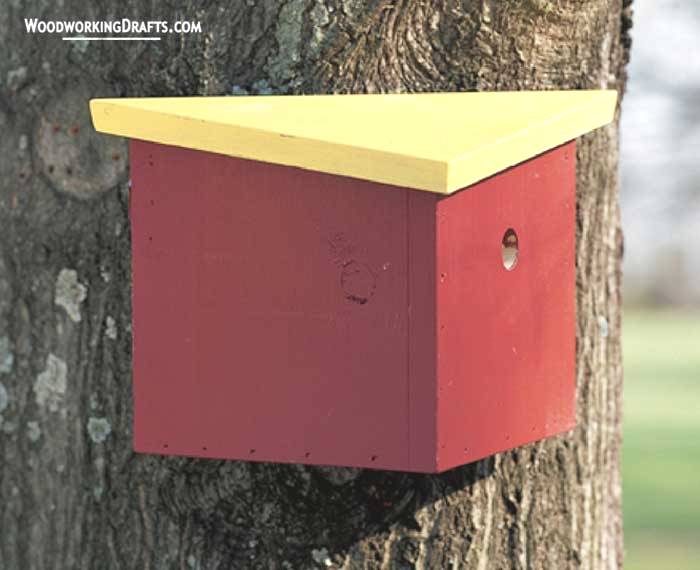
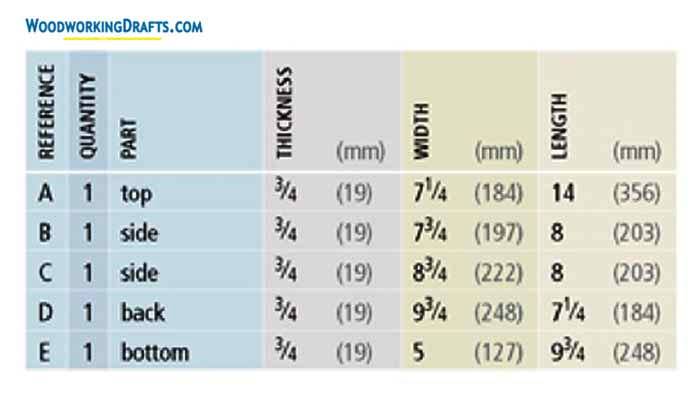
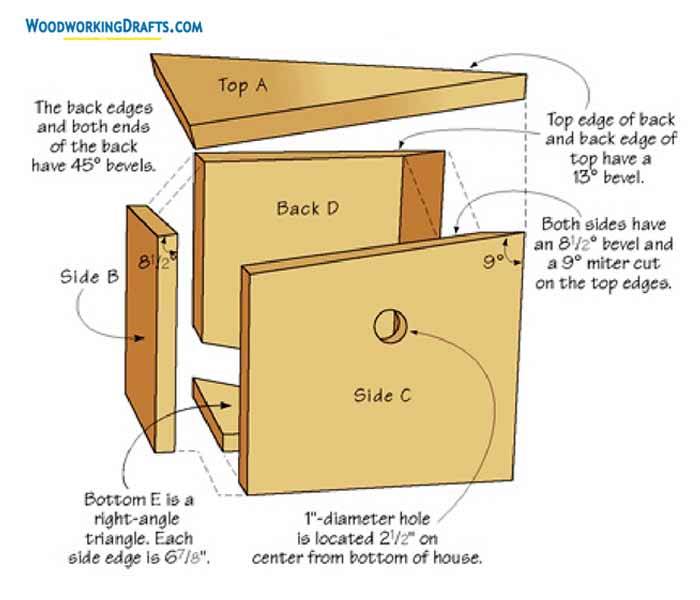
Dove Birdhouse Blueprints
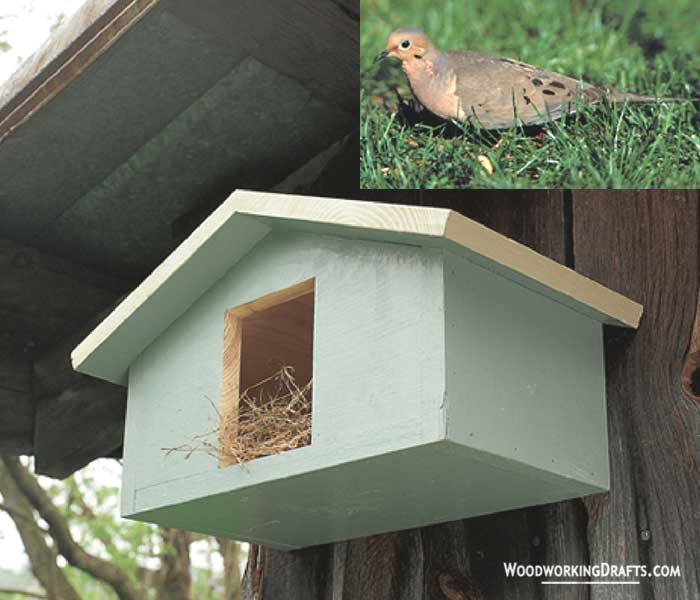
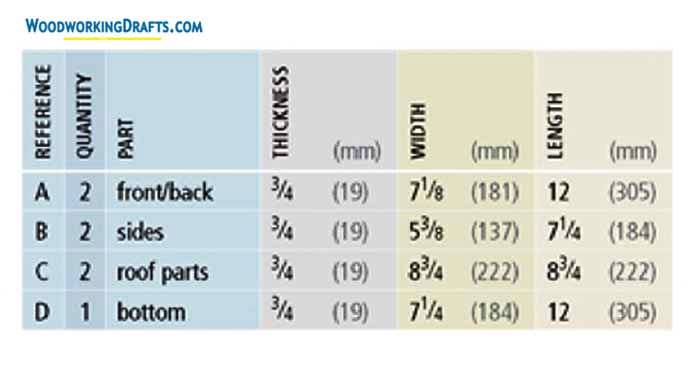
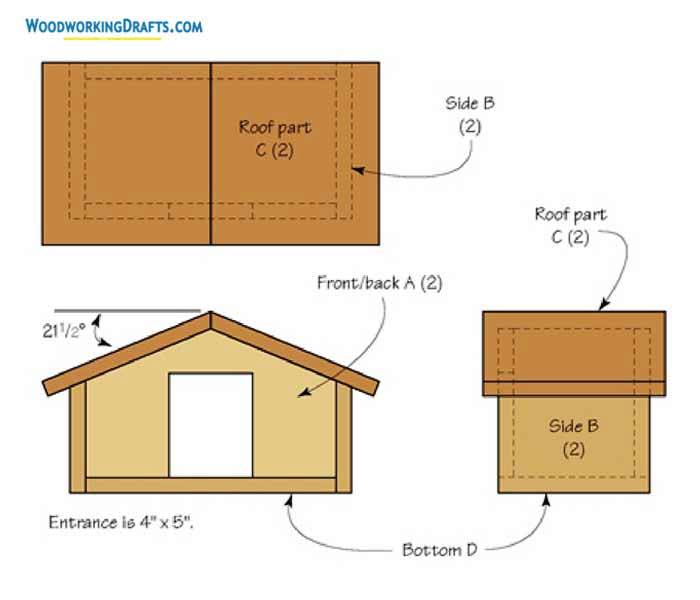
Northern Flicker Birdhouse Plans
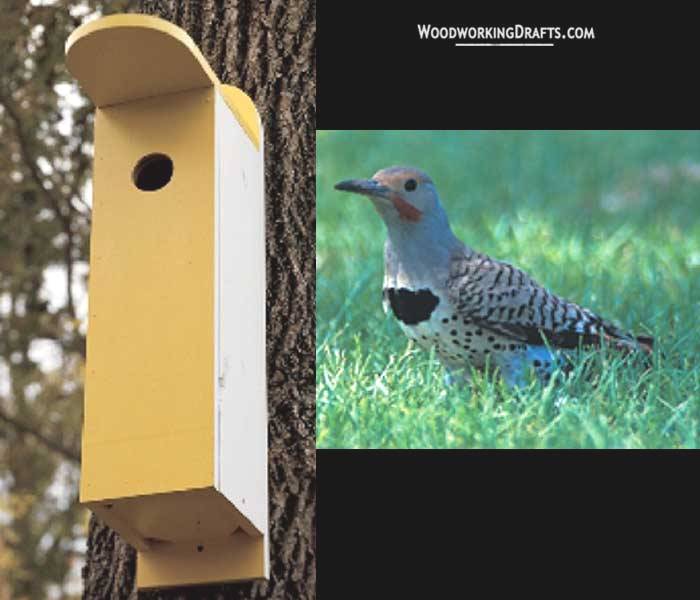
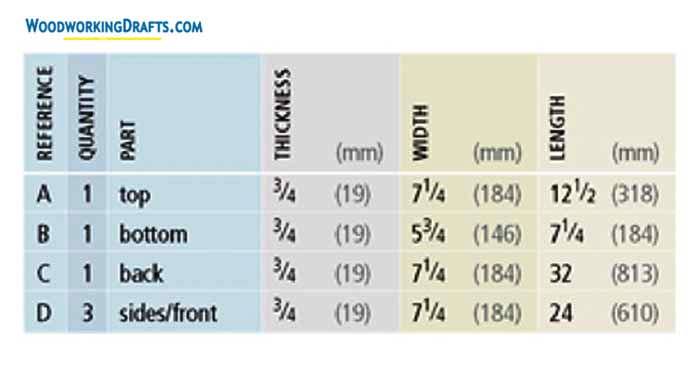
Advanced Birdhouse Blueprints
Modern Martin Birdhouse Plans
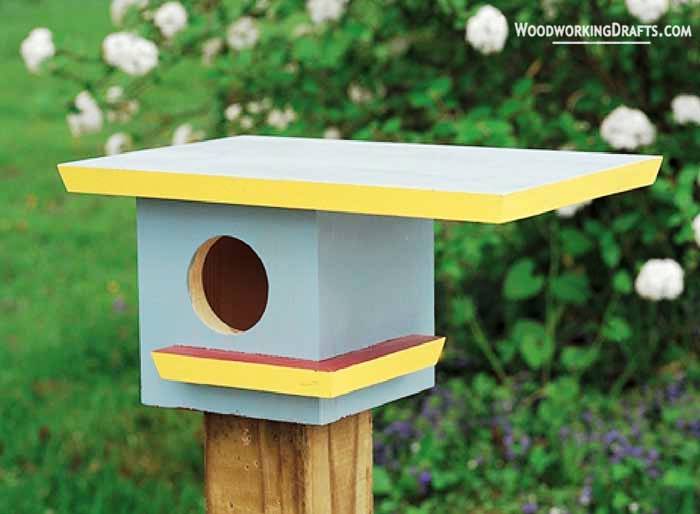
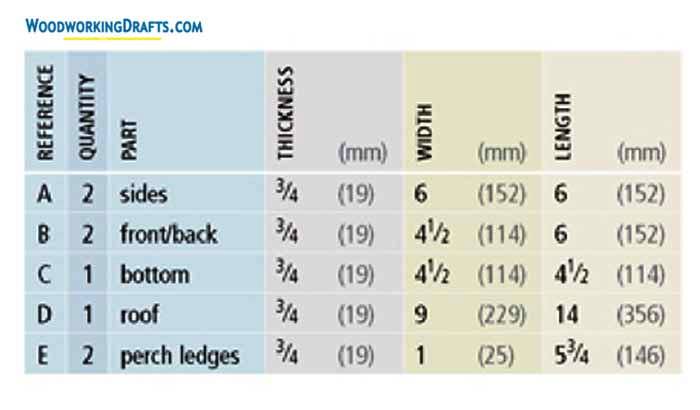
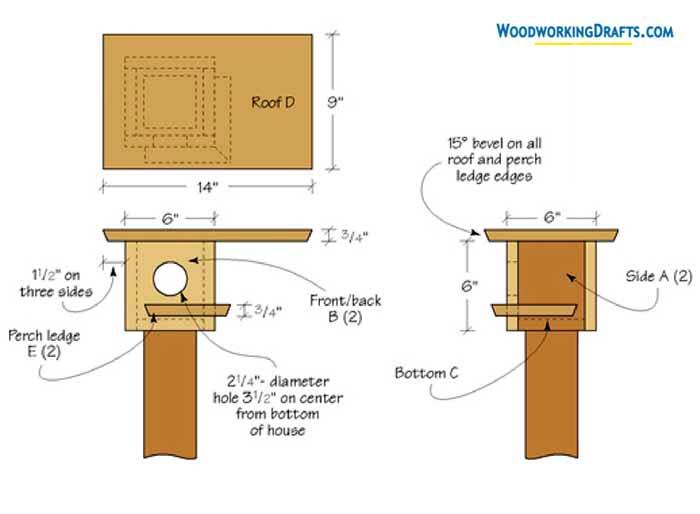
Easy Martin Birdhouse Blueprints
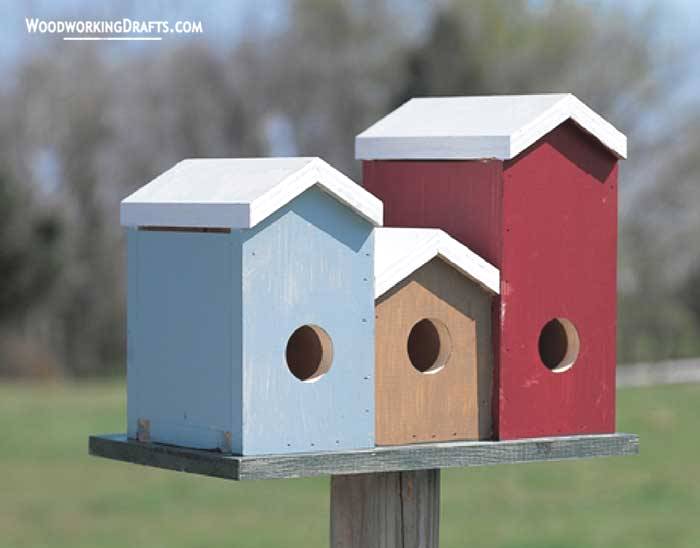
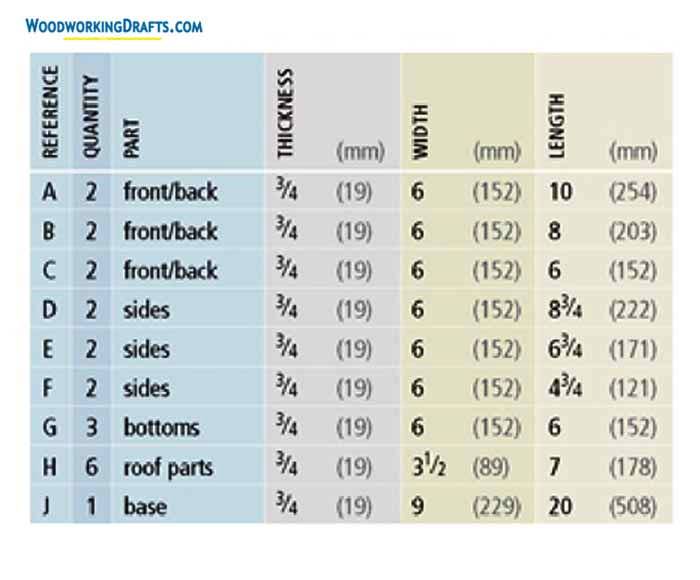
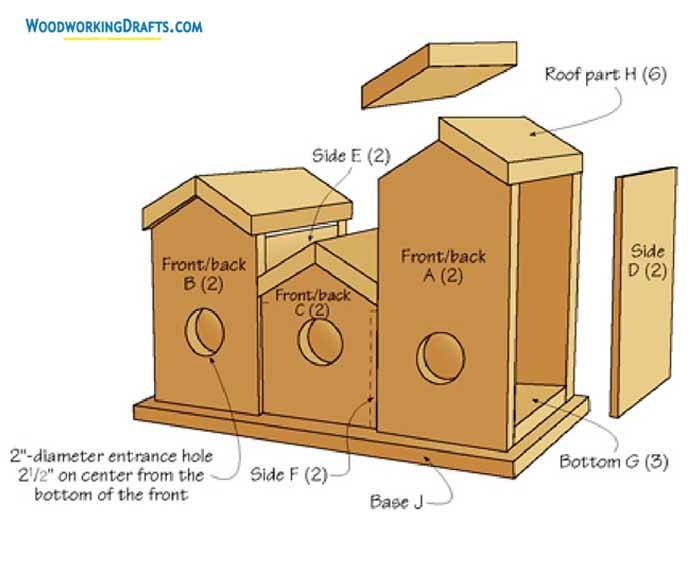
Stacked Martin Birdhouse Plans
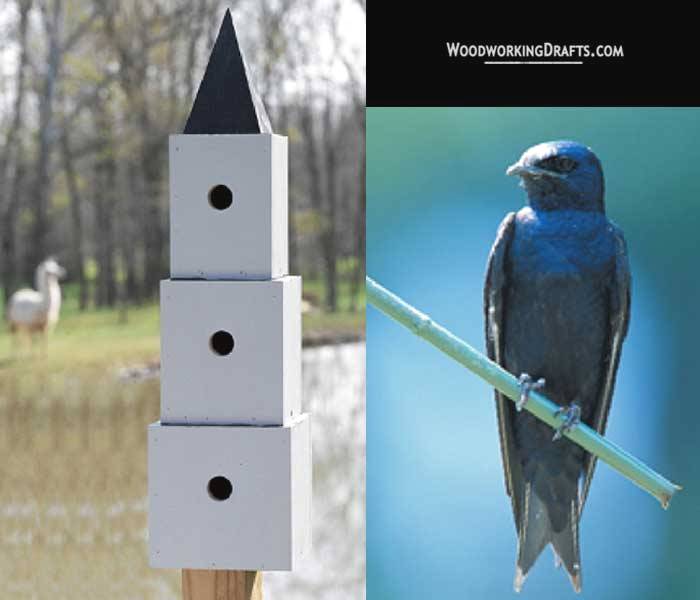
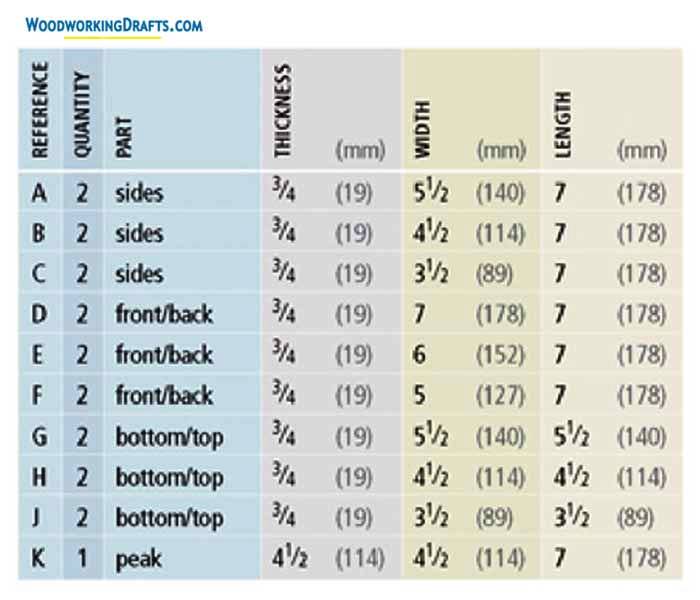
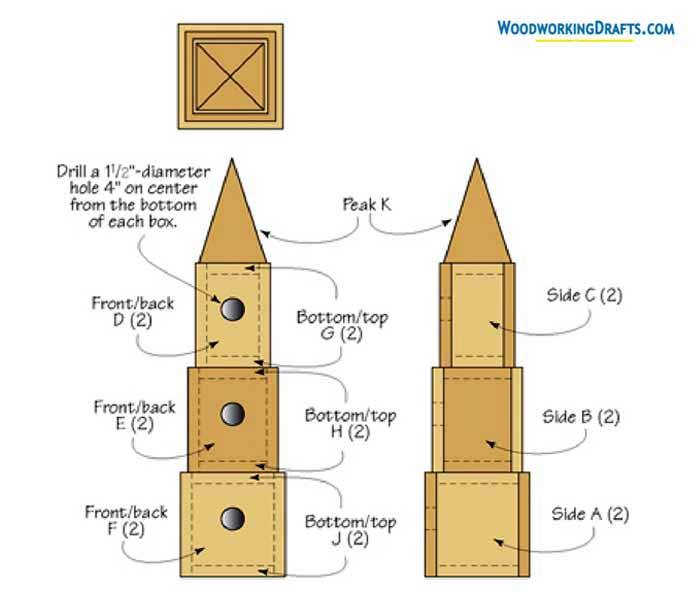
Nut Hatch Birdhouse Blueprints
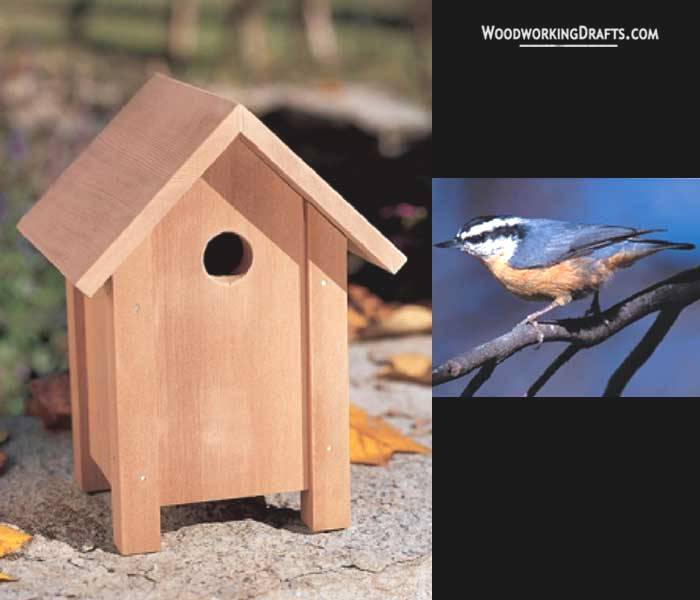
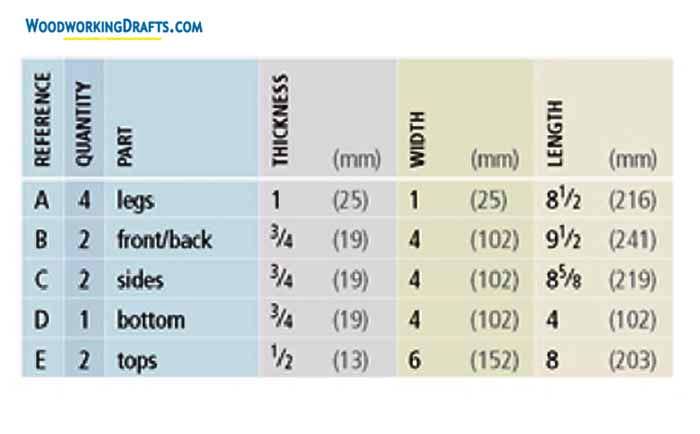
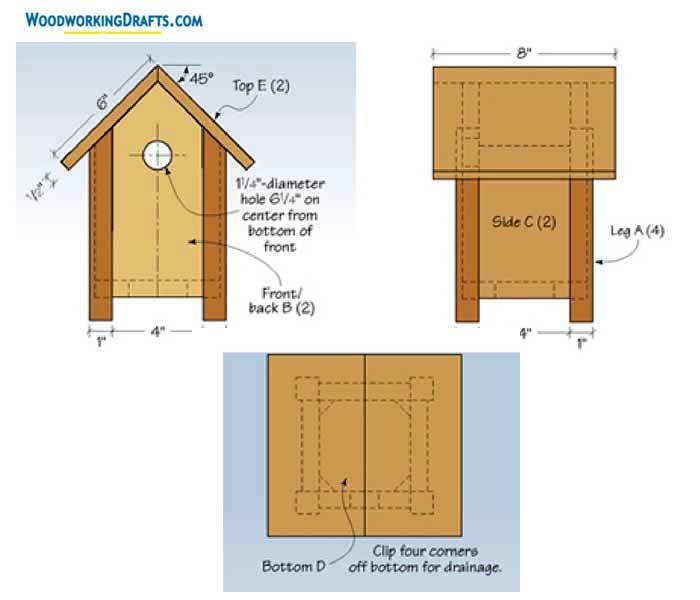
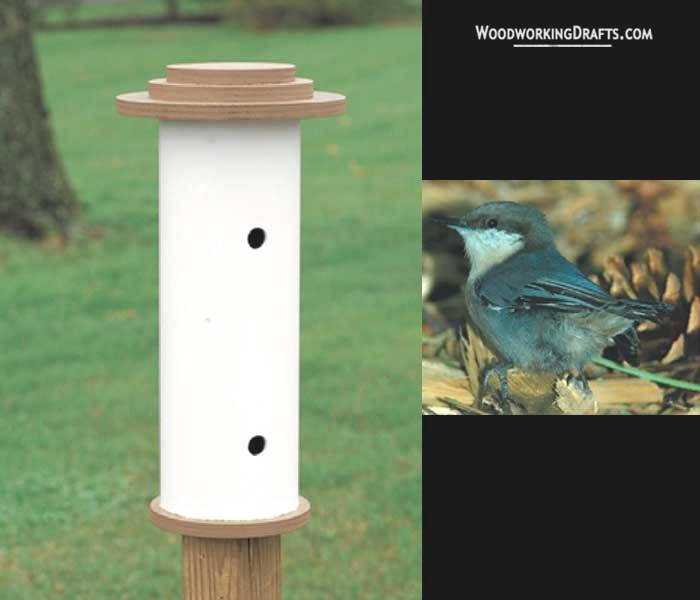
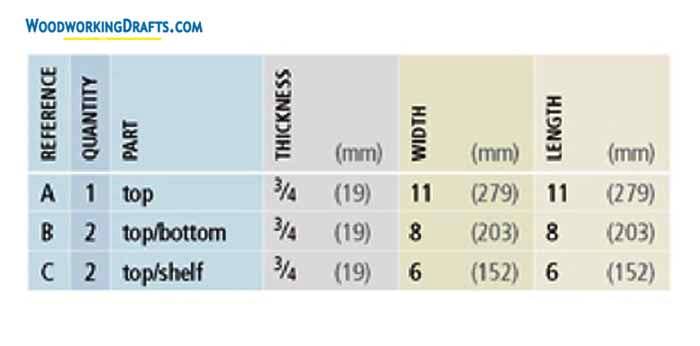
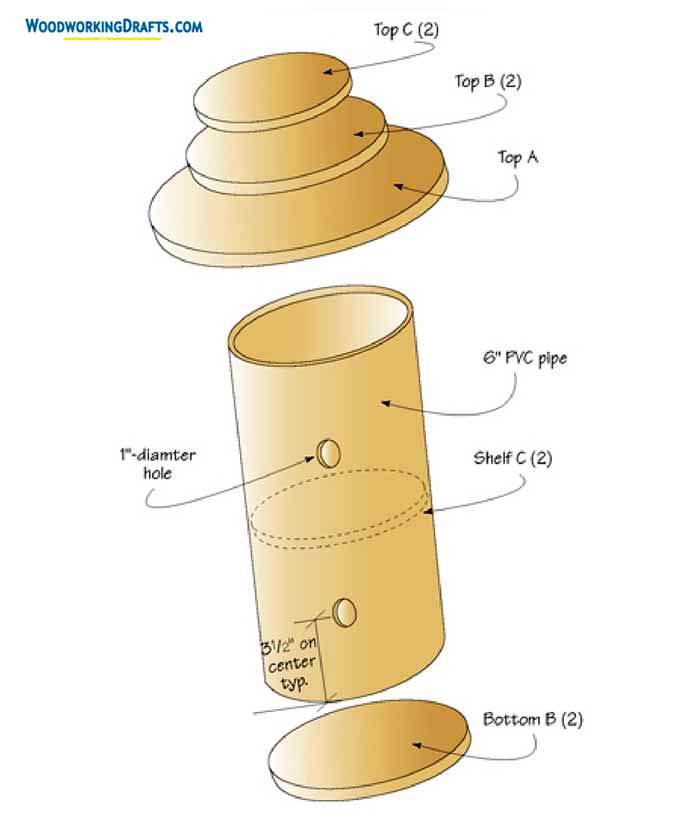
Simple Nut Hatch Birdhouse Plans
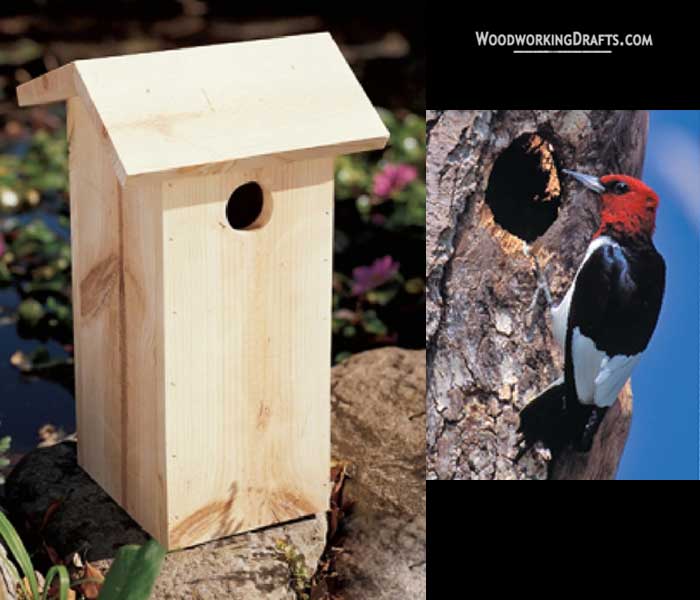
Woodpecker Birdhouse Blueprints
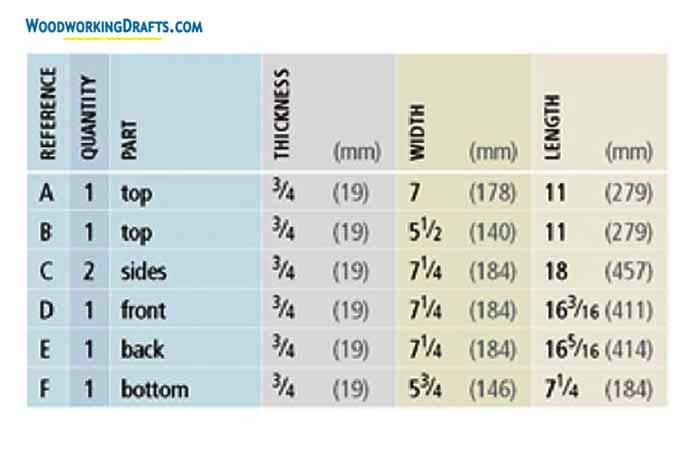
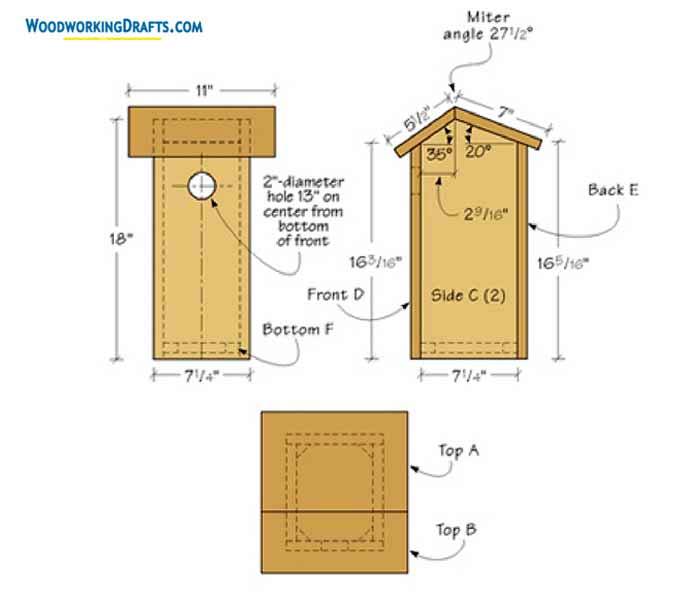
Simple DIY Birdhouse Plans
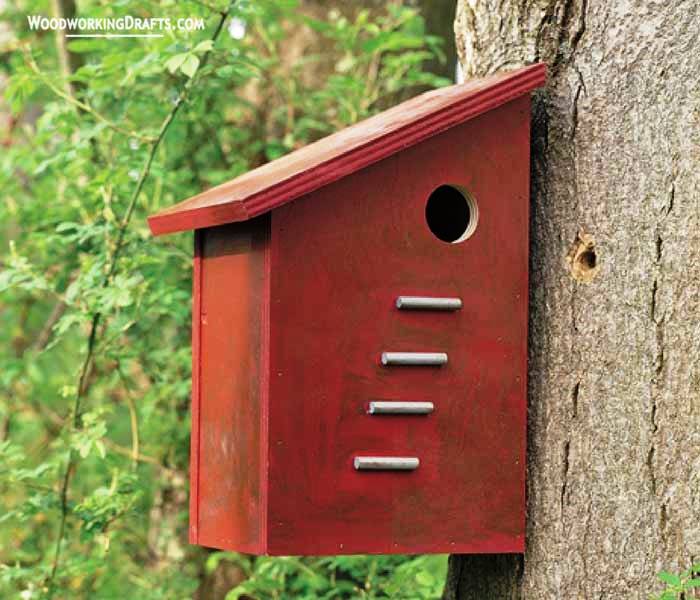
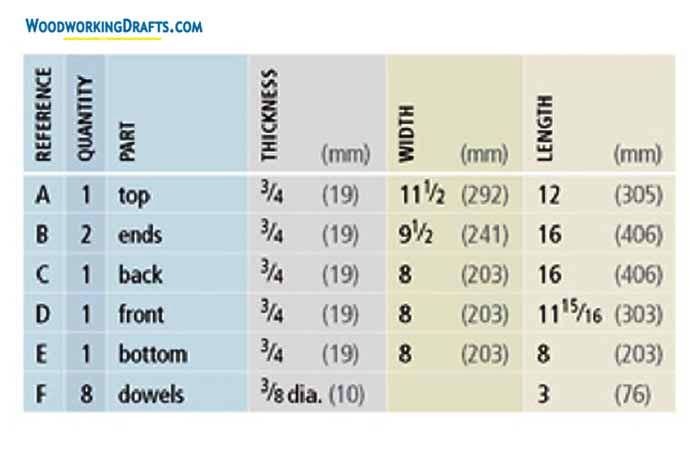
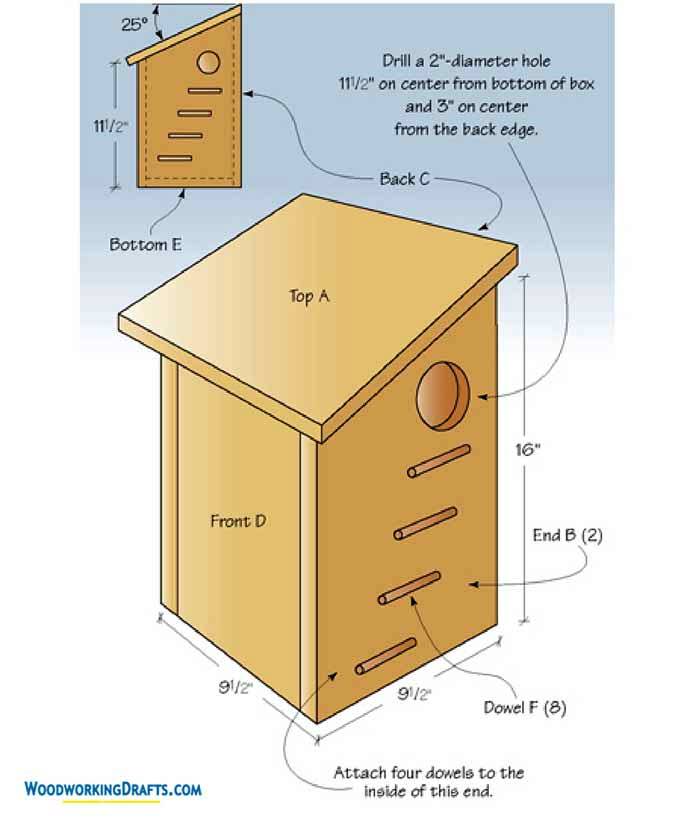
Rosella Birdhouse Blueprints
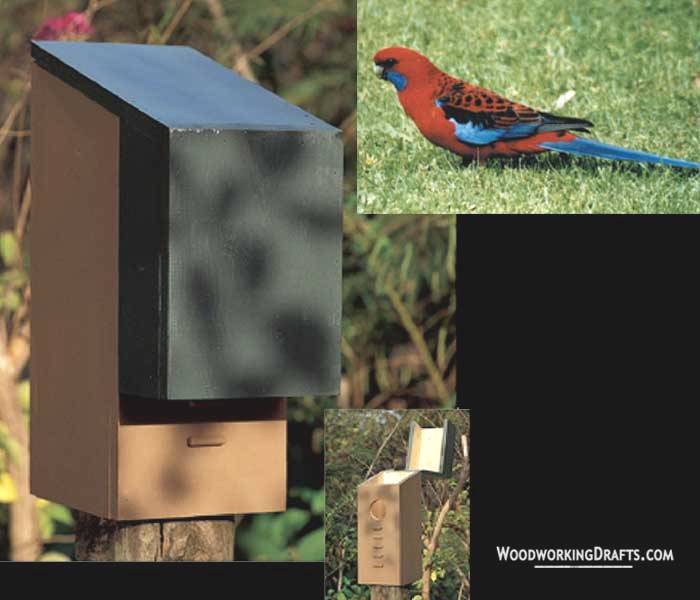
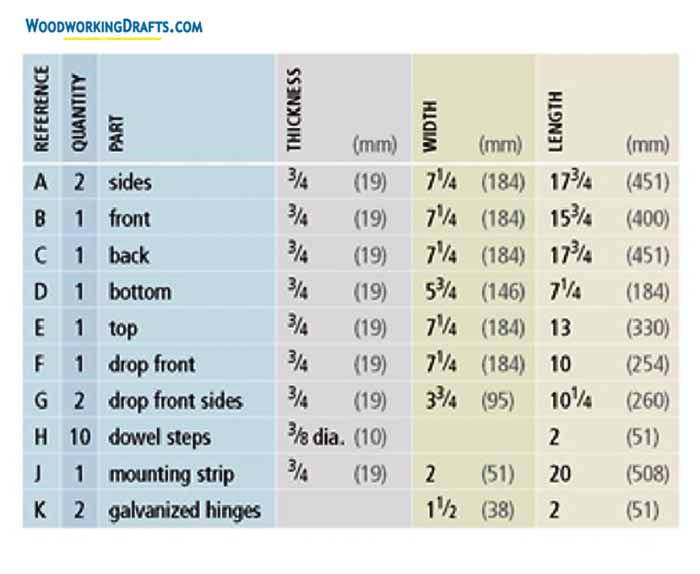
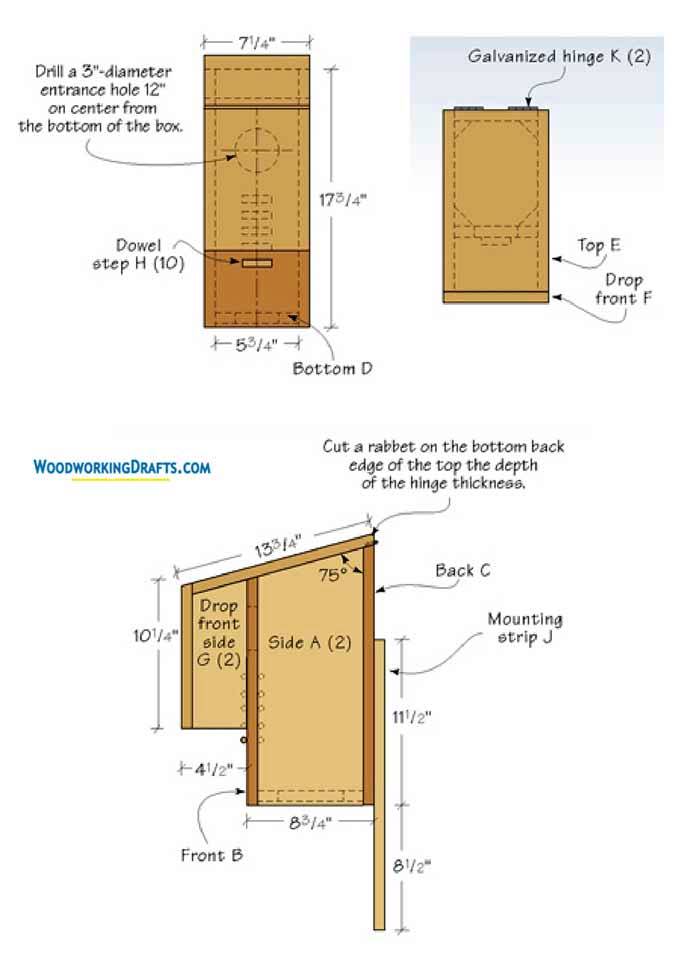
Titmouse Birdhouse Plans
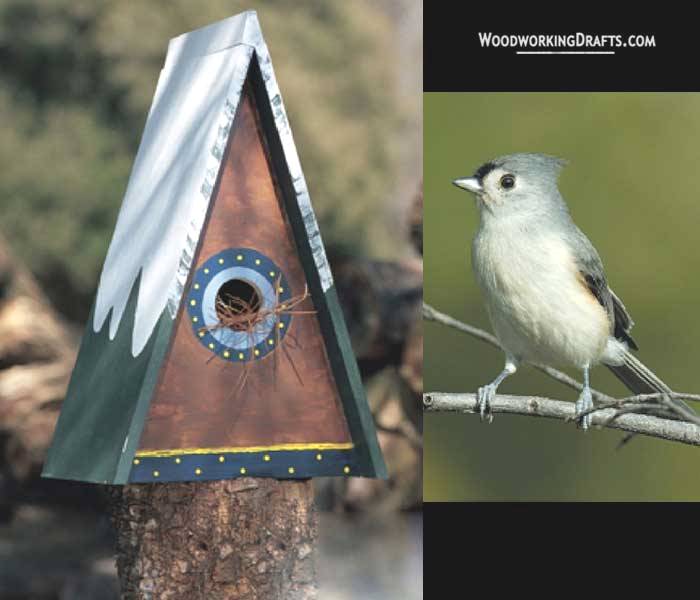
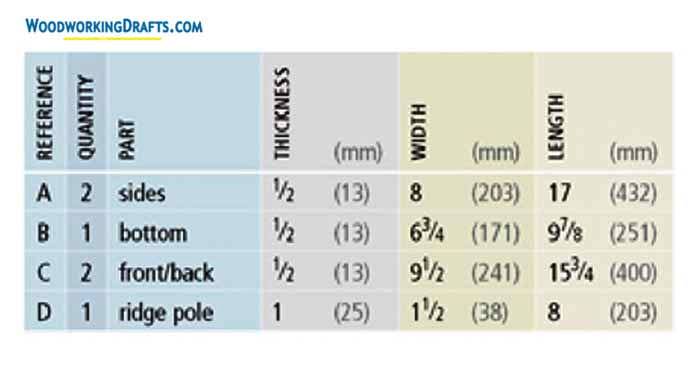
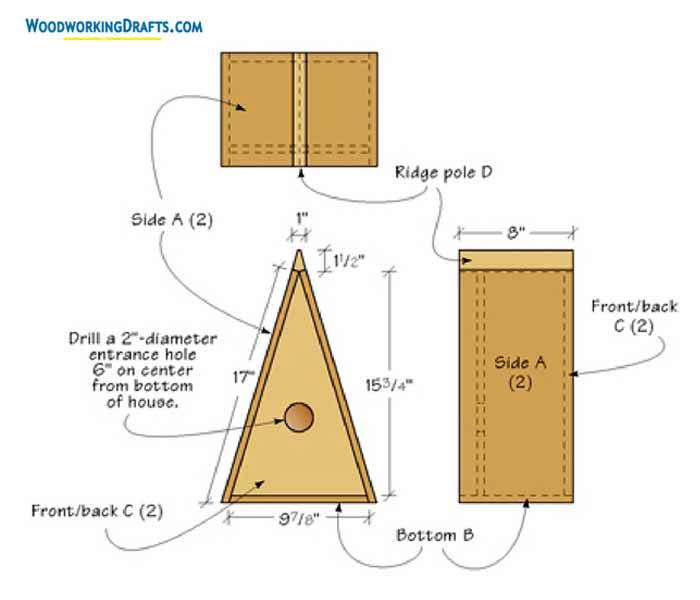
Wood Duck Birdhouse Blueprints
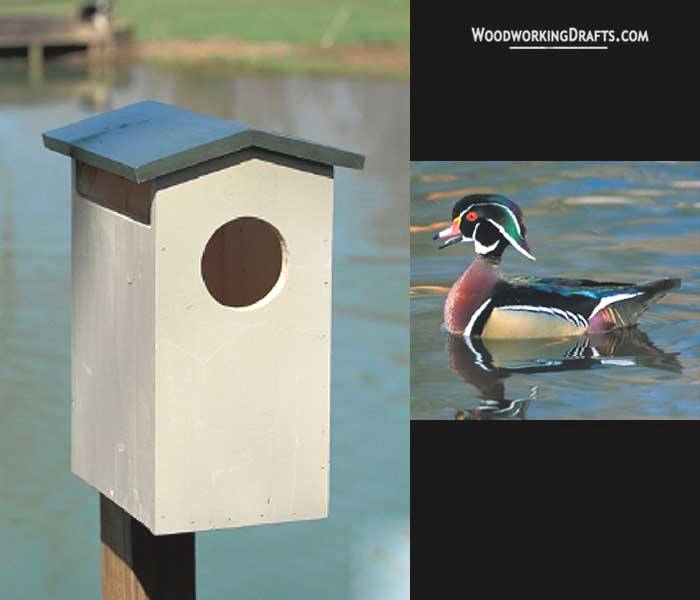
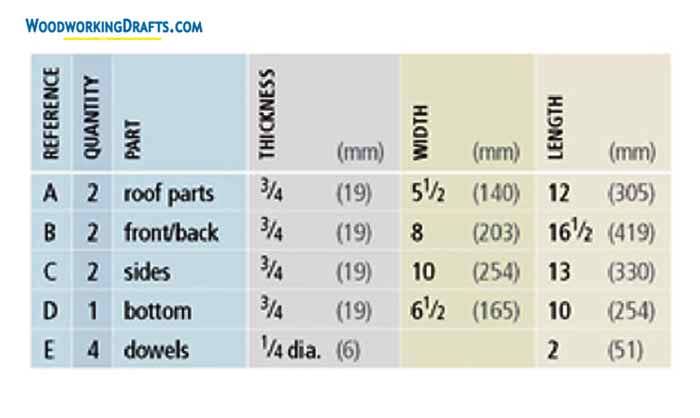
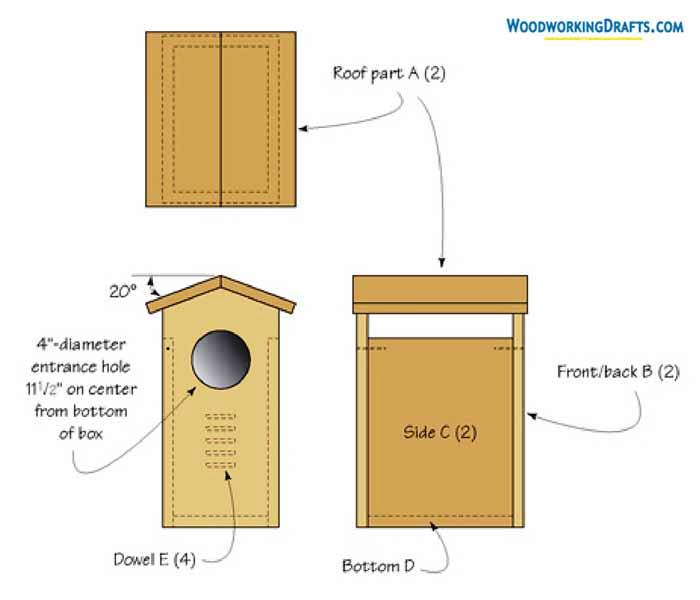
Songbird Birdhouse Plans
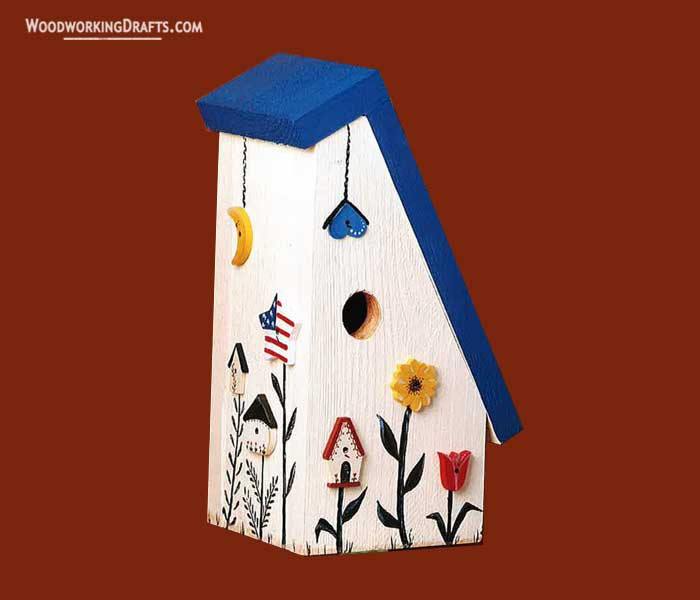
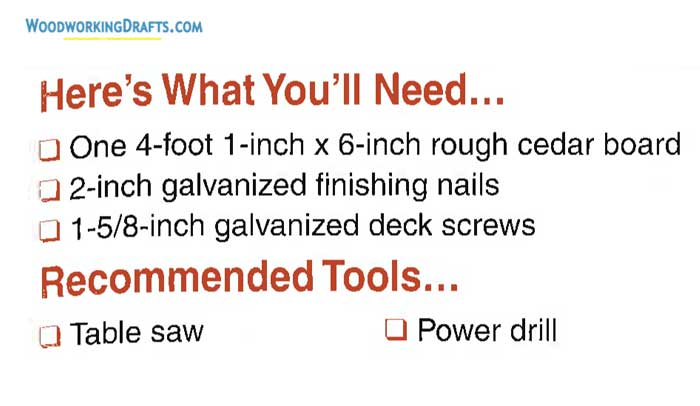
With these birdhouse building plans and some quality timber boards, you can construct a durable and beautiful nesting area for any kind of bird.


