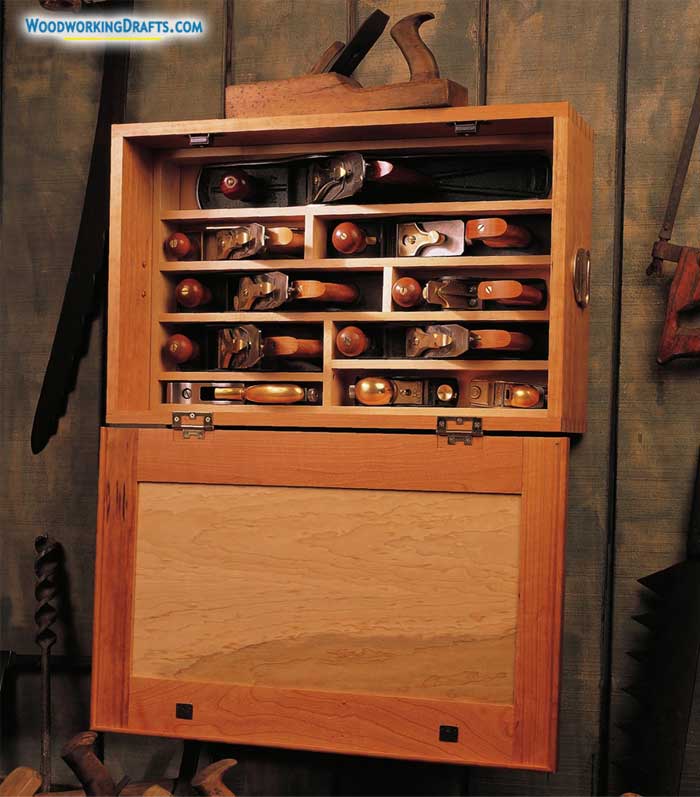
These hand planes tool chest plans will help you assemble a cabinet that can be hung on a wall or used as a classic tool chest sitting on your workbench.
If you have a decent collection of hand planes, then building a dedicated storage area for them is essential for organizing.
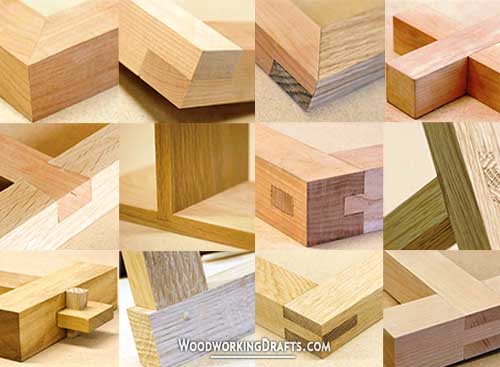
The door of this chest is crafted using strong mortise and tenon joints, and the internal dividers can be easily realigned to adjust the space as your requirements change over time.
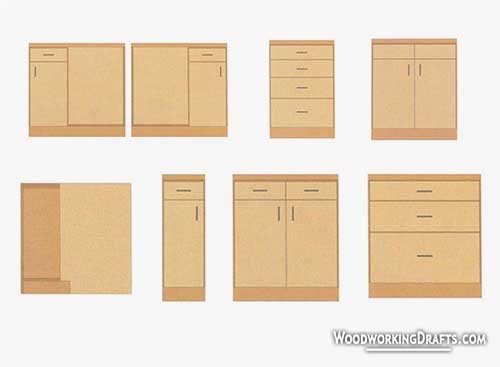
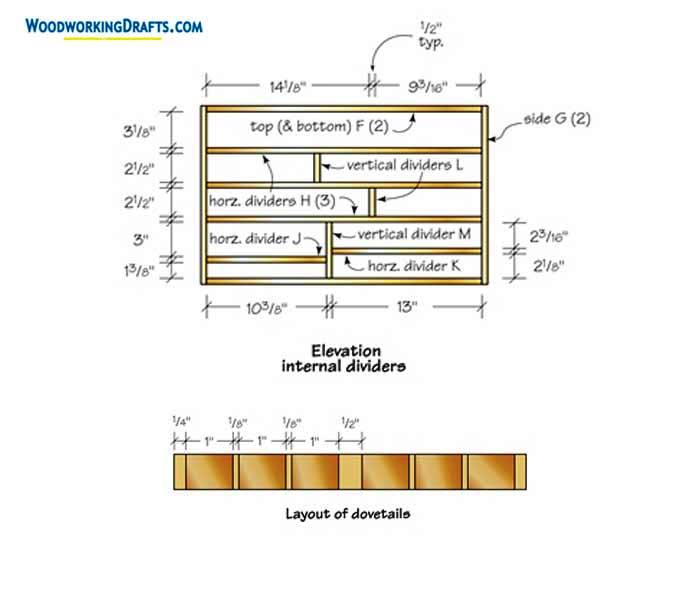
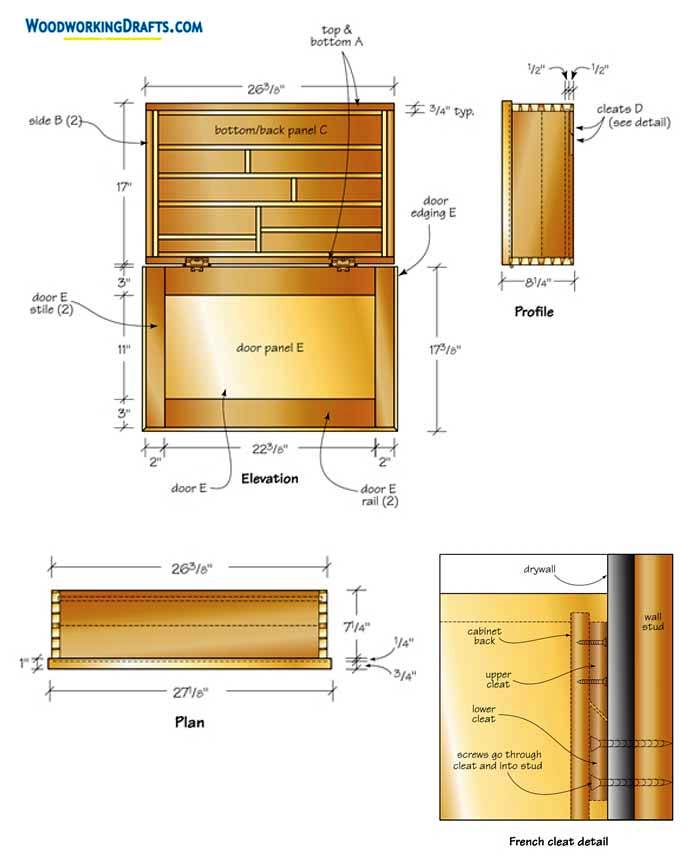
Hand Planes Tool Chest Plans And Blueprints
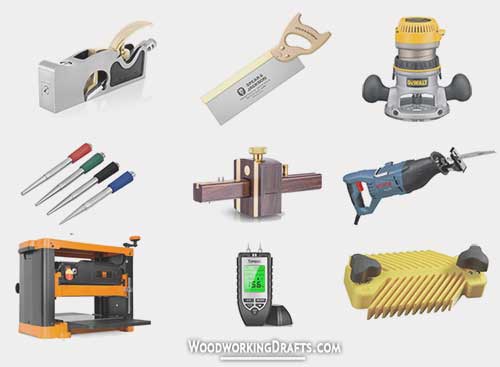
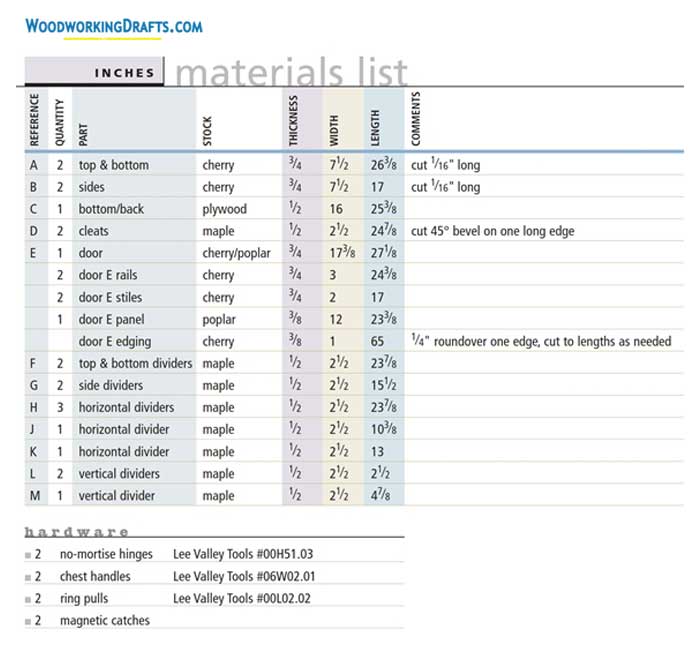
Materials List For Hand Planes Tool Chest
DIY Steps For Building A Hand Planes Tool Chest
- Scribe the patterns for the dovetail pins on the ends of A and B boards using a T bevel.
- Cut the patterns using a dovetail saw. Grip the blade gently and don’t put any pressure downwards while cutting in smooth and long strokes.
- Remove waste between the pins first using a coping saw and then using a chisel.
- Place the pins face down on the tail board and trace out the position for the tails.
- Cut the tails with the dovetail saw and finish using the coping saw and chisel.
- Test fit the tails and pins using a wooden mallet to hammer the joint snugly. Shave off any excess timber as needed.
- Similarly, create the other joints and test fit the case.
- Note the length and width of the case to confirm how large your door would need to be. The door should overhang the case on either end by at least 1/16 inches.
- The frame and panel door would be made using classic mortise and tenon joints. Cut the tenon to about half the thickness of your board.
- Craft the tenons using a crosscut blade and the help of a rip fence. Then craft the face, cheeks, and cheeks using a dado stack.
- Check that the tenon fits tightly into the mortise and shave the sides as needed.
- Scribe the location on the stiles where the mortises will be cut using the tenons as an outline.
- Make the mortises using a chisel or a mortiser. Keep a space between adjacent mortises to prevent the chisel from snapping during a cut.
- Cut the channels into the door sections to support the panel. The groove need not be stopped as the front will be hidden with edging.
- Craft the door E and test fit it over the cabinet.
- Sand the door panel and secure it with the frame using glue.
- Cut the channel for securing the bottom panel C into the assembly by using an edge guide and making multiple passes of a straight router bit. Then make a stopped channel into the tail boards.
- Keep a half-inch space between the channel and the lower edge of the side panels to attach the french cleats.
- Plane all the components for the chest and assemble the joints with glue. Clamp down and let the glue dry.
- After the glue has dried, plane the joints with a block plane.
- Craft the dividers for the chest and fasten them with screws so they can be easily removed if needed in the future.
- Install edging along the perimeter of the tool chest to enhance its look and seal gaps at the edges.
- Now attach the handles, pulls, catches and hinges.