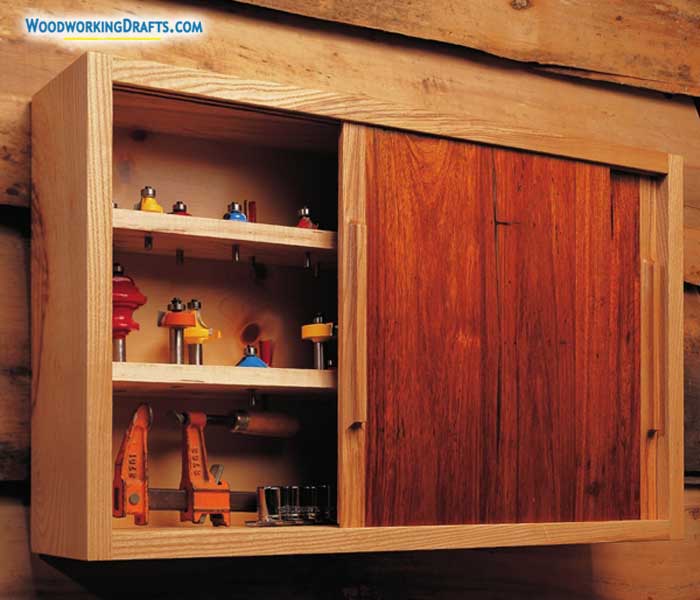
You can build a hanging tool cabinet with sliding doors from these plans and fasten it on the wall next to your workbench.
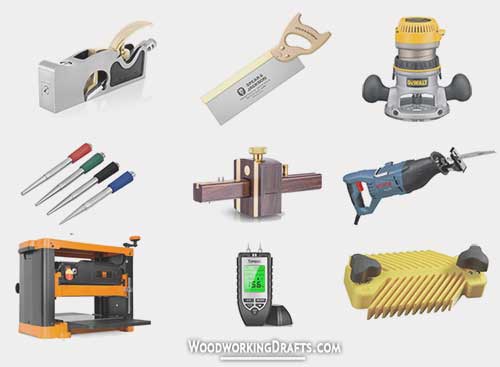
All your bearings, collets, wrenches, chisels, and saws can be kept easily in this tool cabinet.
Hanging Tool Cabinet Plans And Blueprints

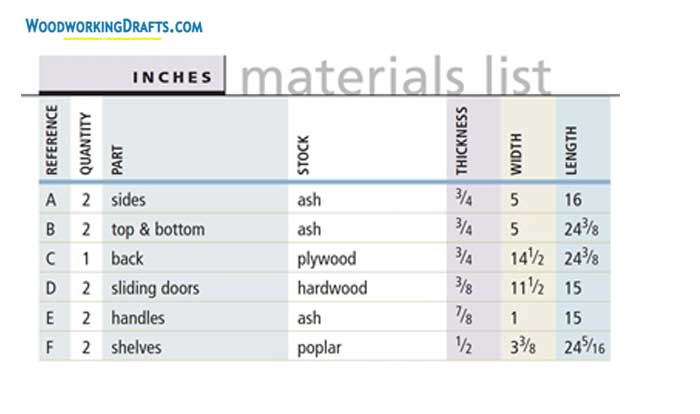
Materials List For Hanging Tool Cabinet
DIY Instructions For Making Hanging Tool Cabinet Plans With Sliding Doors
- Create the component panels as per the dimensions shown in the materials list.
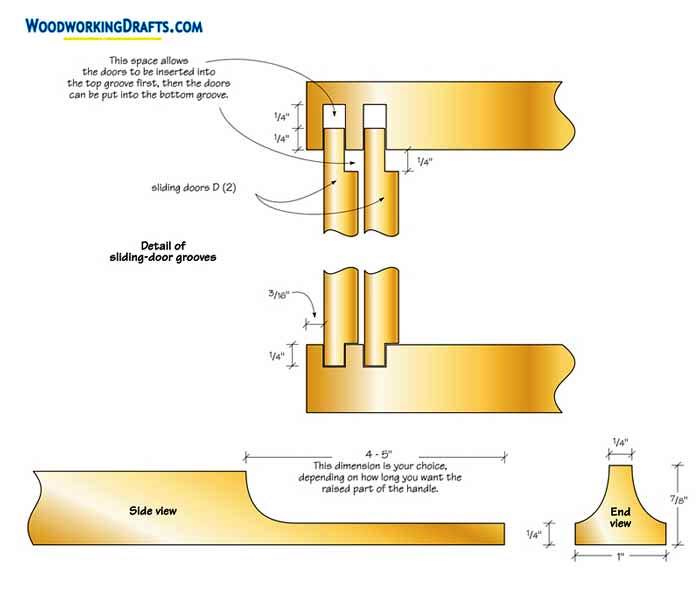
- Craft furrows for the sliding doors into the bottom and top panels. The channel cut into the top panel will be 1/2 inch deep, and the bottom panel will have a 1/4 inch deep channel.
- Once the cabinet construction is completed, the doors will be raised and fit into these channels.
- Fasten the bottom and top panels to the back panel with glue and use spaces to maintain the squareness of the structure.
- Create slots for biscuits into the ends of the bottom and top panels as well as the side panels.
- Build the door handles on a router from a large timber panel and a cove cutter.
- Use a straight router bit and a stop block to finish cutting the handles into separate pieces.
- Secure the side panels to the cabinet assembly with glue.
- Attach the handles on the door panels with glue.
- Build the shelves and fasten them inside the cabinet.
- Craft matching tenons on the door panels that will fit into the channels cut earlier into the cabinet base and top.
- Check that the doors can slide freely. Shave any excess timber as needed.