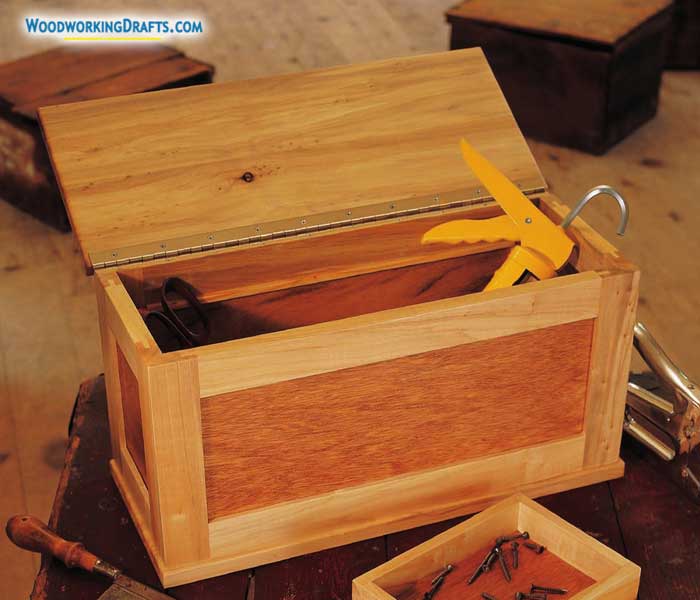
These small wooden toolbox plans blueprints can be used to build a simple chest from solid lumber or plywood.
It is a very handy and portable storage container for carrying your frequently used tools like hammers, screwdrivers, rulers, and fasteners.
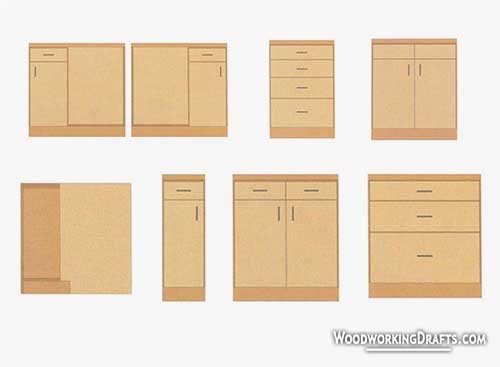
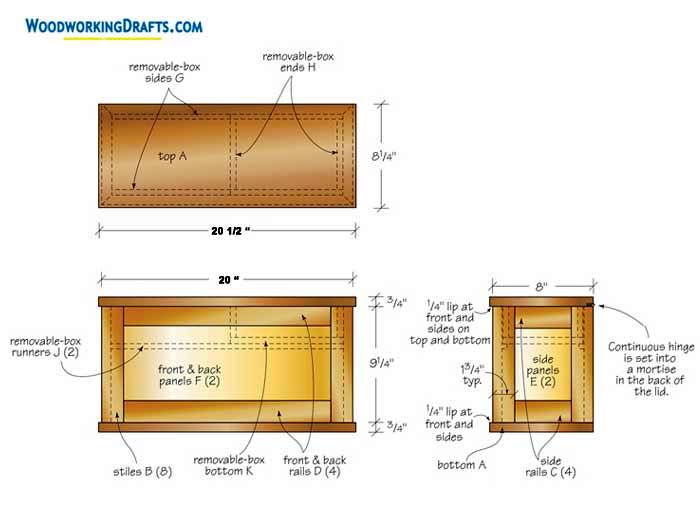
Small Wooden Toolbox And Blueprints
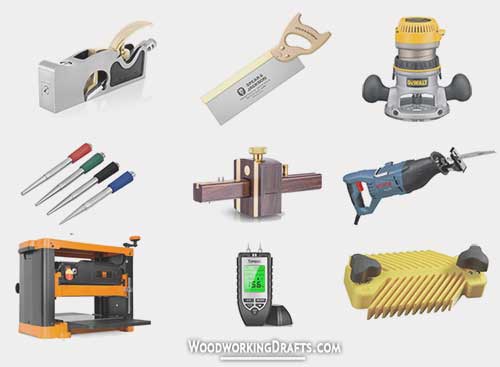
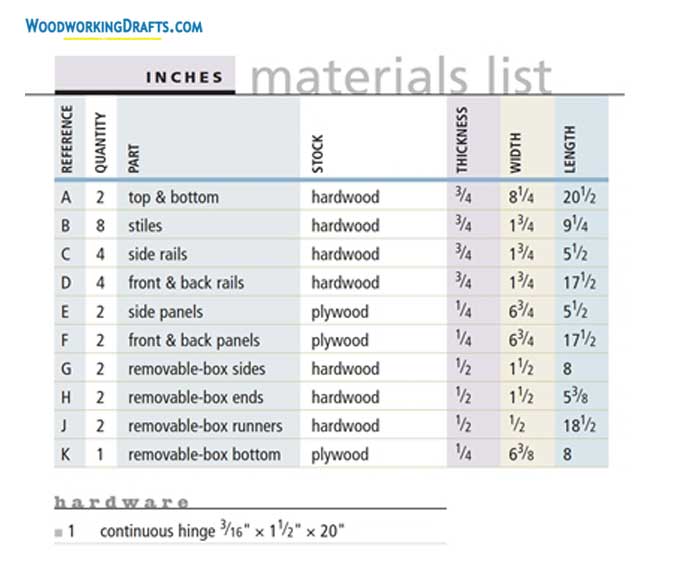
Materials List For Small Wooden Toolbox
DIY Instructions For Crafting Simple Wooden Toolbox
- Craft the component parts as per the dimensions from the cutting list.
- Create the front panel by first arranging all the parts in your work area. Now glue the first rail and fasten it over the stile. Similarly, fasten the other rails into place.
- Fasten the assembly with clamps by applying gentle pressure. Verify that the frame is square and make minor adjustments as needed. Let the frame dry.
- Similarly, craft the back and side panels.
- Once all panels have dried, place them all face-up and positioned end to end. Use clear packing tape to tape the joints and press it down with a roller.
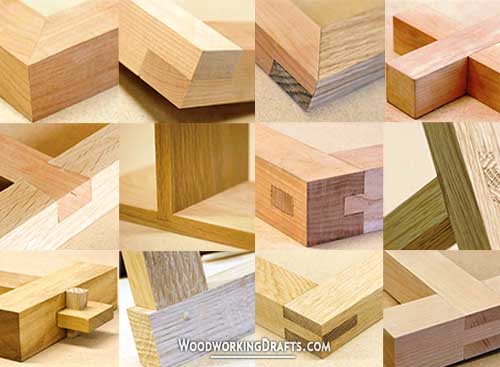
- Now turn the assembly to face downwards, coat the bevel joints with glue, and fit them together.
- Clamp down the joints after checking the assembly is square and let the glue dry.
- Cut a rabbet for the hinge into the upper part of the back panel.
- Attach the handle and connect it to lid A.
- Secure the bottom panel with screws and attach the J runners for the removable upper box.
- Craft the parts G, H, and K for the removable box and fasten the sides, back, and front with each other using glued butt joints.
- Secure the bottom portion K of the box after the glue is dried.
- Sand the entire box and apply a stain or paint as per your preference.