
The classic design of these traditional tool chest plans will help you build a large tool chest for storing a lot of power tools.
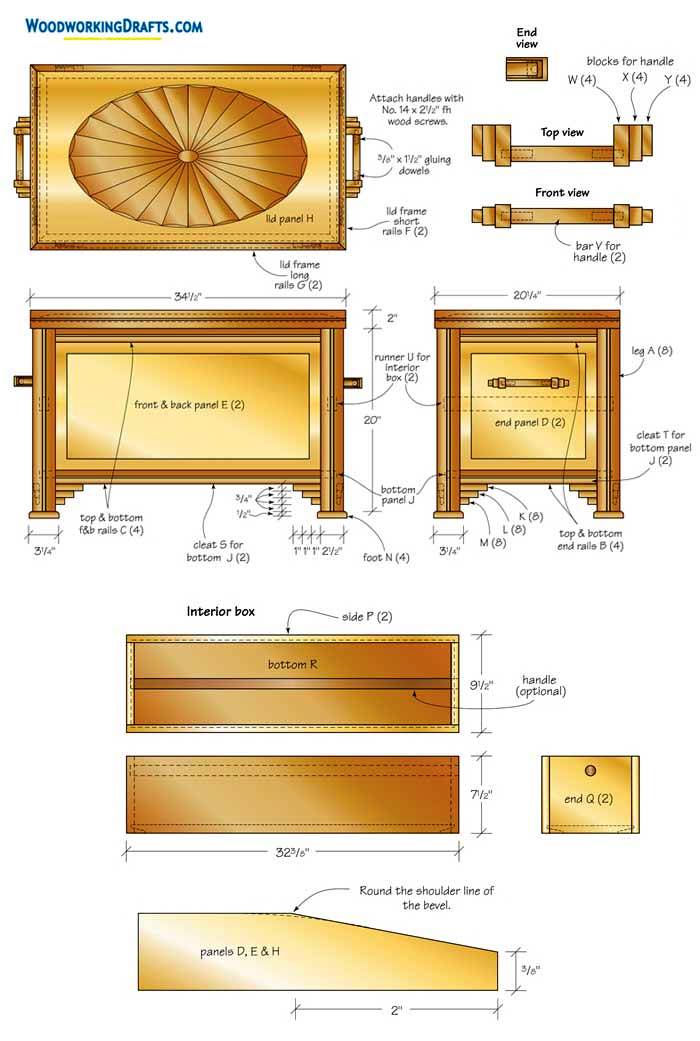
The drop-in compartment can be stored inside the chest or can be used as a toolbox in itself by attaching a handle.
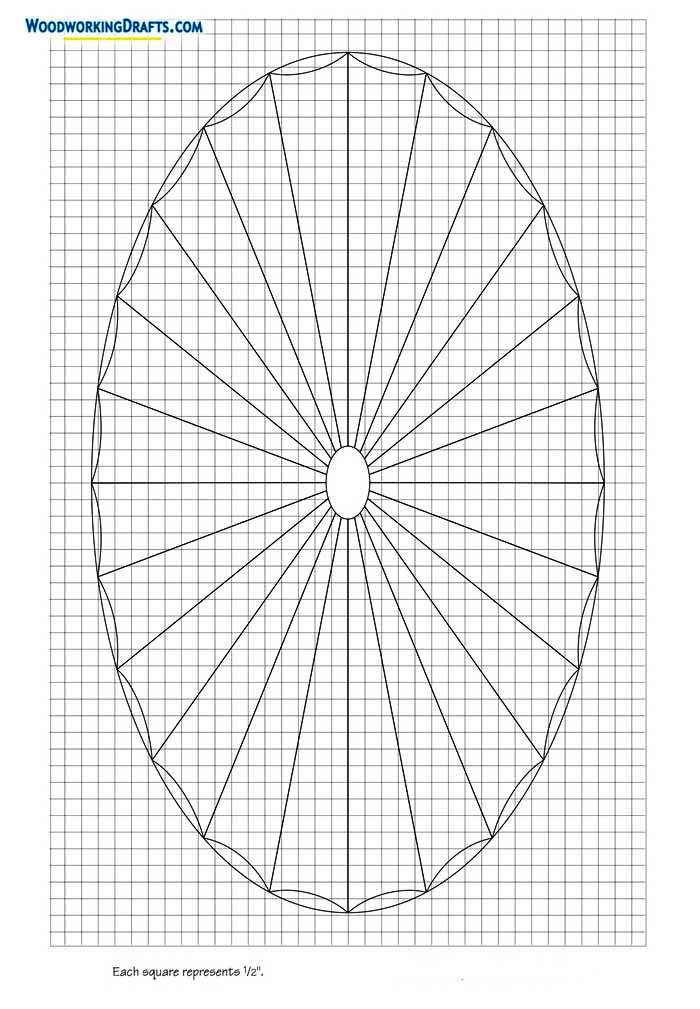
The pattern on the top of the lid gives it a beautiful look. If you use heavy hardwood for construction, then you can add casters on the bottom of the chest to move it easily.
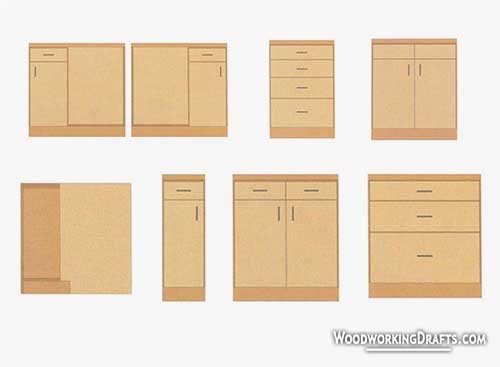
Traditional Wooden Tool Chest Plans And Blueprints
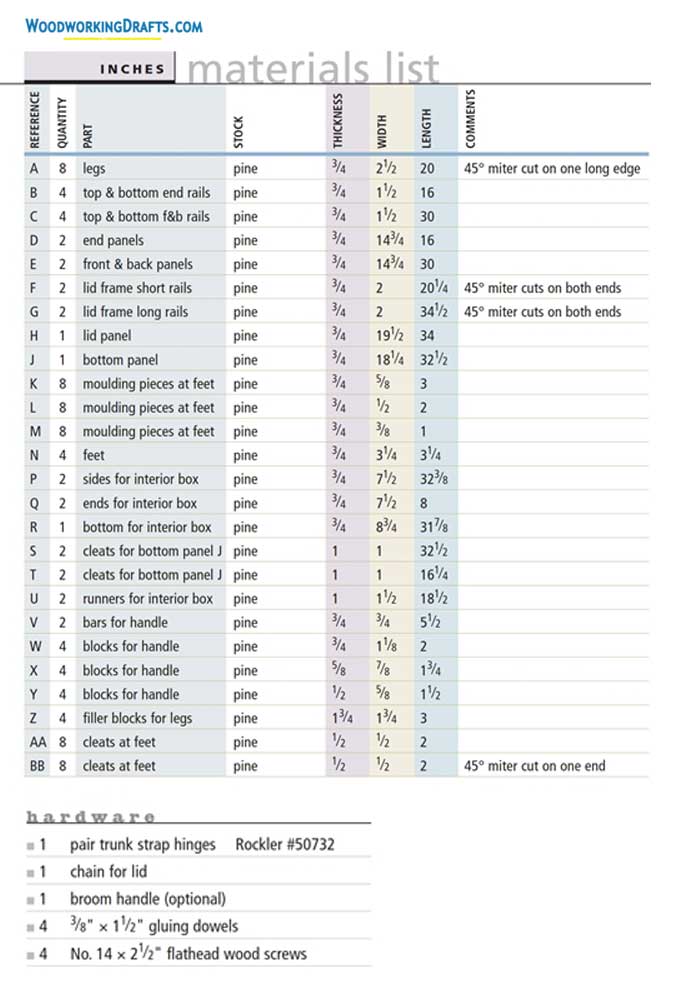
Materials List For Traditional Tool Storage Chest
DIY Instructions For Building Traditional Wooden Tool Chest
- Craft the sections for crafting leg A and secure the pieces together with glue.
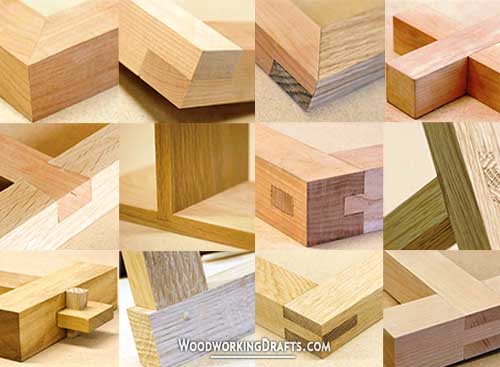
- Angle the table saw blade at 45 degrees and create the V-shaped pattern that will be set between the legs. Create similar patterns for all the bottom rails.
- Create the rail tenons using the same dado head.
- Change the blade angle to 5 degrees and create bevels on the back, front, and end pieces, along with the lid and bottom panels.
- Craft rabbets into the panels to make a tenon that will slide accurately into the frame’s grooves.
- Secure the rails and legs to the back and front panels using glue and clamps. Verify that the rails of the frame are square with legs.
- Fasten the back and front panels with the rails and end panels after the glue dries.
- Create the Z blocks and secure them to the inner bottom of the legs to make them more sturdy.
- Cut the moldings to size and secure them in place with glue. Then attach the cleats.
- Fasten 1×1 cleats to the inner edges of the bottom rails.
- Set the bottom panel over the cleats and fasten it with screws.
- Attach the runners with glue and screws.
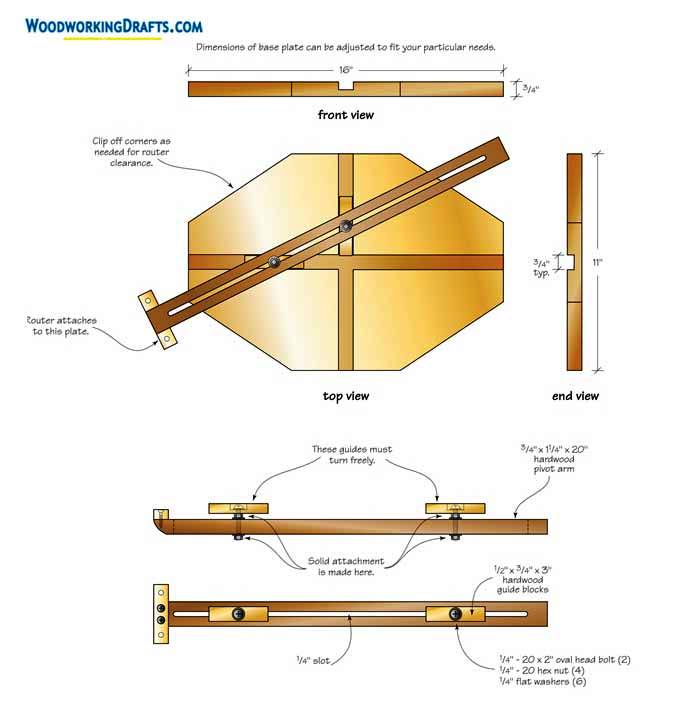
- Use a router bit to create the oval pattern on the lid.
- Smoothen the pattern by sanding it with a high grit sandpaper.
- Create miters on the rails F and G and reinforce them with biscuits.
- Secure the miters from both ends with a clamp to hold them tightly.
- Create sections P and Q for the removable toolbox as per the dimensions shown in the materials list.
- Craft the bottom panel groove and secure it into the box assembly with glue and screws.
- Create a stopped hole in one end and a through-hole in the other end of the box for attaching the handle. Now insert the handle inside to complete the tool carrier.
- Fasten the blocks for the handle together with glue and drill a hole in the handlebar ends.
- Secure the blocks with the handlebar using dowels and glue.
- Install the handles over the end panels.
- Align the lid over the box and connect the strap hinges for the trunk.
- Attach a metal chain inside the box to prevent the lid from opening too far and damaging the hinges.
- You can also install casters on the box legs to make it more portable.