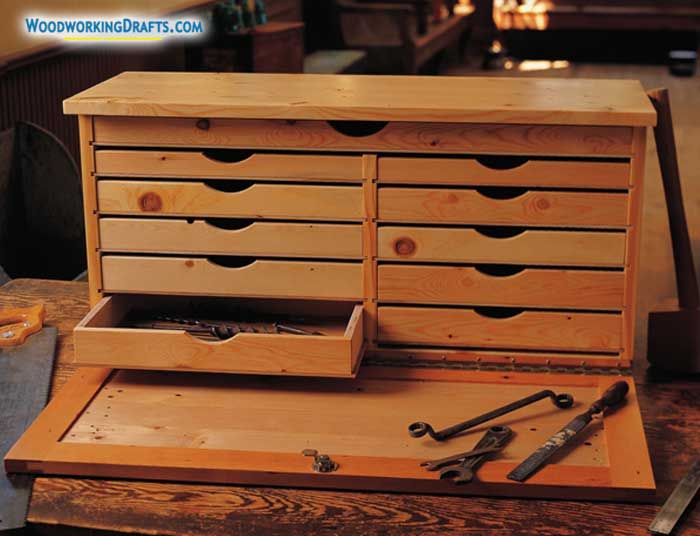
These DIY wooden multi-drawer tool chest plans create a storage area for holding a large number of tools.
The wide drawer on top allows you to hold longer tools easily. This chest can be made out of pallet wood or plywood.
Wooden Multi-Drawer Tool Box Plans And Blueprints
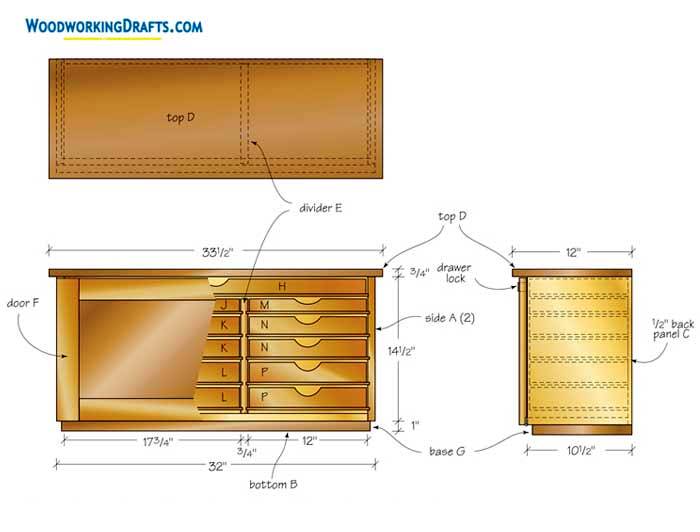
Materials List For Multi-Drawer Toolbox
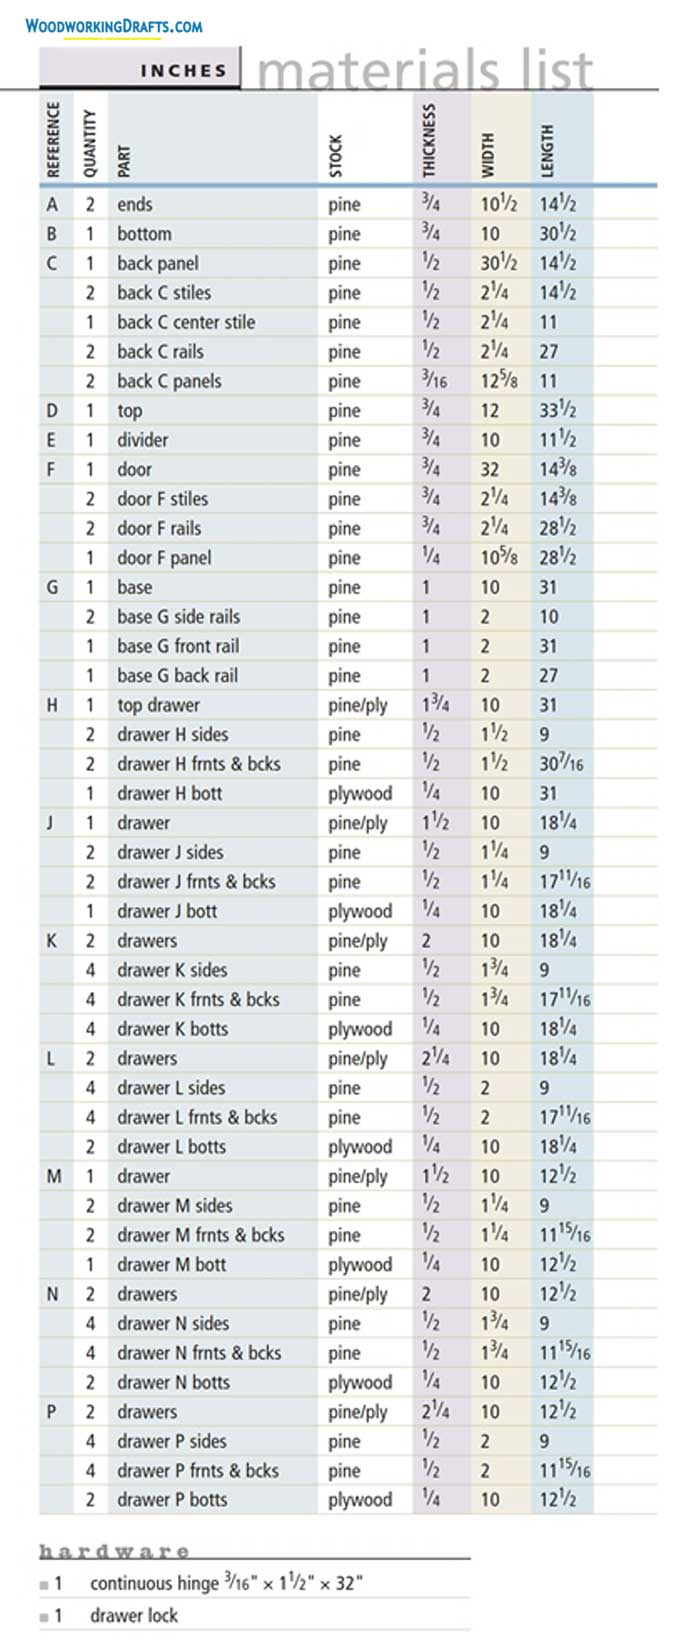
Building Instructions For Crafting Multi-Drawer Tool Box With Drawers
- Cut and craft the parts for C back panel and fasten the parts together. Then secure the bottom B to the back panel, checking that it is correctly square.
- Create the grooves for the drawers in divider E and ends A with a router or table saw.
- Fasten the bottom B with the divider E using screws and glue. Then secure it to the center stile of the back panel with only glue. Verify that the divider is properly square.
- Create biscuit slots in the end panels A and the back panel ends.
- Fasten the ends A with the back panel using biscuits.
- Craft biscuit slots in the top D, upper edges of the back panel, and the ends.
- Build the base G for the tool chest with biscuits. The joints in the back are butted while those in front are mitered.
- Secure the base with the cabinet bottom using screws.
- Create all the parts for the drawer boxes and design the fronts with a round finger pull.
- Assemble the drawer parts together with screws and glue. Check that each drawer slides smoothly in its corresponding opening. Sand as needed to make fine adjustments.
- Then cut the drawer bottoms and secure them with the drawer boxes. Test fit into the openings once again.
- Build the panel door and frame and install the hinge into a mortise carved into the door. Create the mortise of the same depth as the hinge to ensure the lid closes tightly.


