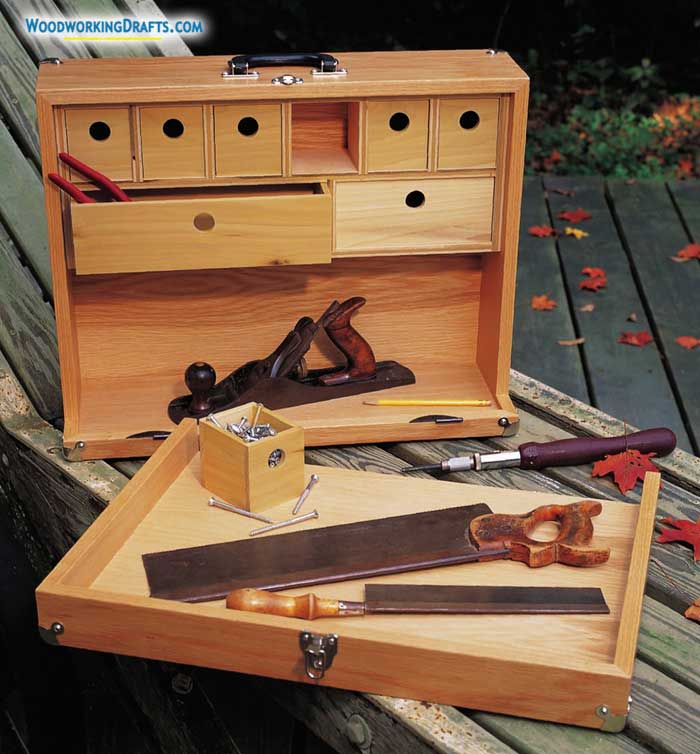
These wooden tool caddy plans show how to create a handy storage chest that can be easily carried around.
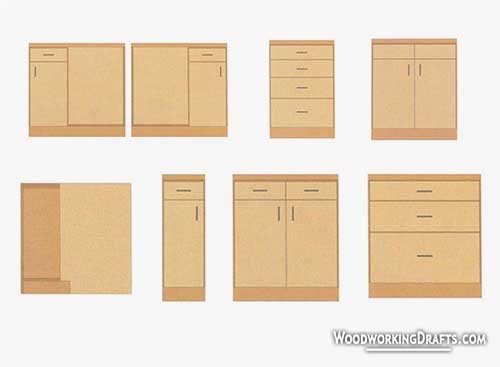
Wooden Tool Caddy Plans And Blueprints
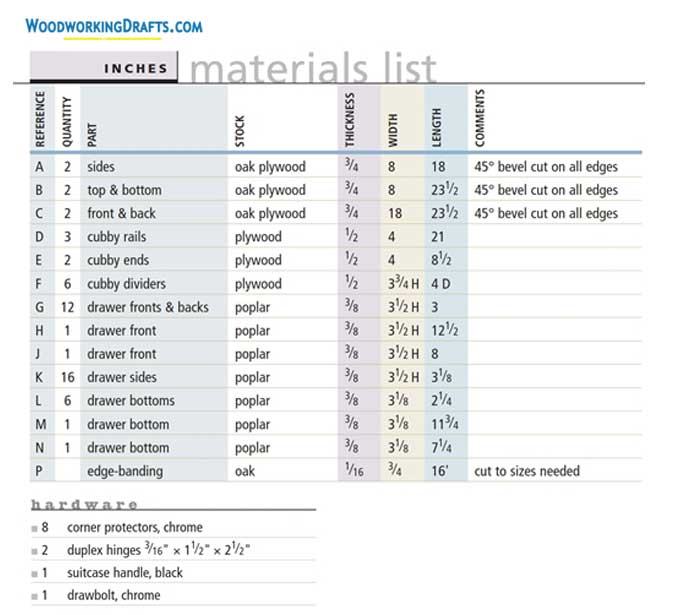
Materials List For Wooden Tool Caddy
DIY Instructions For Making Wooden Tool Chest
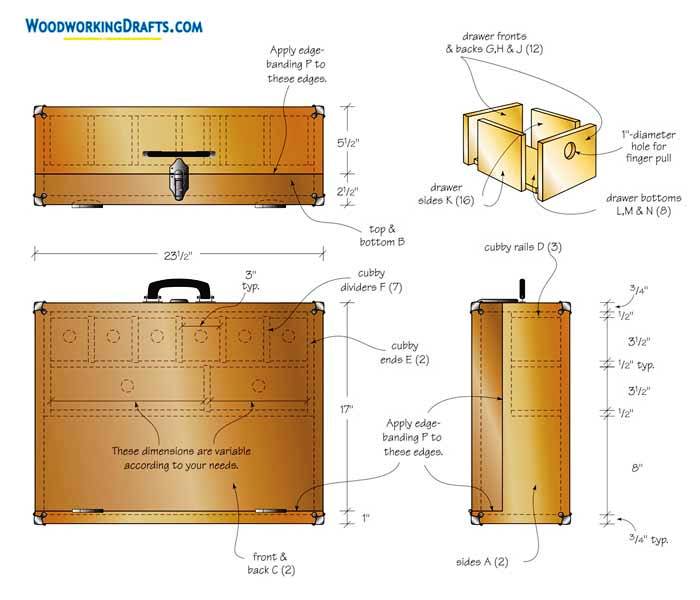
- Create sections A, B, and C of the caddy as per the measurements from the materials list.
- Craft 45-degree bevels on each edge using a table saw. Then place the door cutouts over the sides and first make the shorter cut using the saw.
- Now make the longer cut by placing the sides flat over the saw.
- Make the cutout square using a handsaw and clear out debris from the door parts.
- Place all the parts of the caddy facing upwards on your workbench and tape over the joints. The parts should align accurately and squarely with each other.
- Reverse the assembly and make it face downwards, apply glue to the joints and bring together the pieces.
- Clamp down the pieces to keep the box in alignment as the glue dries.
- Fit all the needed hardwood strips along the corners by making miter cuts and taping them. Now apply a thin coat of glue to all the plywood edges and fasten the strips over them.
- Use a biscuit joiner to create the grooves for the hinges. Fasten the duplex hinges.
- Create the dividers, rails, and ends as per measurements.
- Make the dado slots in the rails and secure the assembly together with glue.
- Construct the parts G to N for the drawer and fasten them together with glued butt joints.
- Create one-inch wide holes in the drawer fronts to use as pullouts.
- Complete attaching the remaining hardware, and now your tool caddy is done.