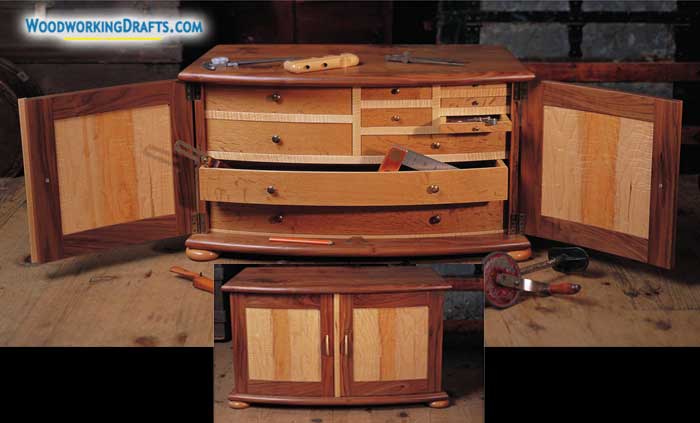
Woodworking Tool Chest Plans Plans And Blueprints
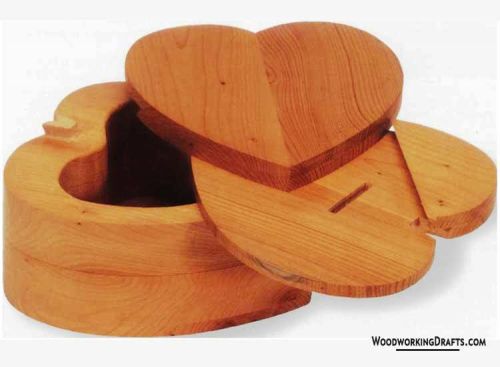
Here are the woodworking tool chest plans for a curved box that has a unique and beautiful design.
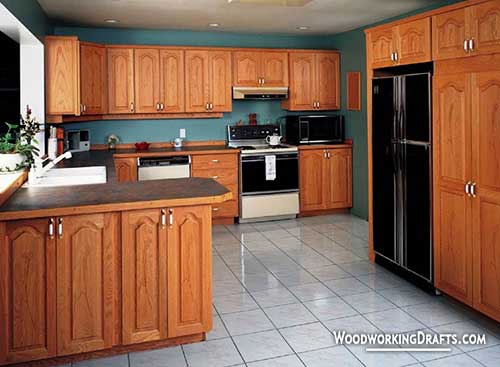
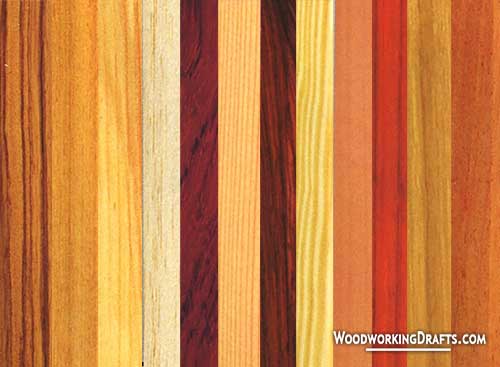
The chest can be made even more beautiful by using a lovely timber like curly maple or walnut to build it.
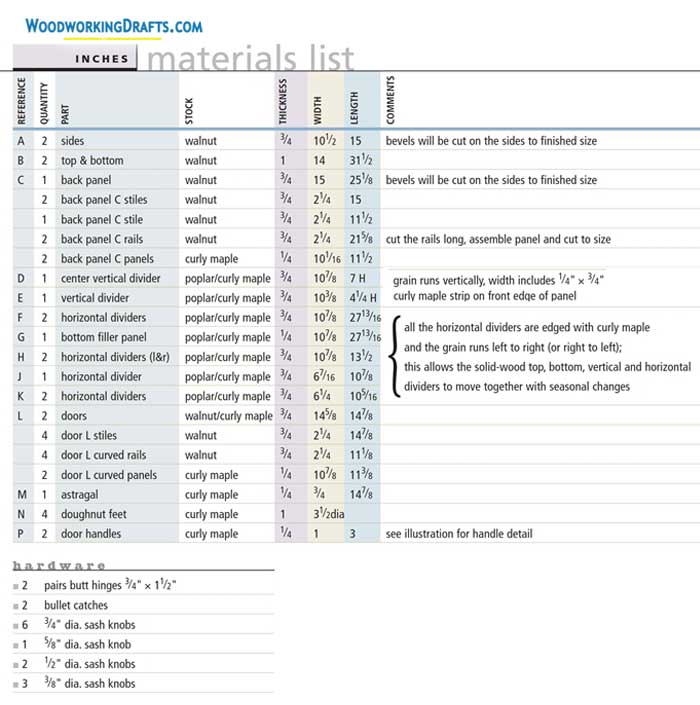
Materials List For Woodworking Tool Chest Plans
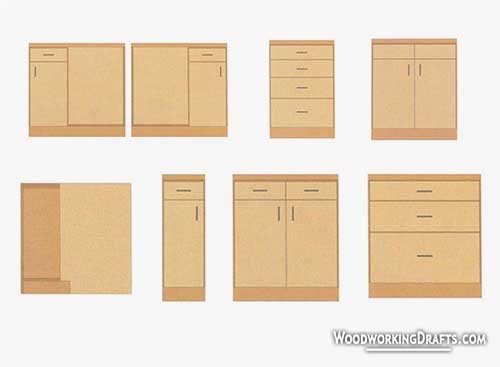
Crafting Instructions For Assembling Curved Woodworking Tool Chest With Drawers
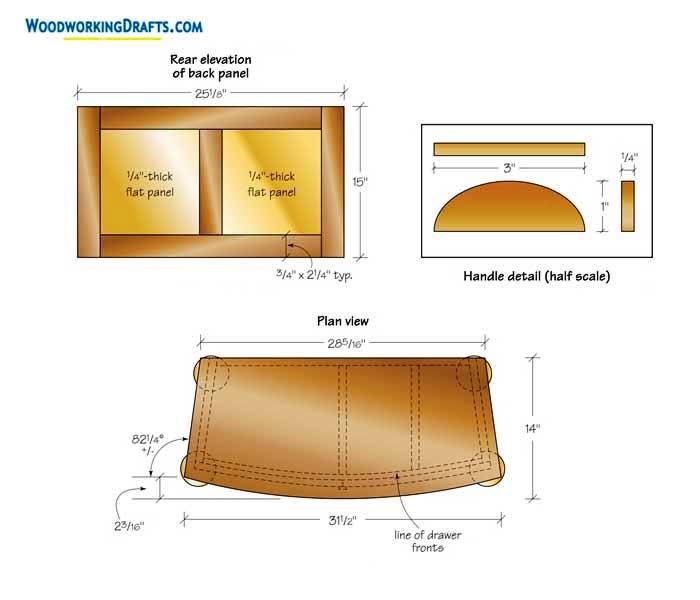
- Create the outline for the upper panel on a timber board and cut it out carefully.
- Make the front edge smooth and scribe the outline for the bottom panel on another timber board using the upper panel as a template. Then cut out the bottom panel.
- Mark the lines for the sides, drawers, back panel, and dividers on the top panel as shown in the construction plans.
- These lines will act like a guide and help you get the correct size for crafting these parts.
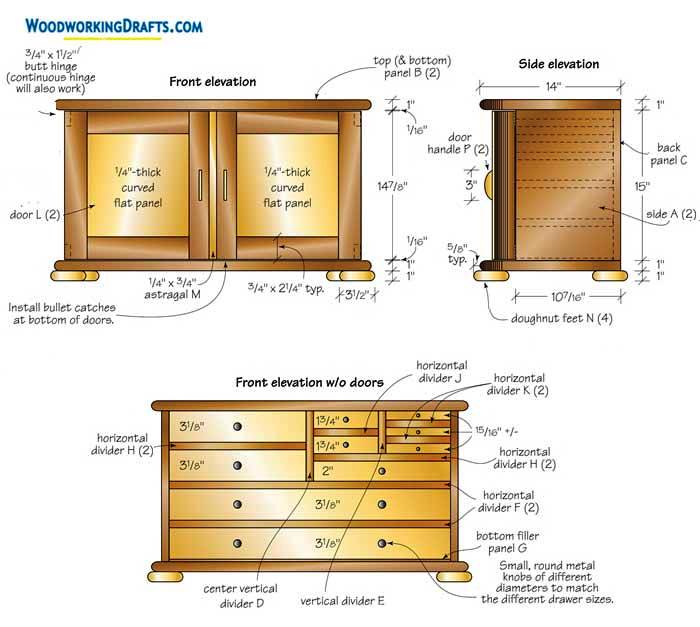
- Create the horizontal and vertical dividers as well as the bottom filler using the guiding lines as a reference. Attach 2-inch wide strips of any decorative wood to the front edge of these components.
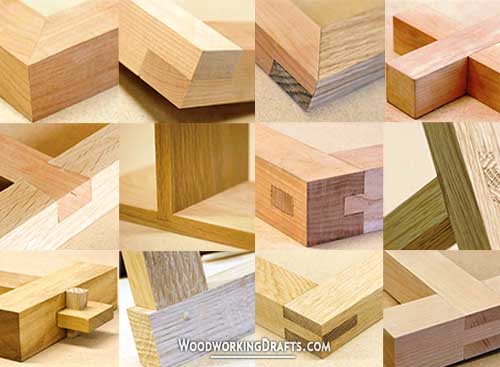
- Assemble the dividers for the right side with biscuits.
- Build the side panels as per the dimensions in the blueprints. With the top panel as a reference, find the bevel angles for the back and front edges.
- Craft corresponding biscuit slots into the side panels for fitting the right-side dividers we constructed earlier.
- Assemble the body sections of the cabinet along with the dividers by installing biscuits.
- The horizontal dividers are separated by spacers to keep the setup symmetric on both sides.
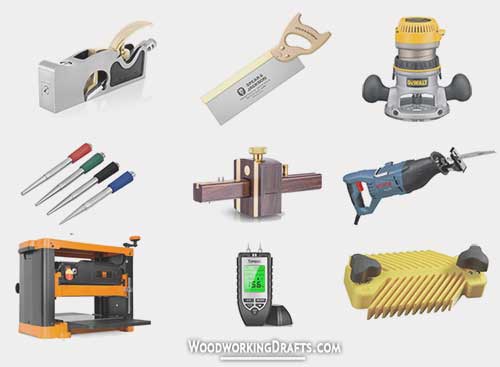
- Craft the parts for the back panel frame using a table saw. Create the center stile and tenons with the help of a fence.
- Assemble the back panel and install it between the side panels with glue.
- Round the front and side edges of the bottom and top panels.
- Secure the bottom panel with the drawer case using biscuits. Then install the filler panel into the base of the cabinet and glue it. Similarly, fasten the top panel.
- Craft the circular feet with a jigsaw and drill a hole in the middle of it to create the doughnut shape.
- Sand over the edges of the feet and craft the bullnose.
- Bend the drawer fronts with a jig as per the curvature of the top panel. Use bendable timber like white oak for crafting them.
- Create the drawer bottoms from plywood panels and install them into the corresponding openings adjusting for the width of the drawer fronts.
- Now craft the backs and sides of the drawers. Glue them to the drawer bottoms.
- Check that the curve of the bottoms and fronts of the drawers match each other.
- Cut 8-inch strips of decorative wood for crafting the doors’ curved rails.
- Create a groove for the curved panel with a router.
- Craft the sites to match the curvature of the rails and that of the door.
- Create tenons in the curved rails with a table saw and rip fence.
- Now build the curved panels taking care of the grain pattern that will match with the rest of the components.
- Create 1/4-inch wide strips, and craft bevels for the edges on a table saw. Then clamp the bevels to the curved panels with glue.
- Use a block plane to smoothen the bevels after the glue is dried.
- Sand both inside and outside the panel and check it fits tightly in the rail grooves.
- Position the door stiles and scribe the location where they connect with the rails.
- Test fit all frames and panels and then secure them with glue taking care to keep the assembly square and level.
- Mark the location for the hinges using a utility knife, then create the mortise with a chisel.
- Attach the hinges, and then fasten the handles.